Blog

hole in the wall

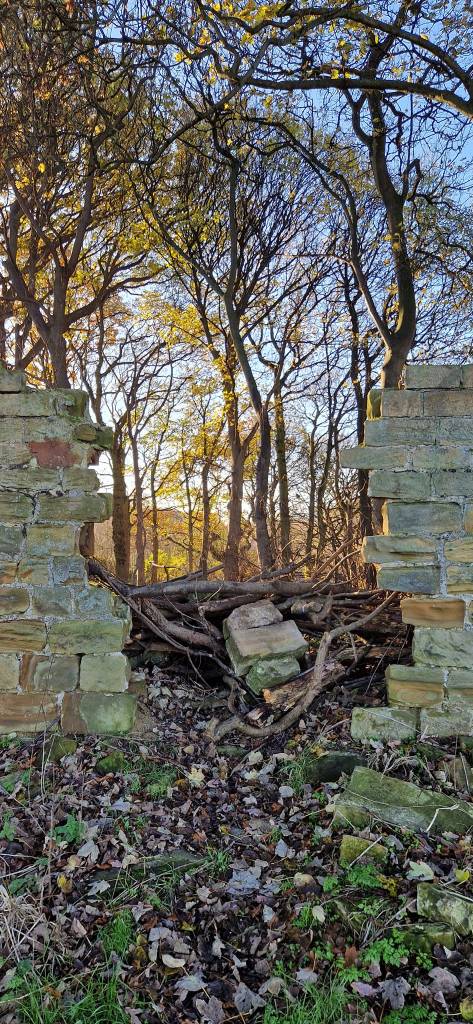
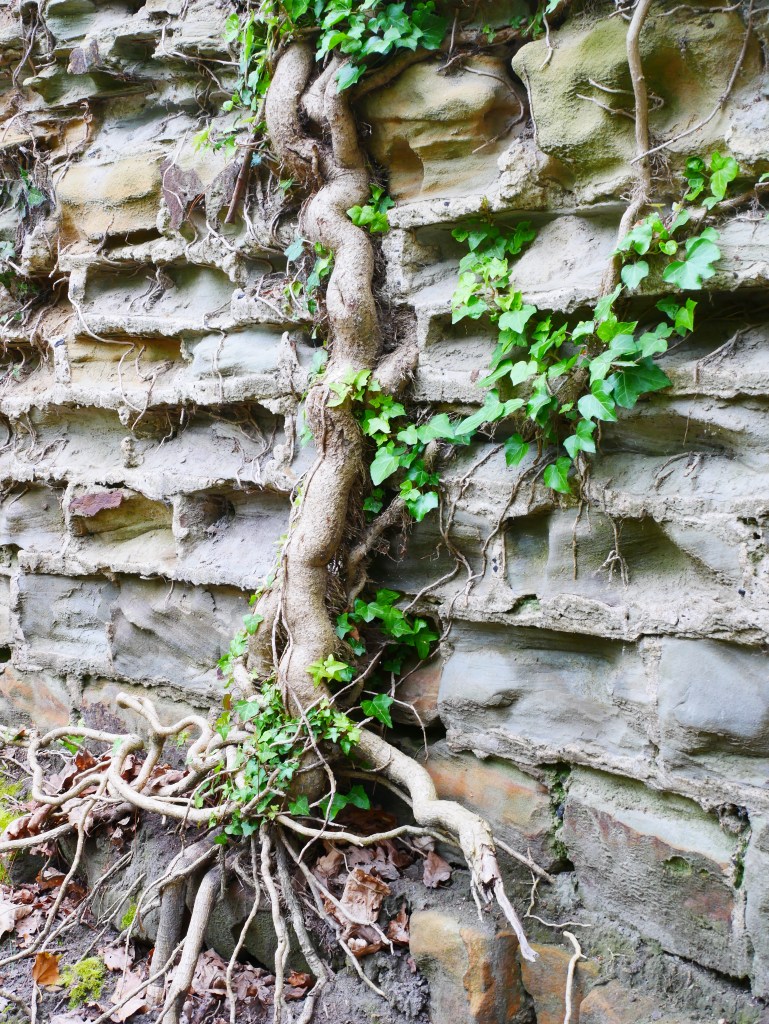
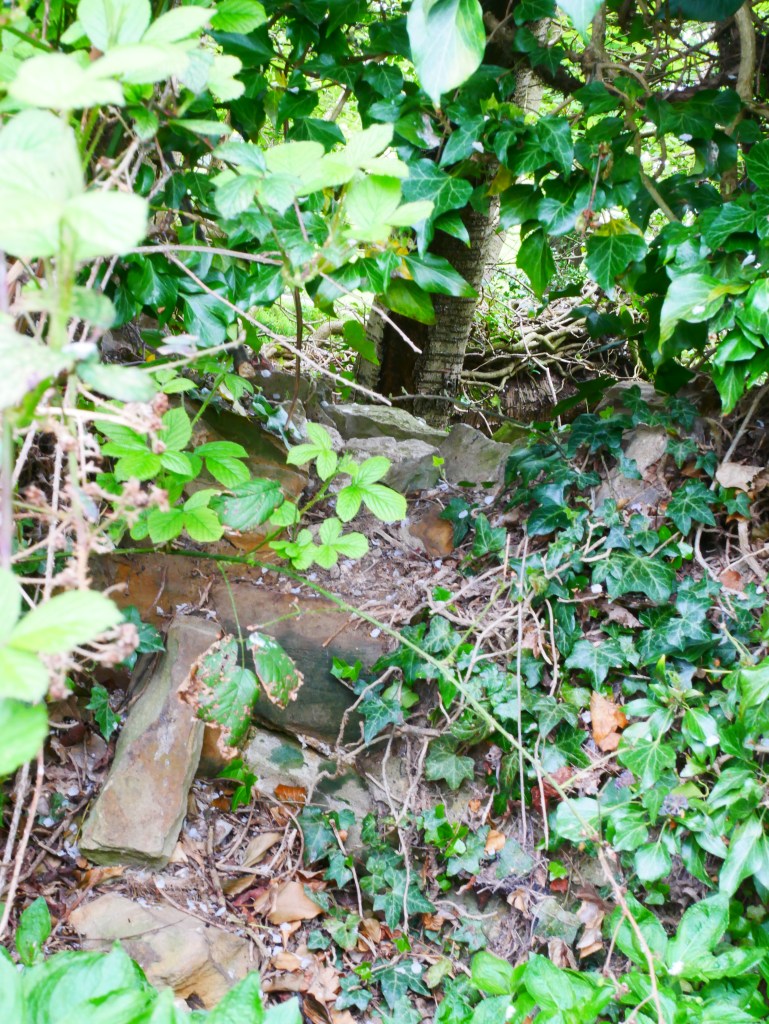
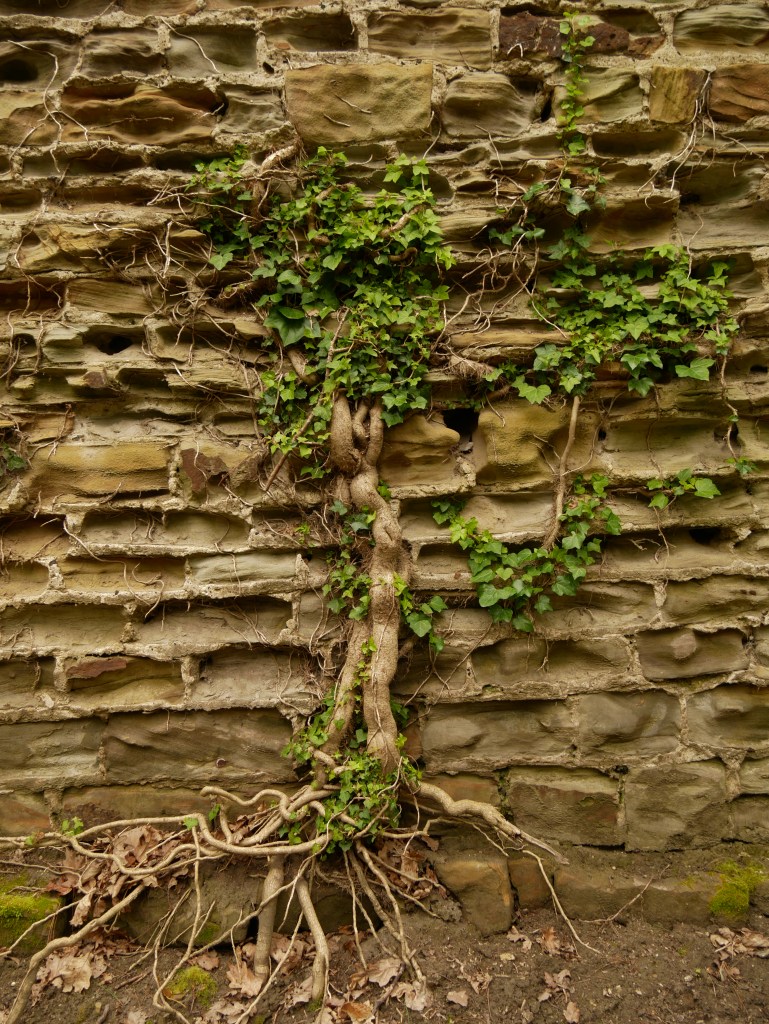
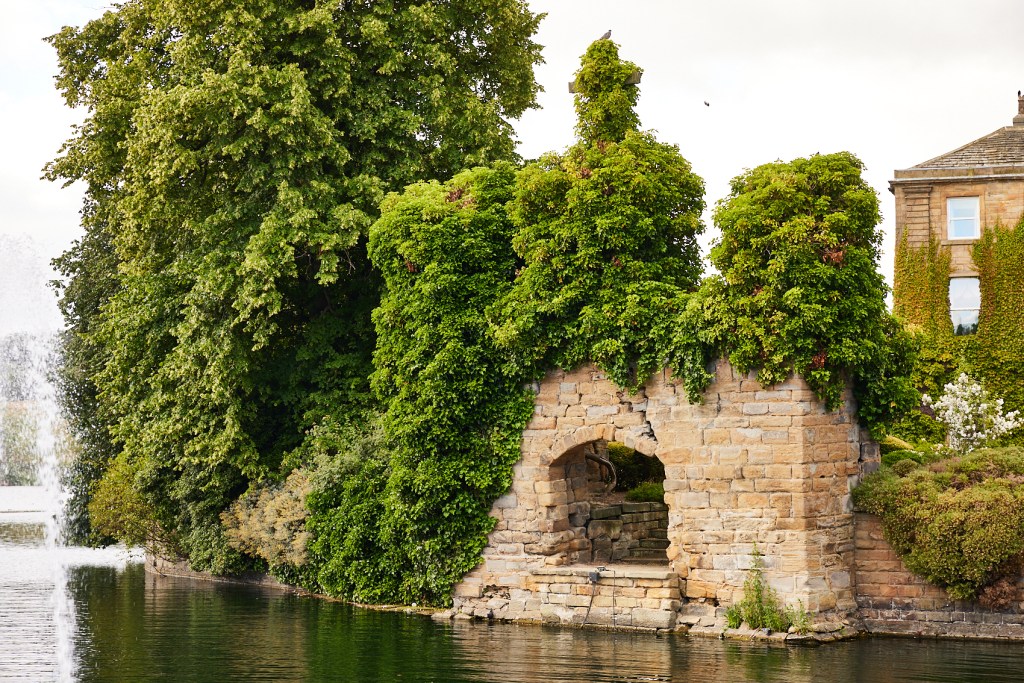
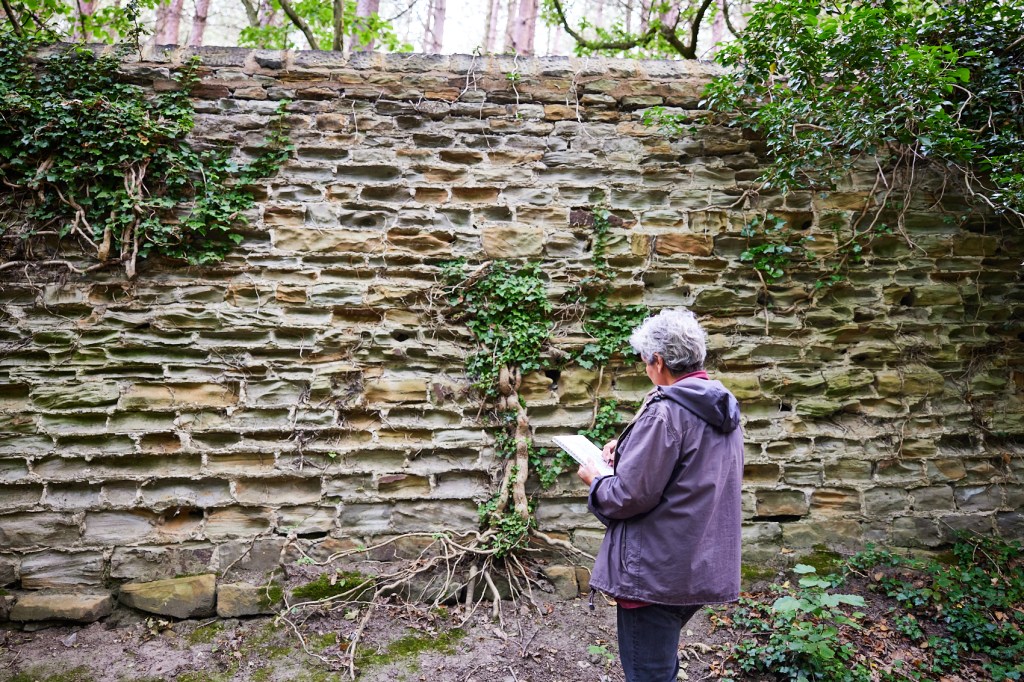
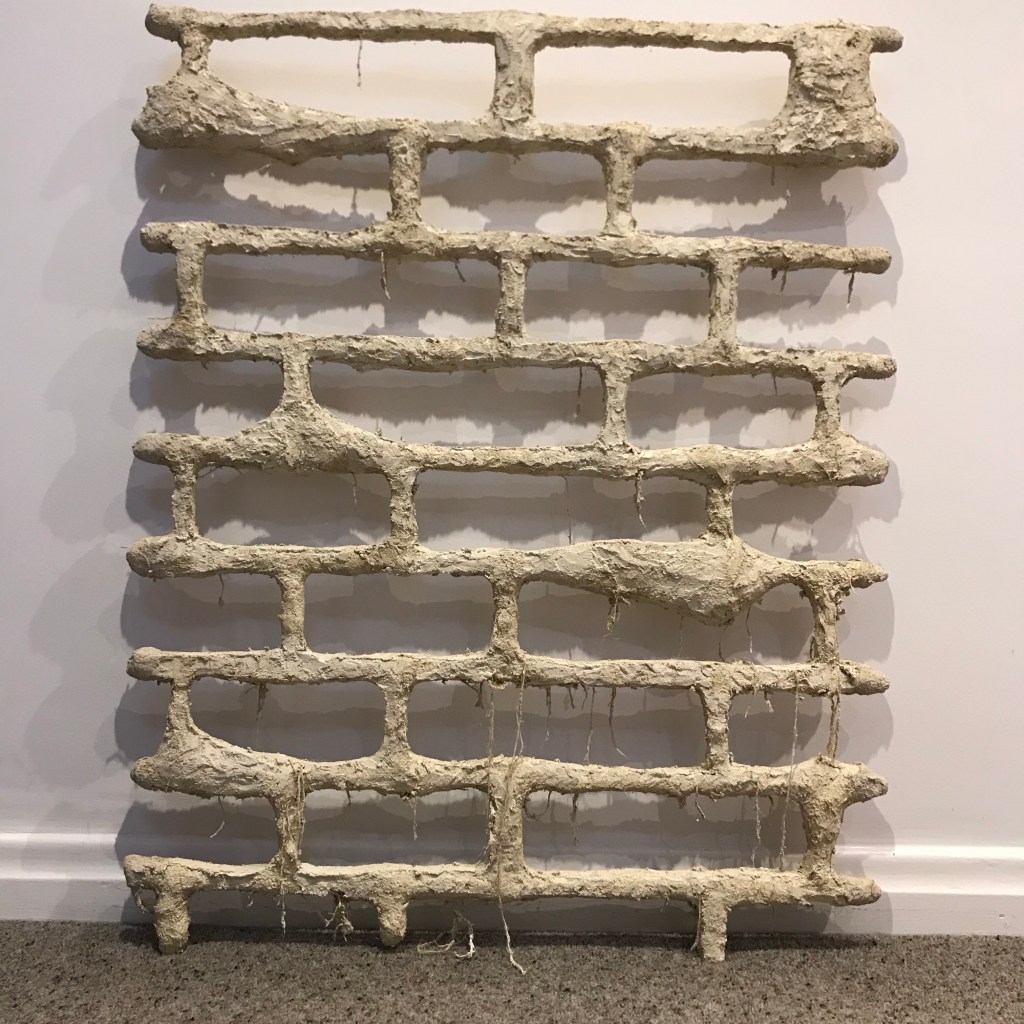
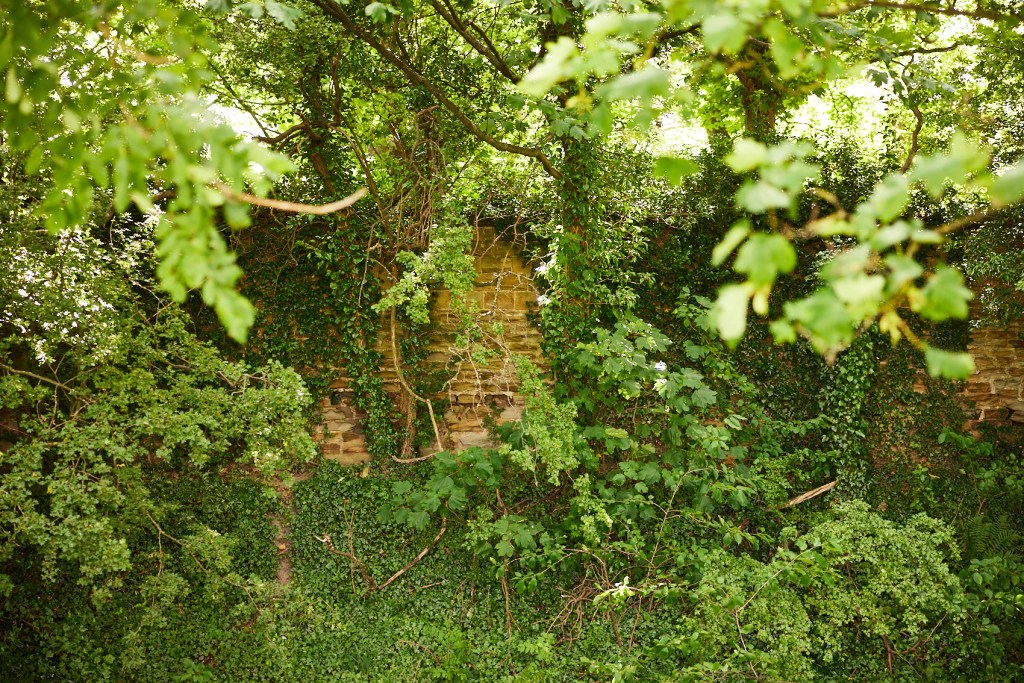
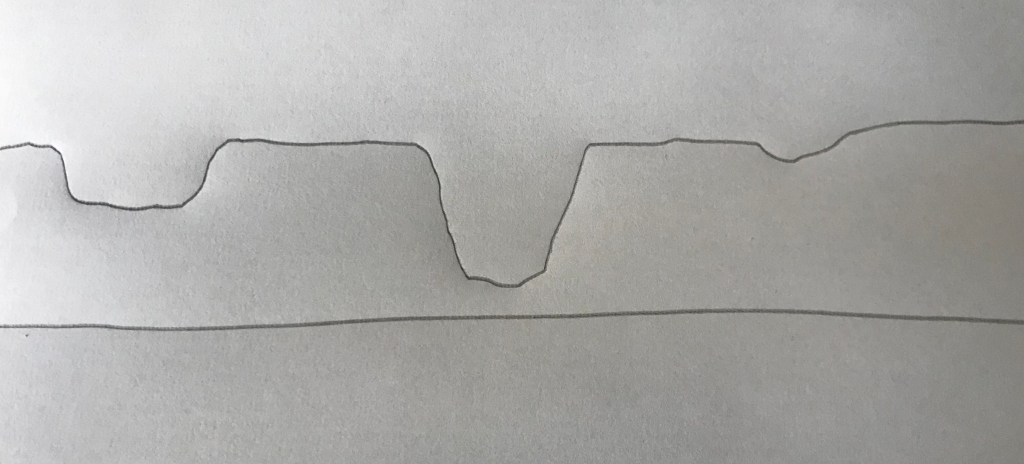
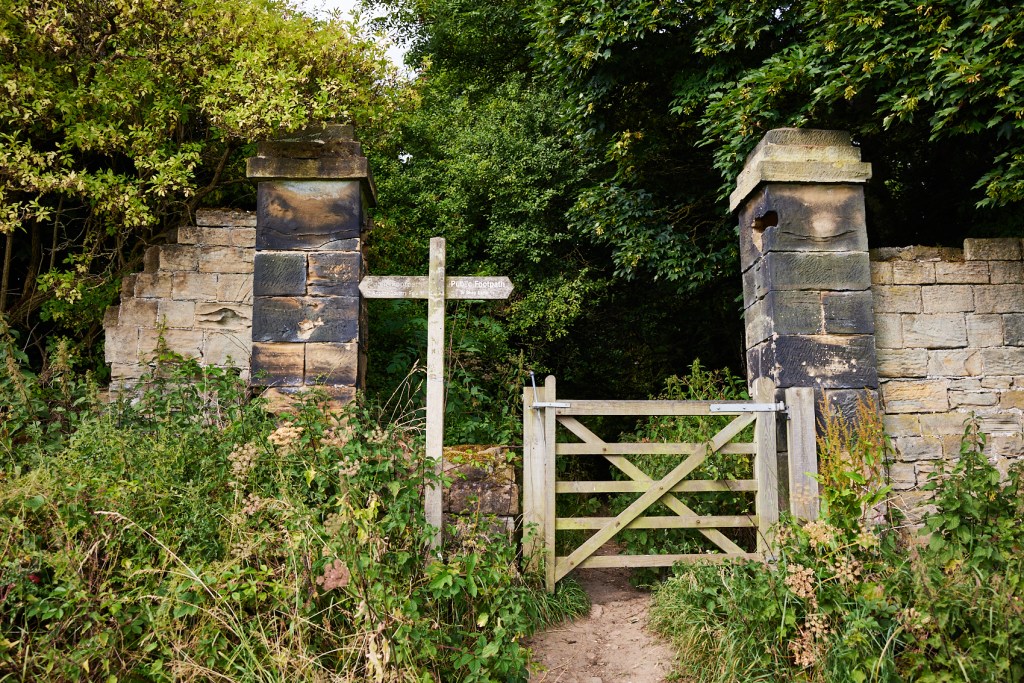
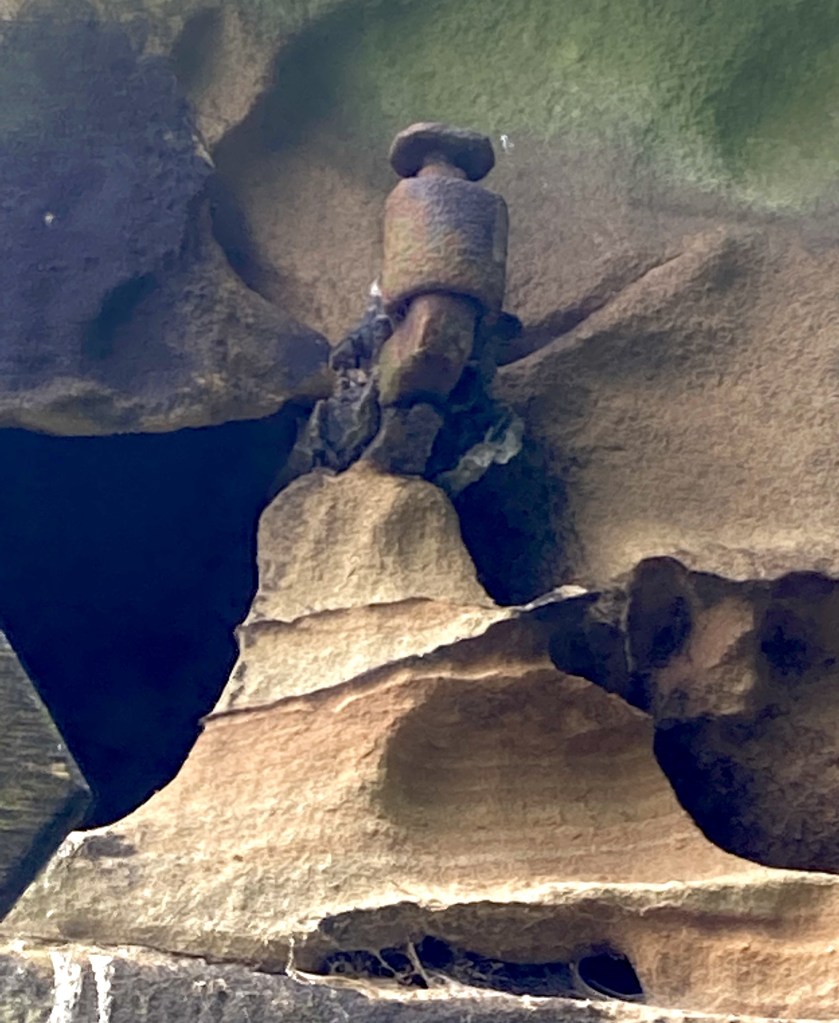
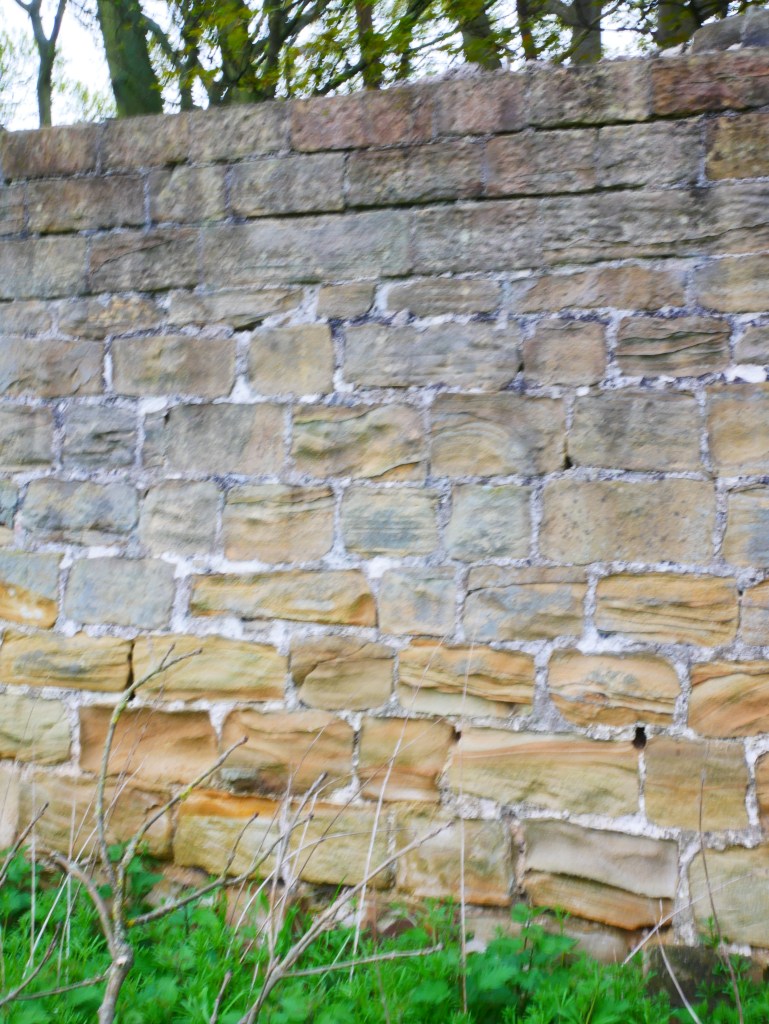
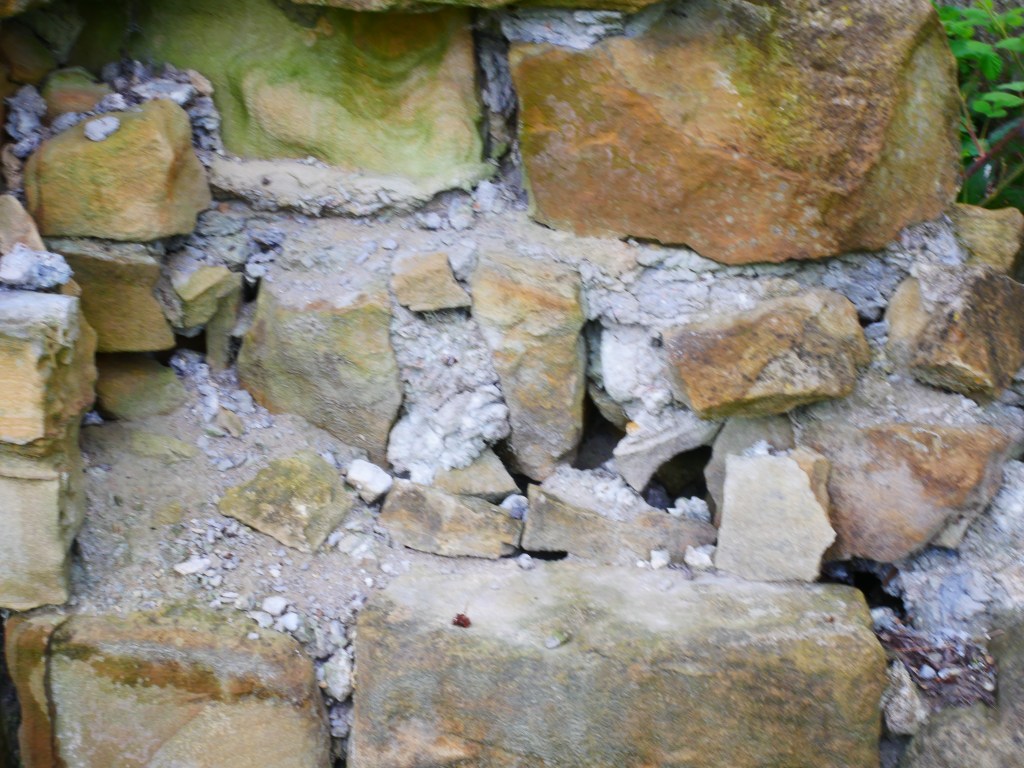
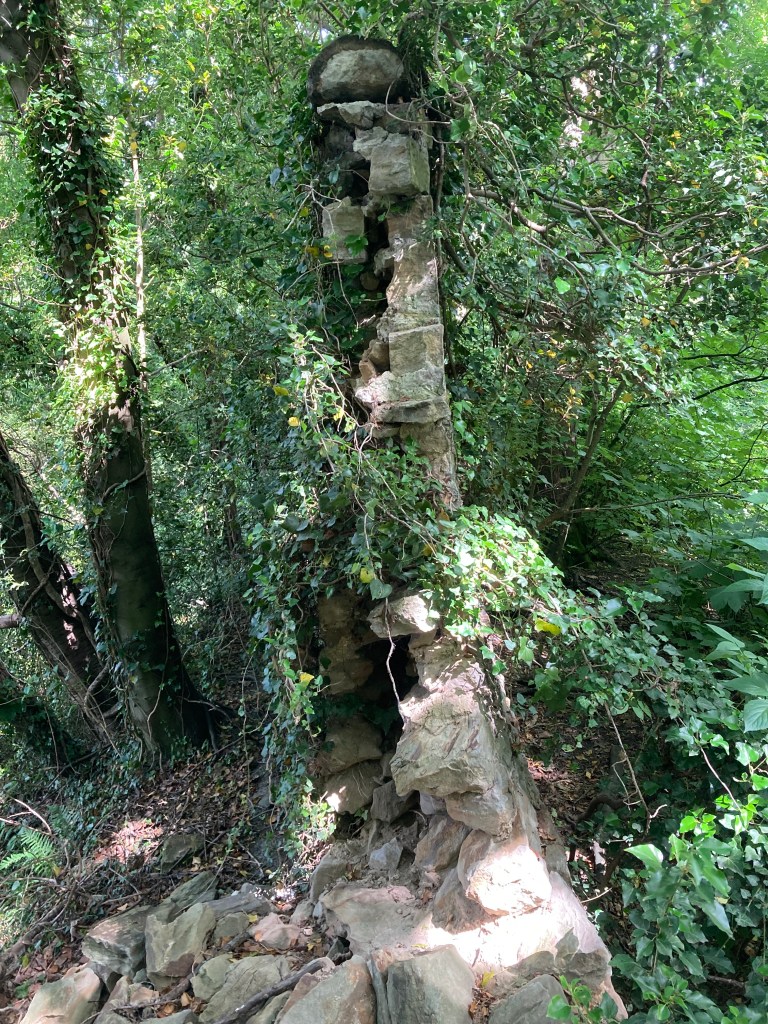
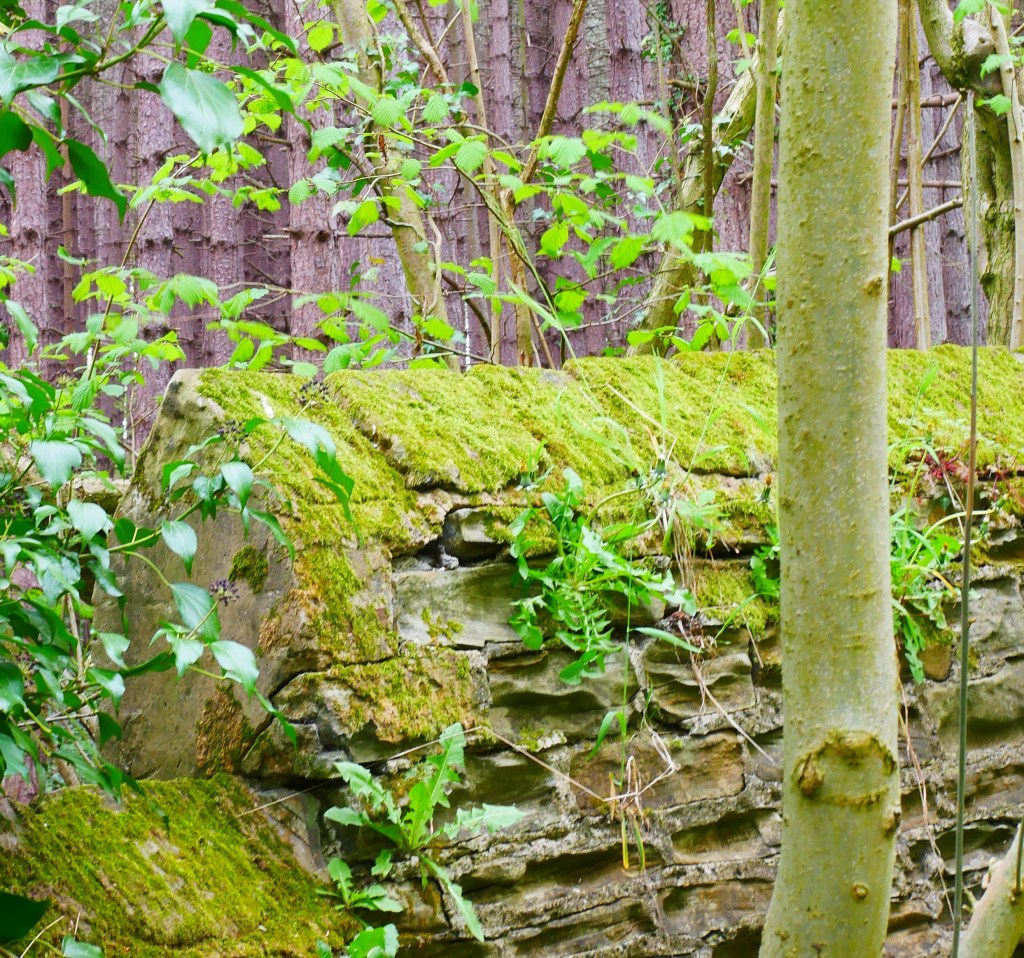
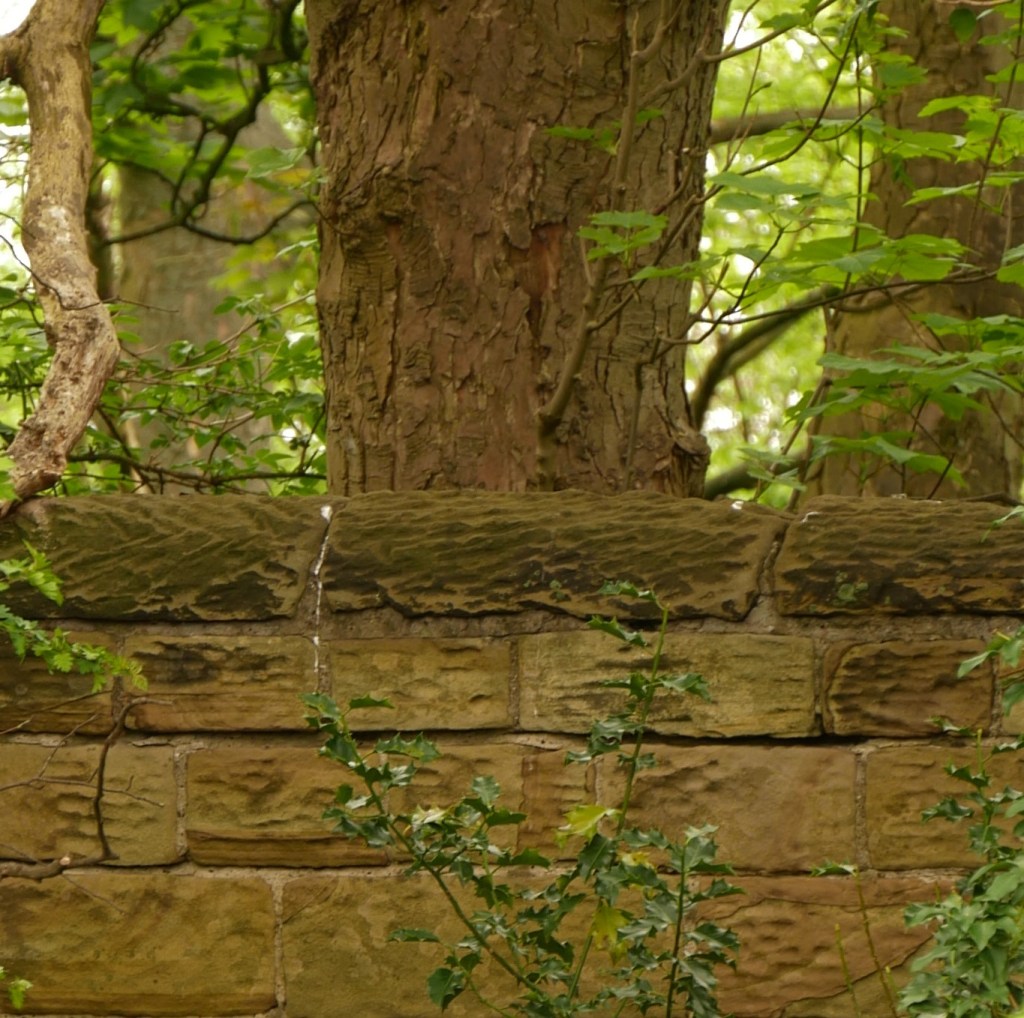
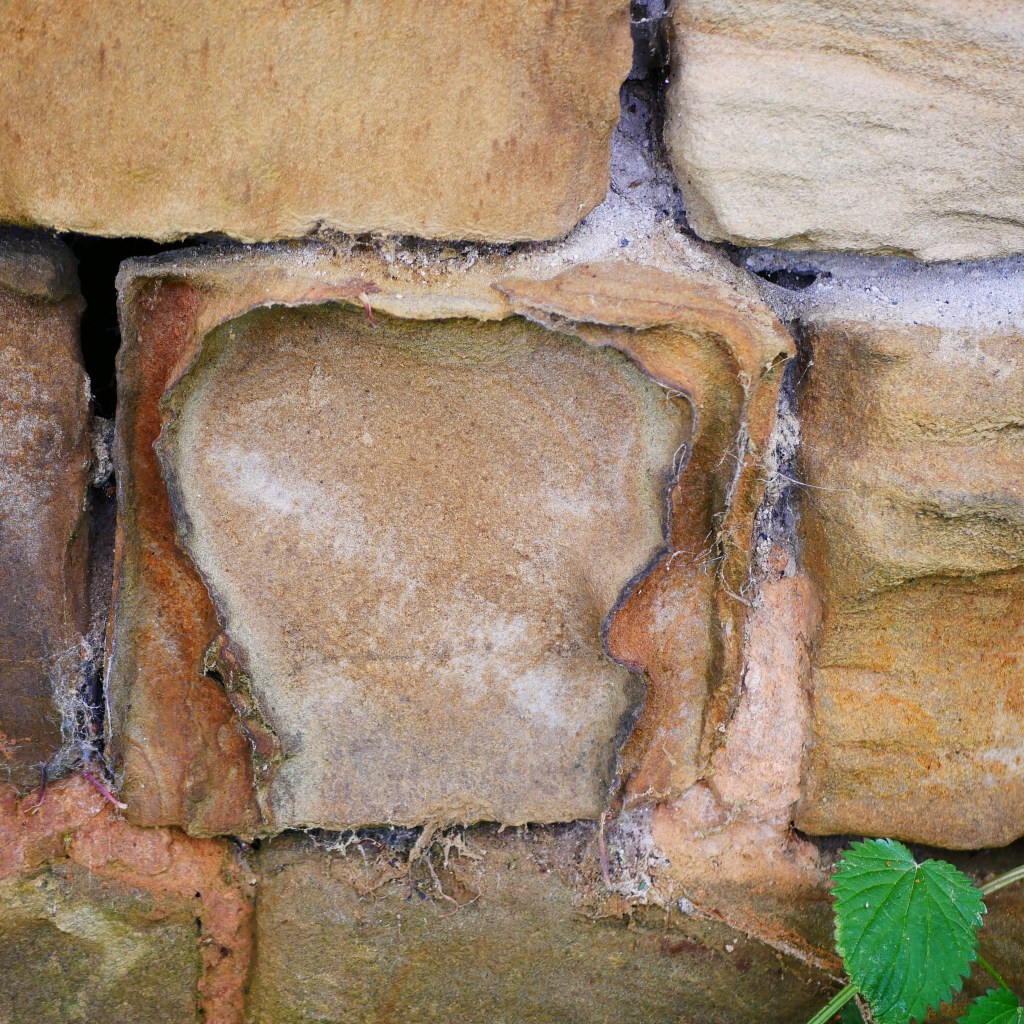
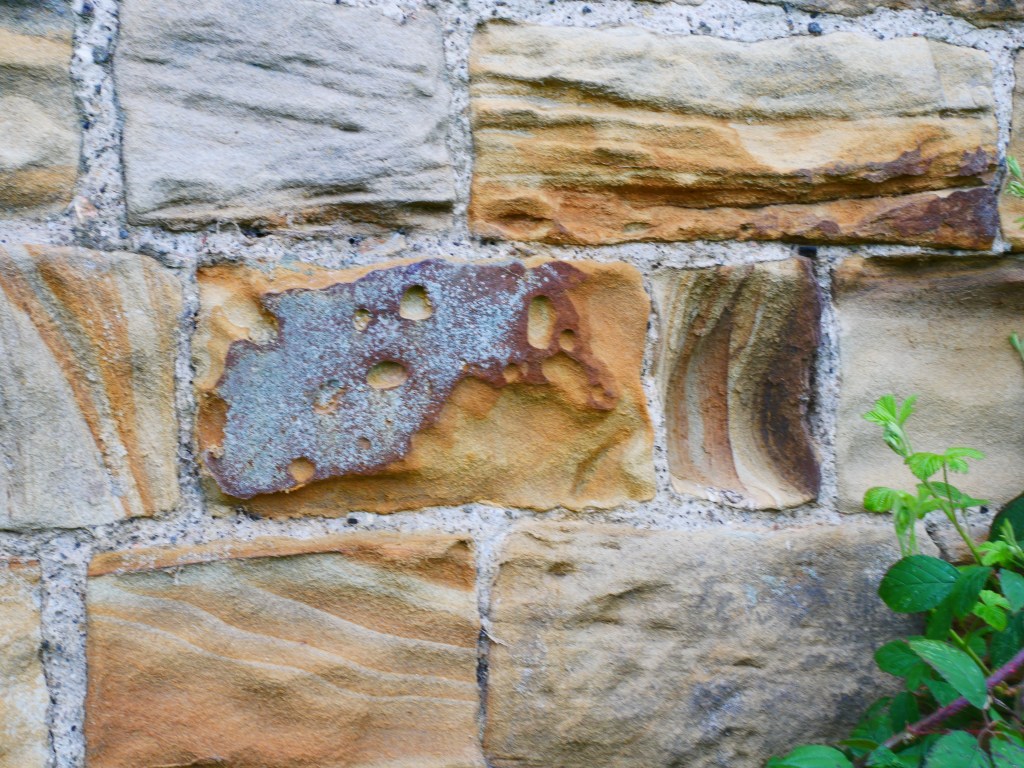
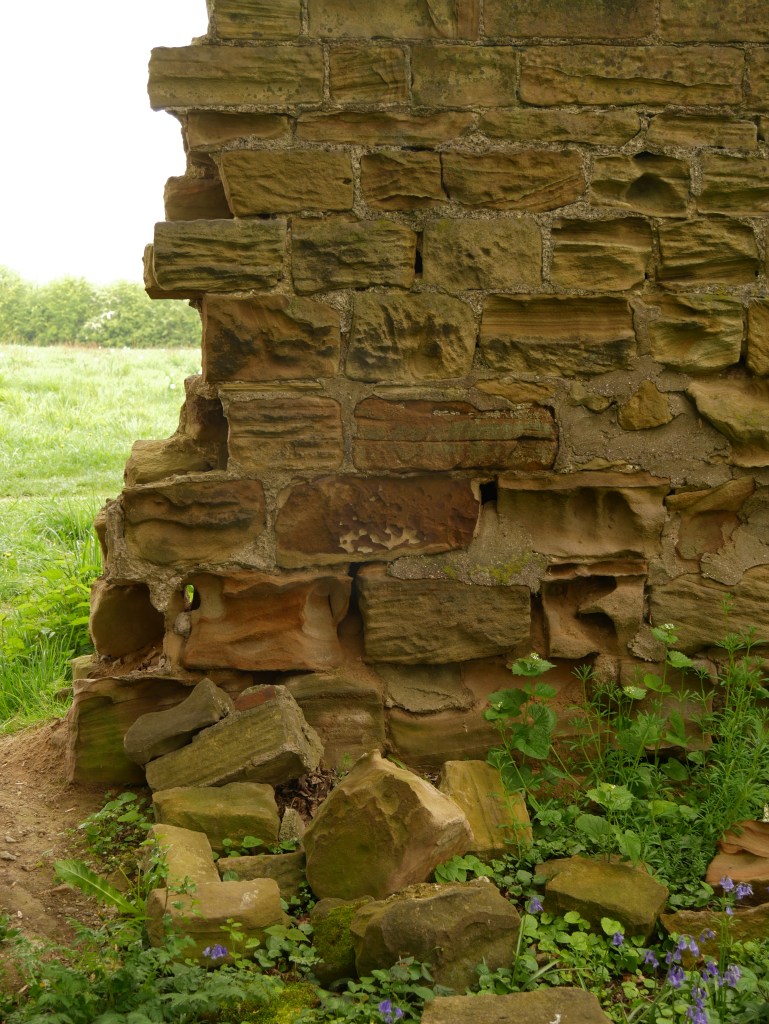
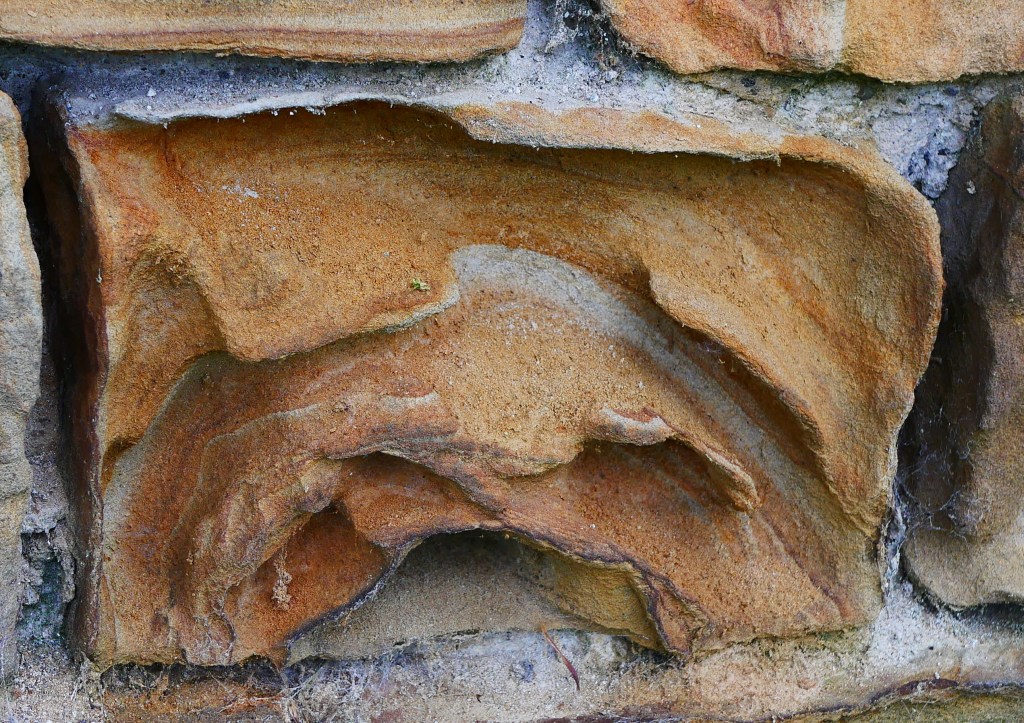
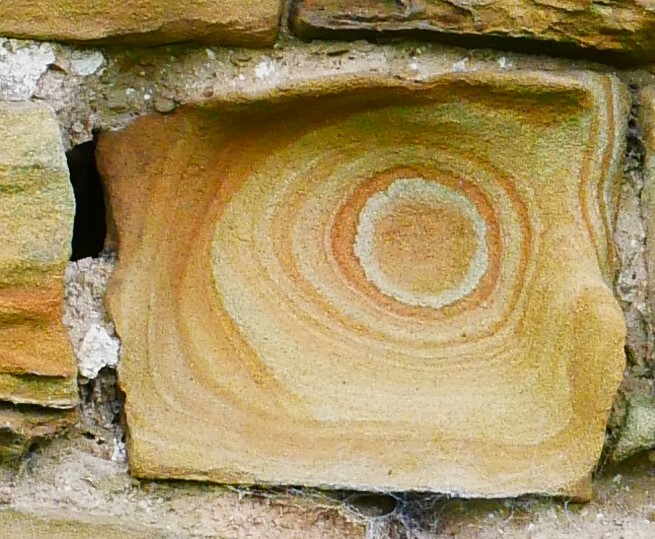
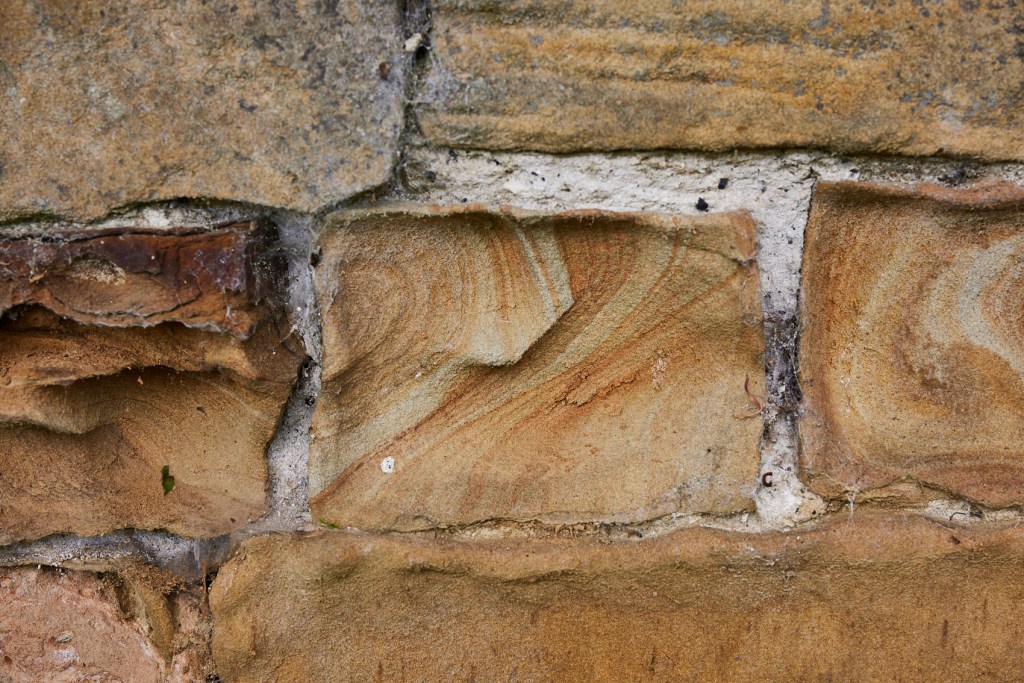
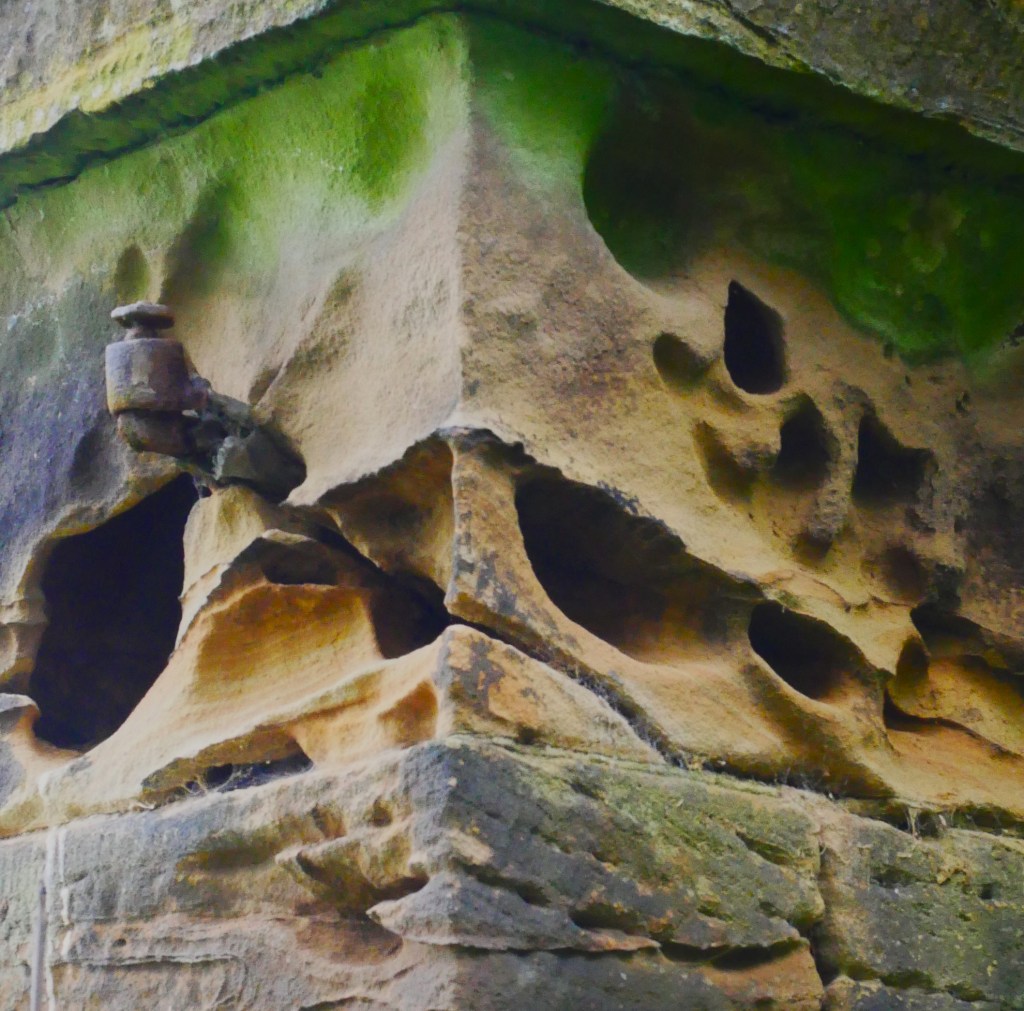
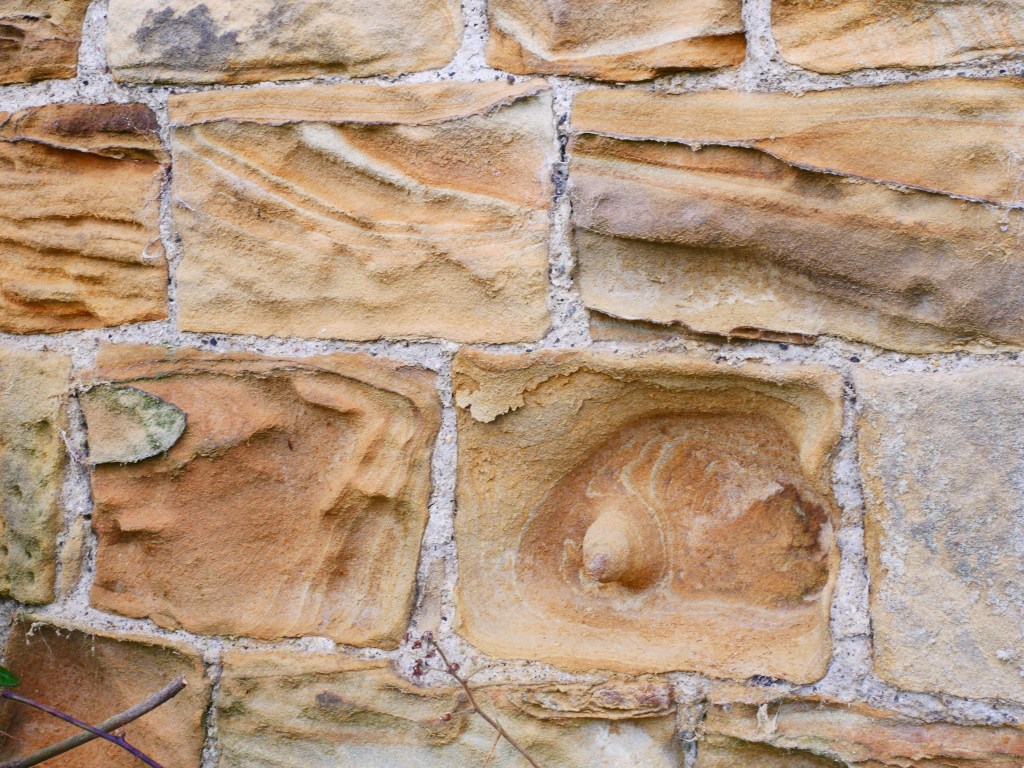
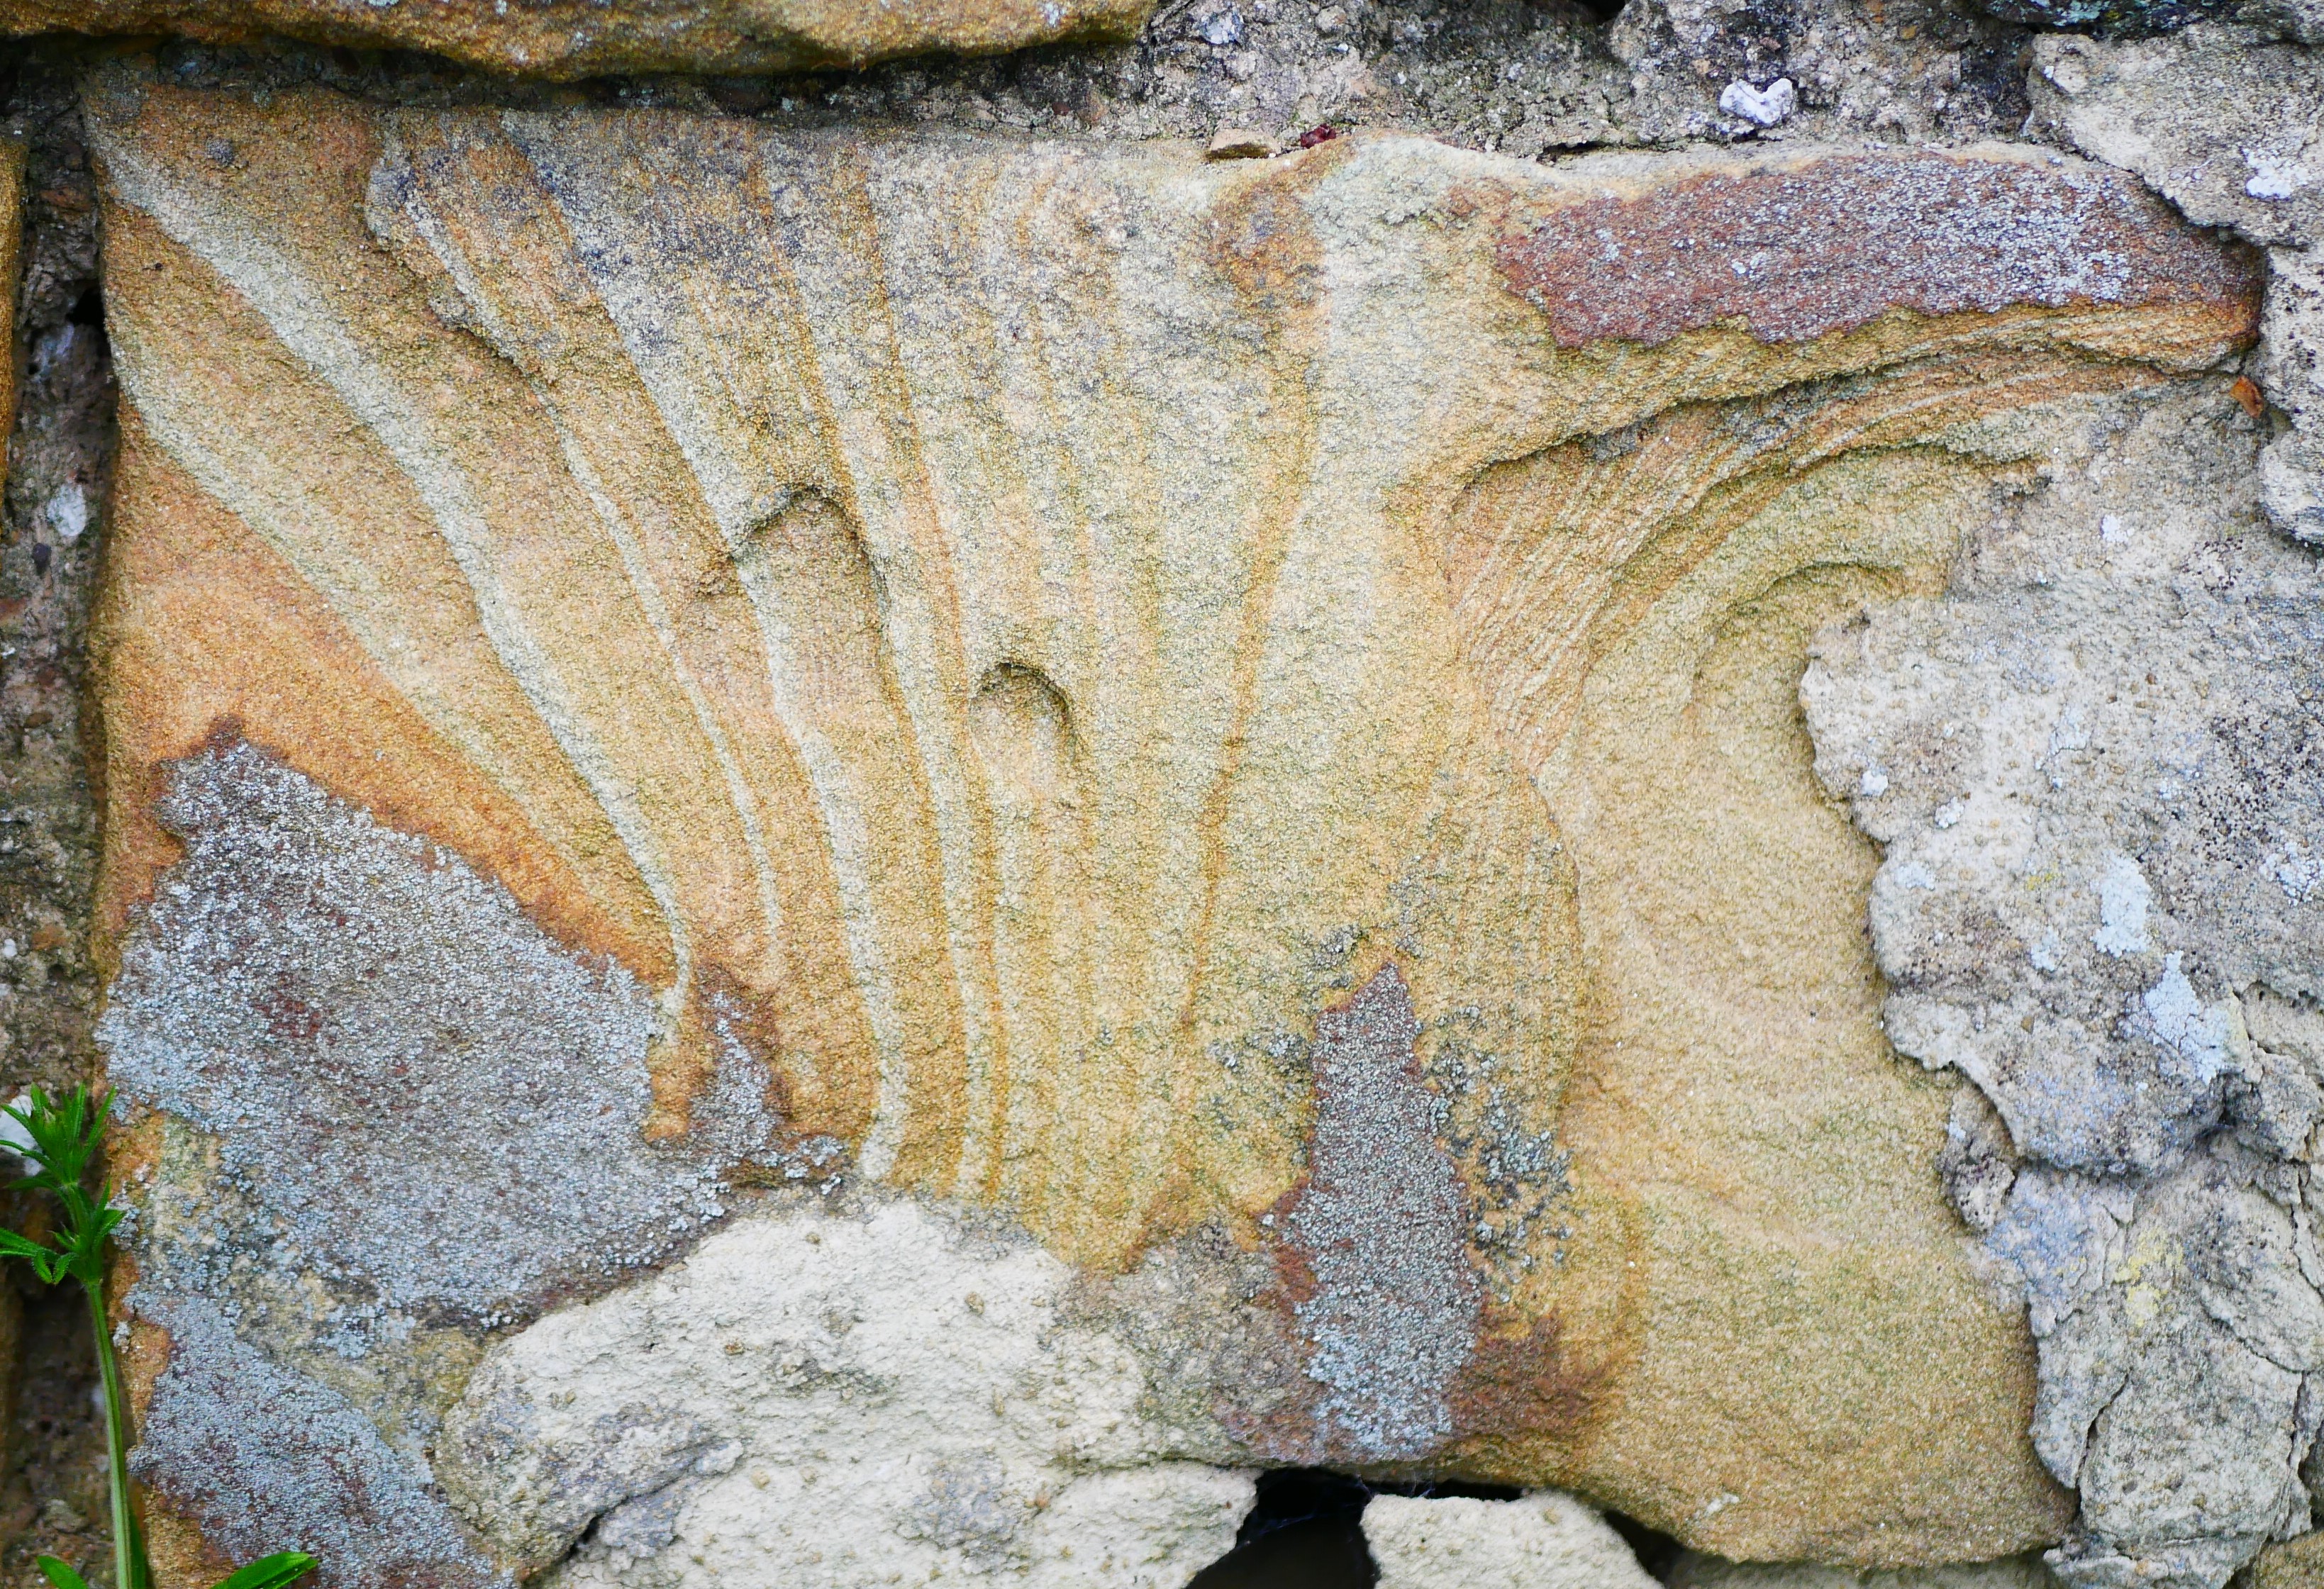
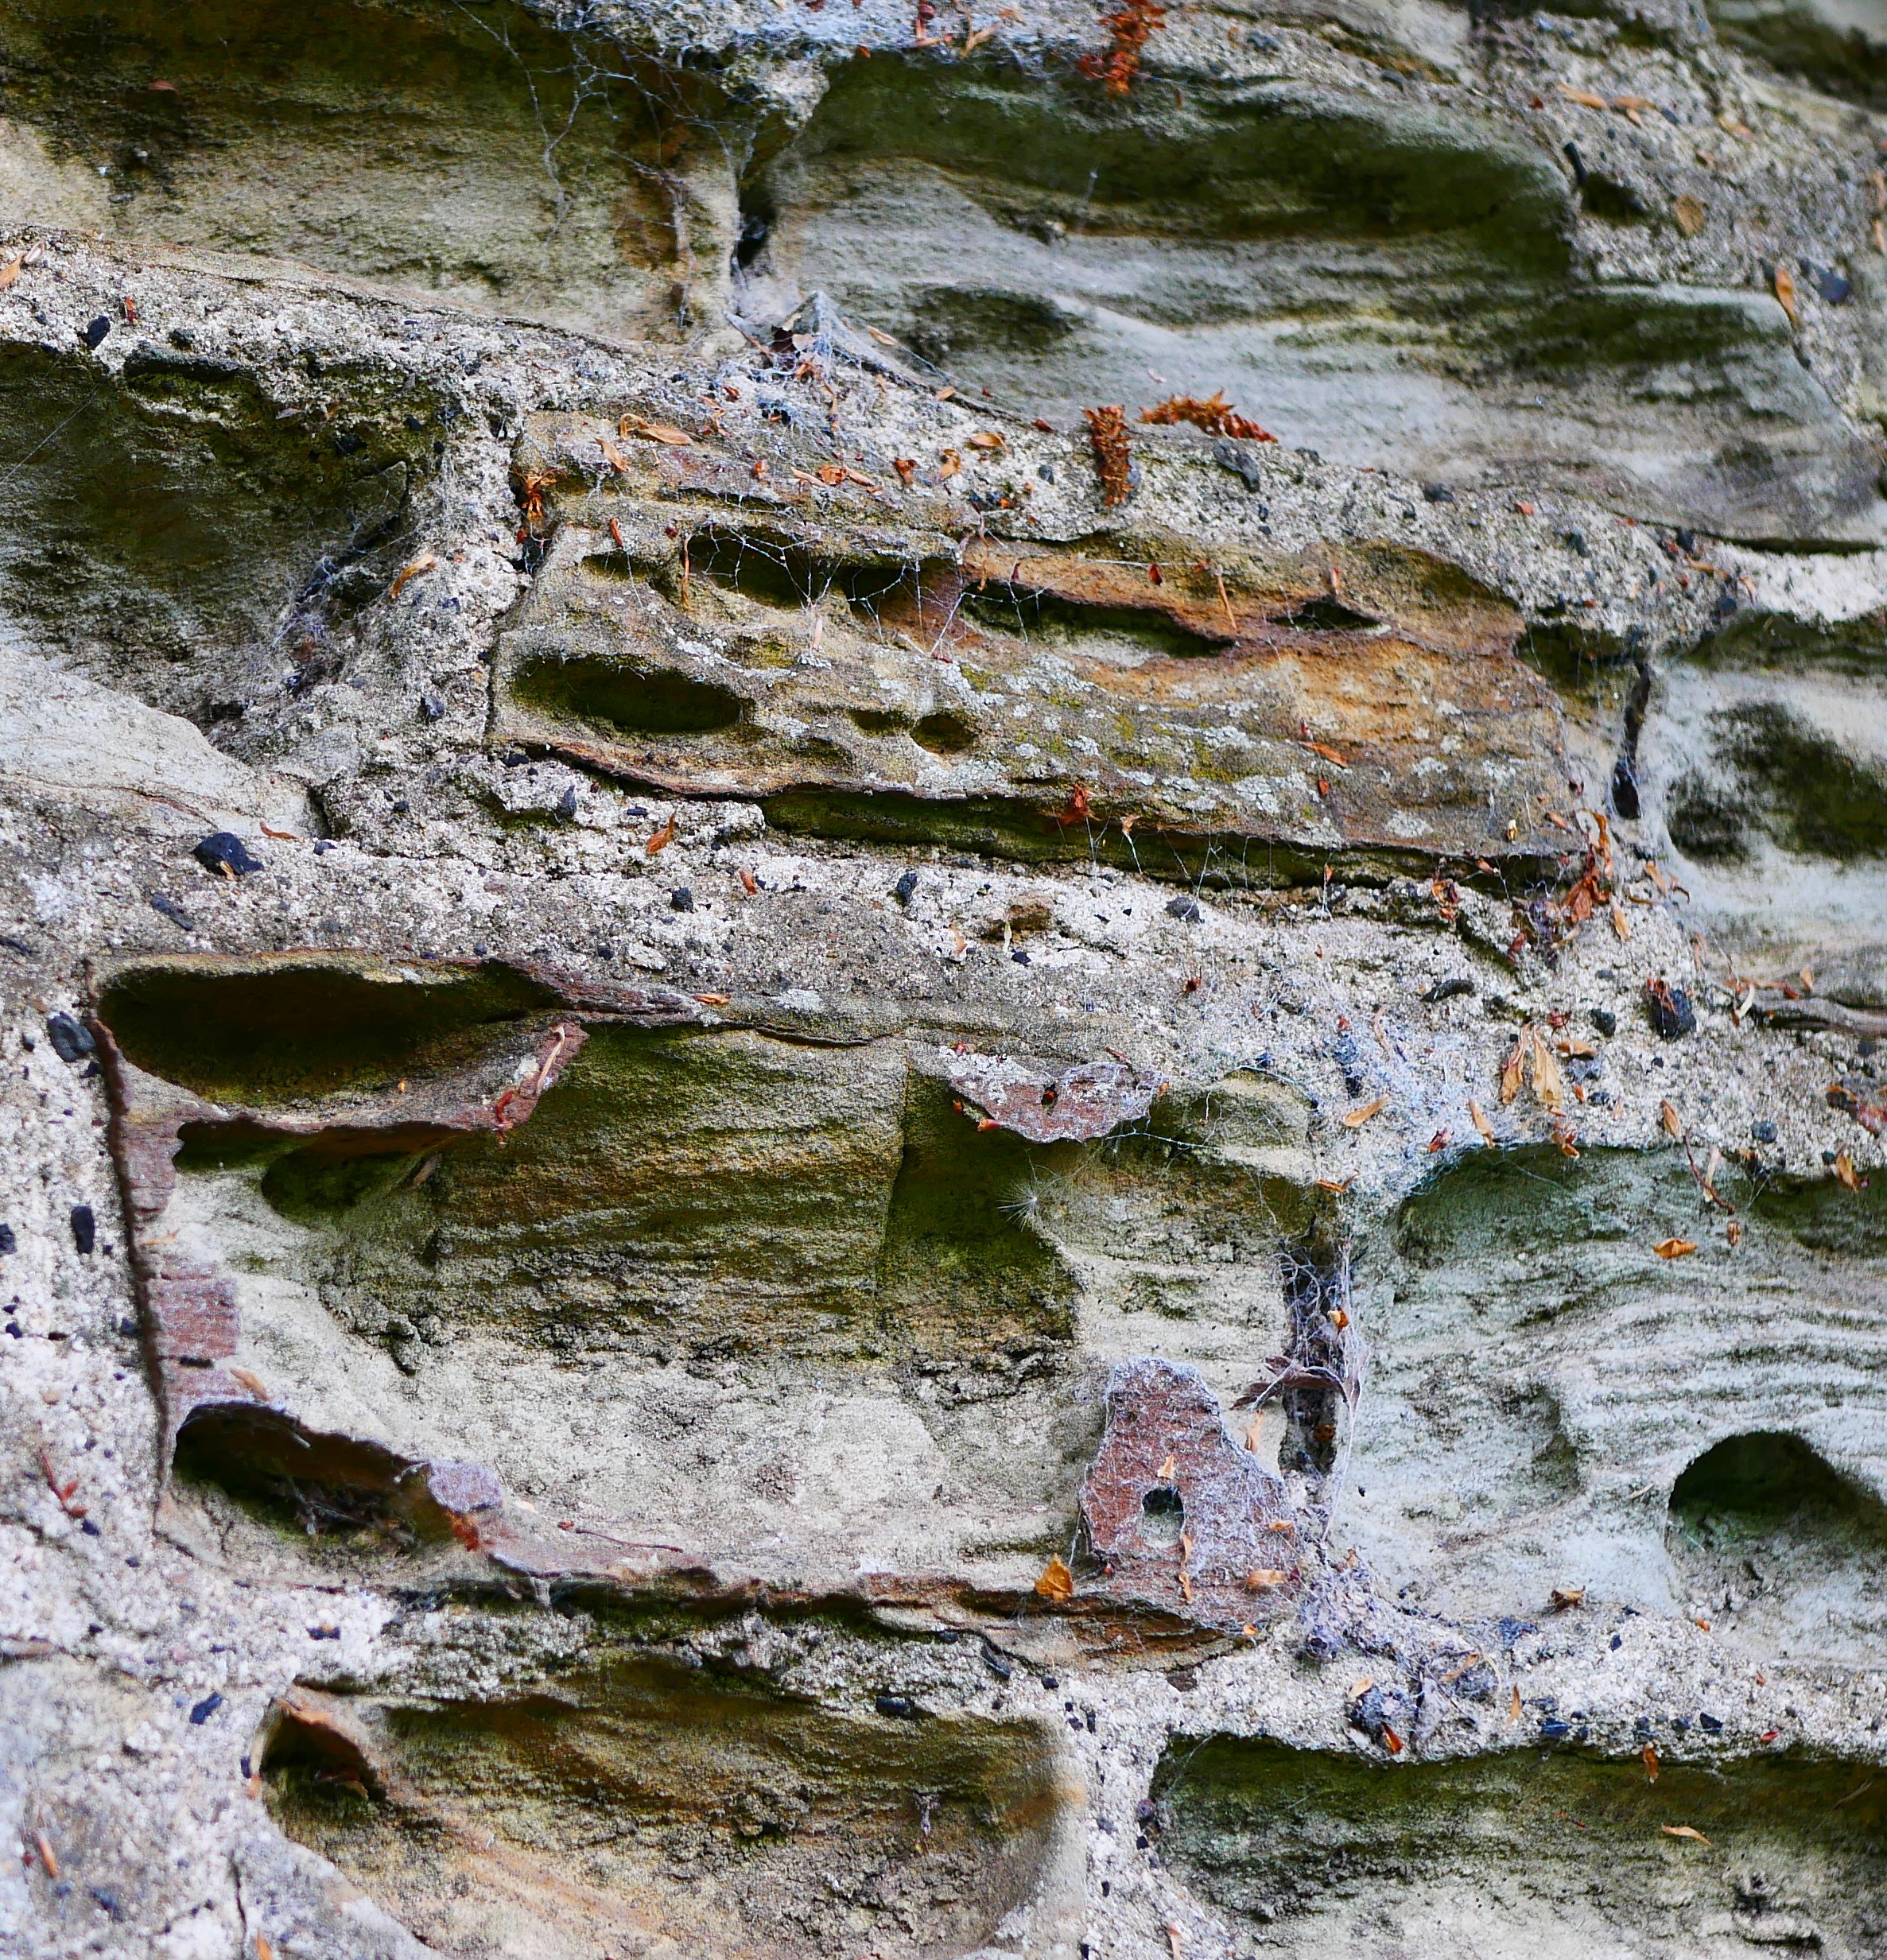
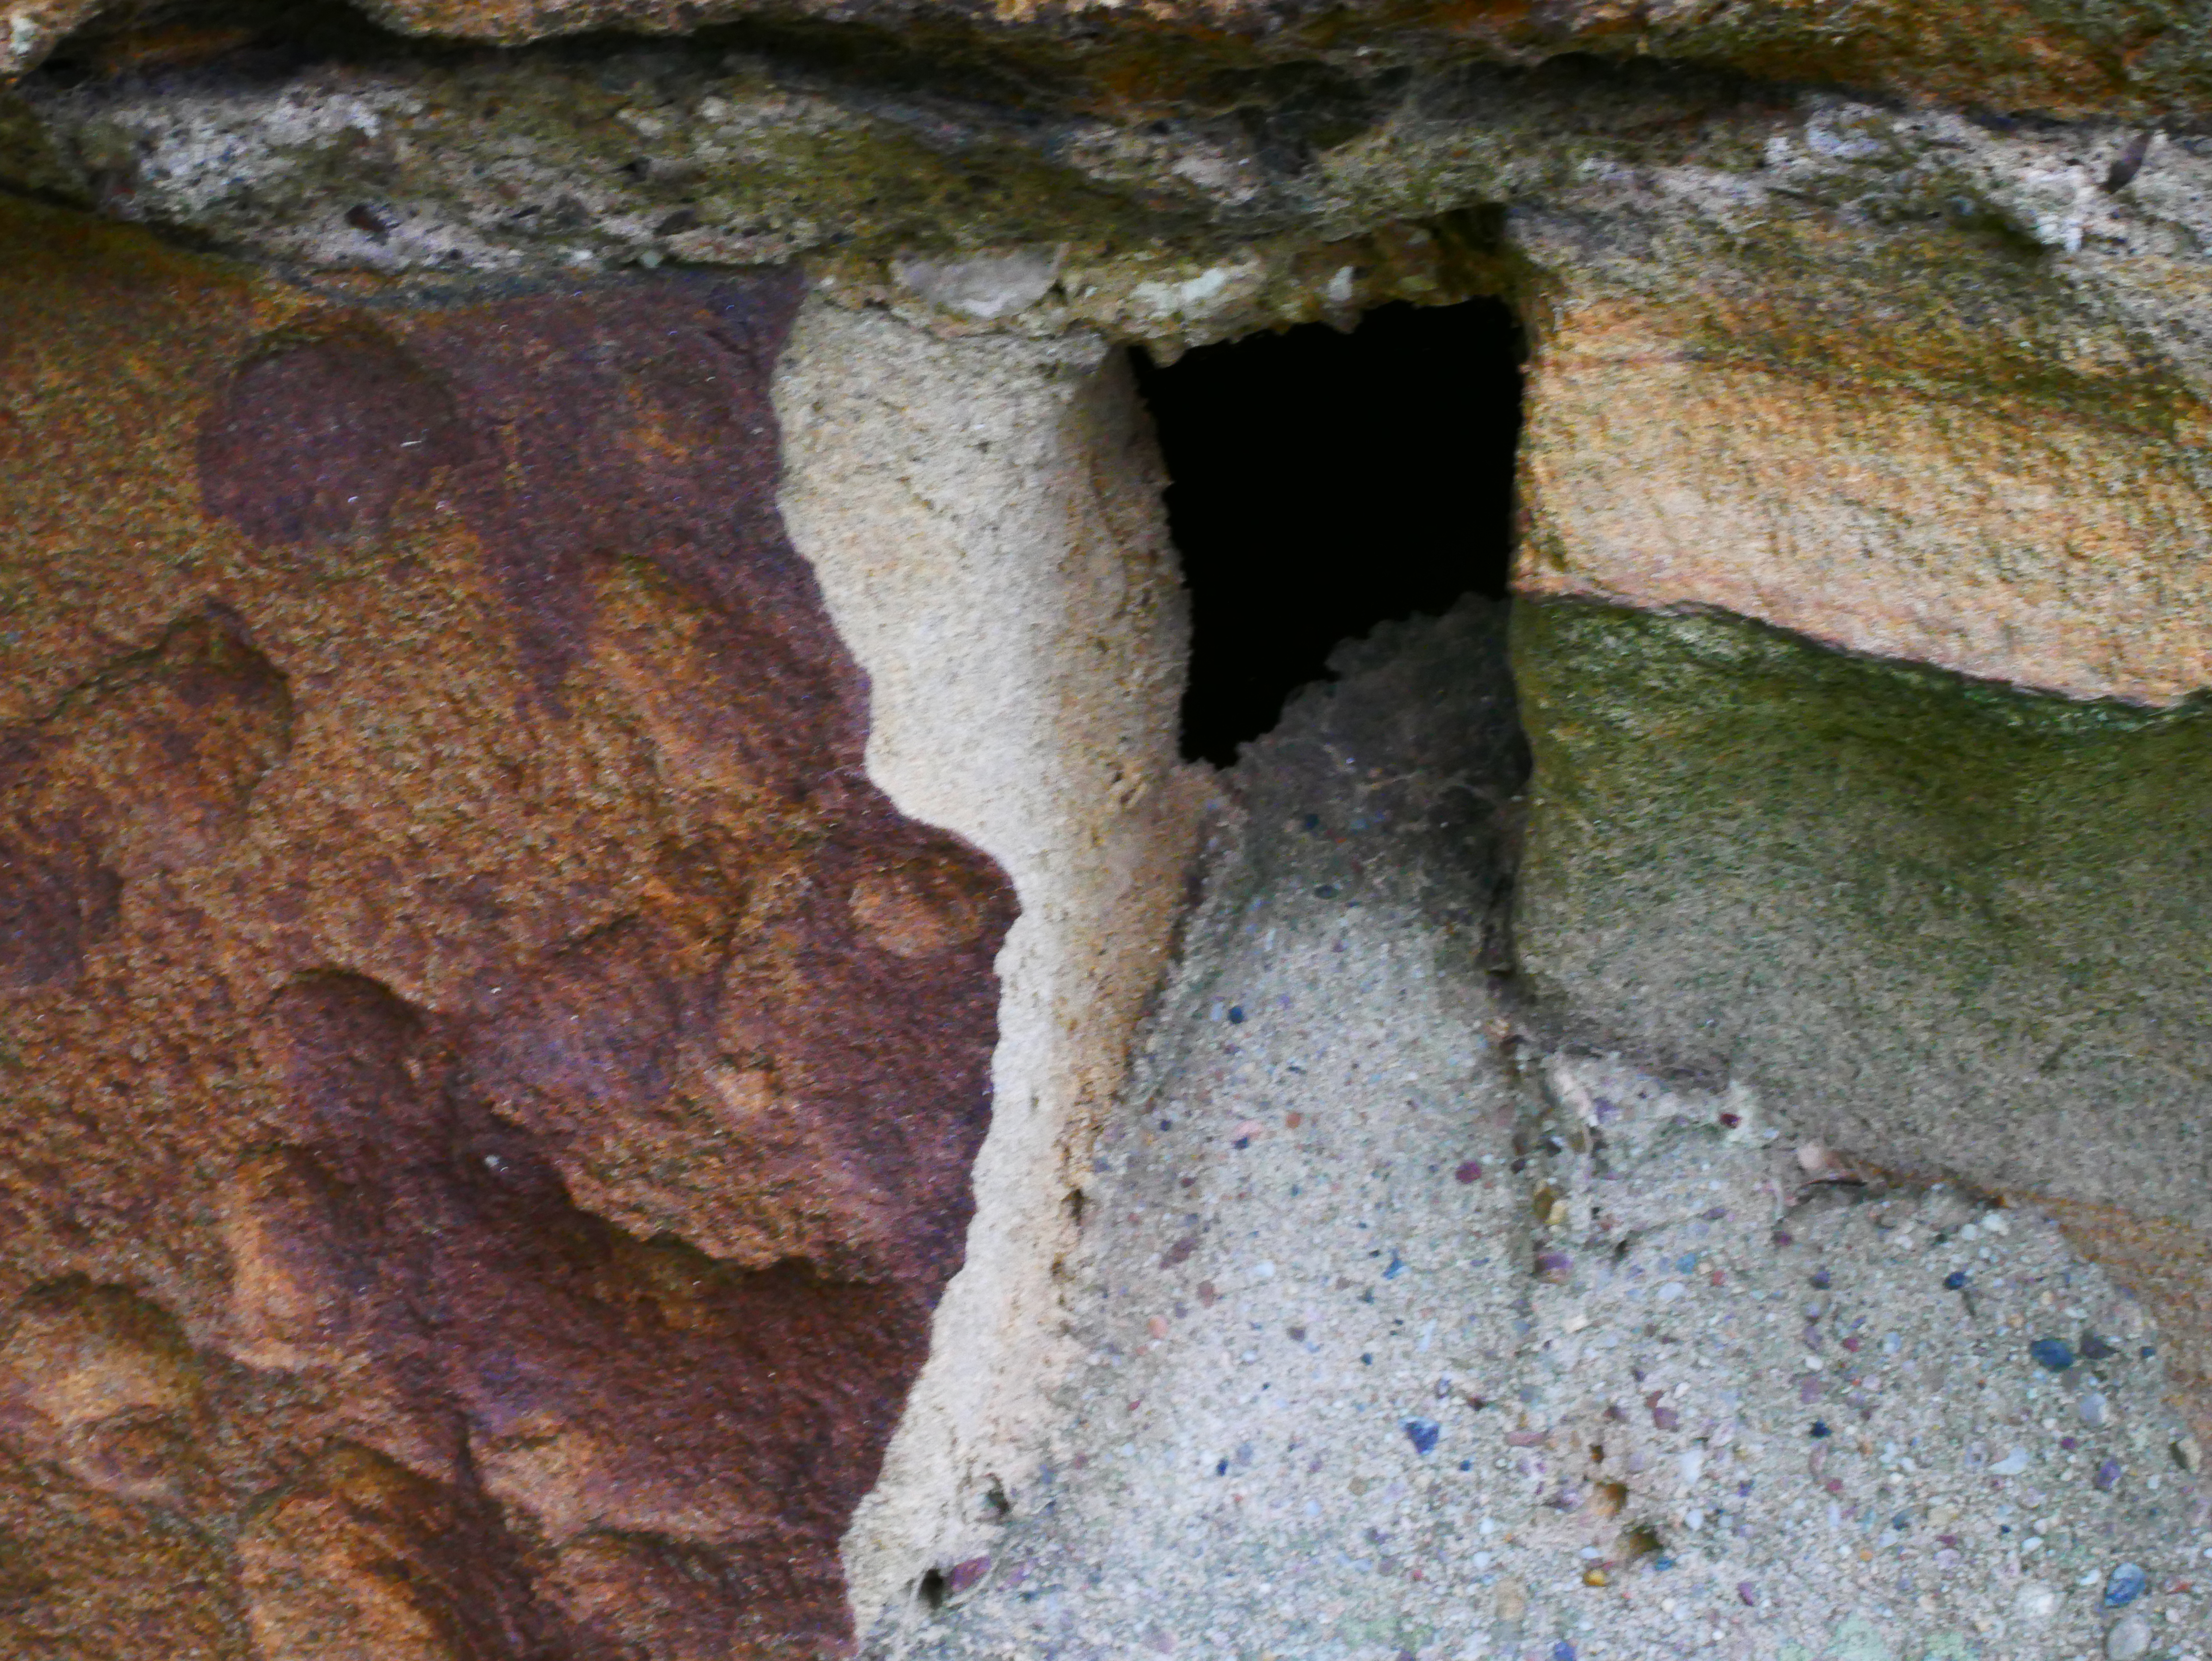
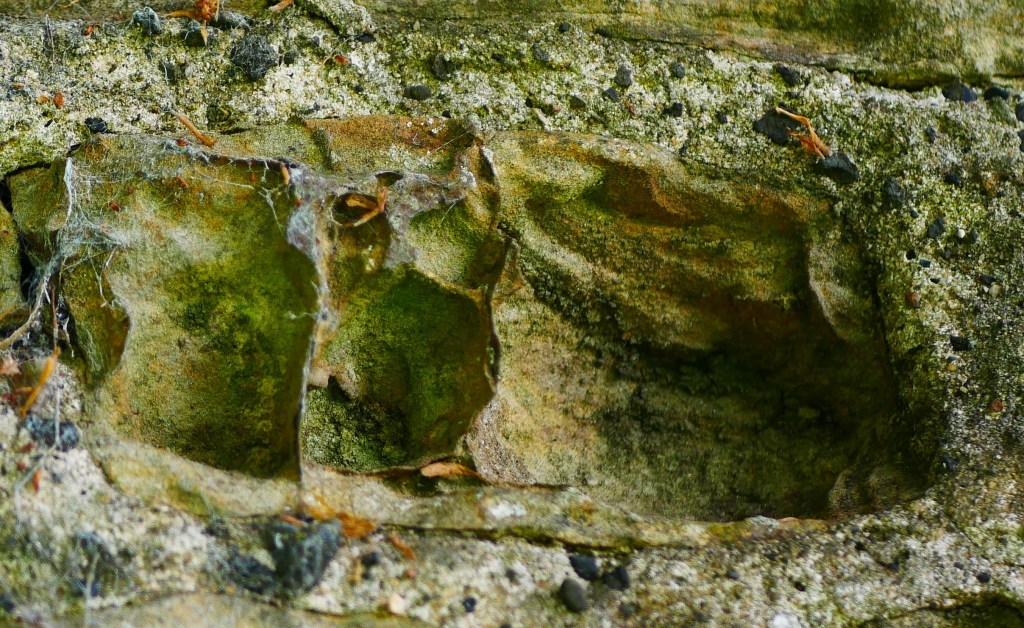
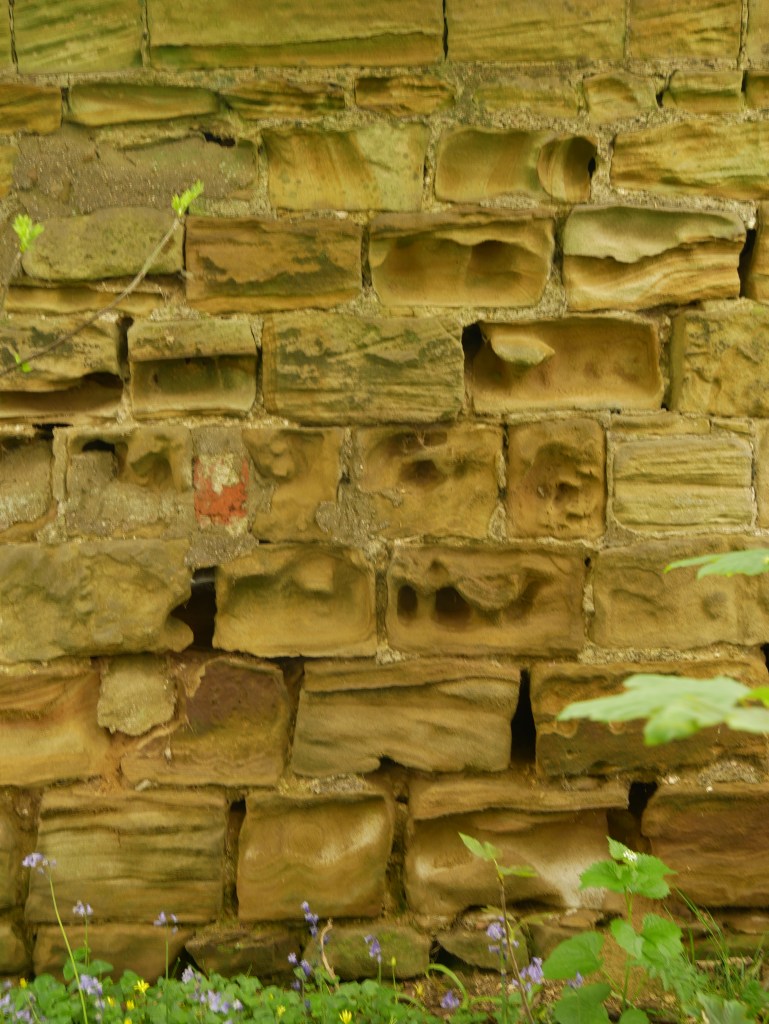
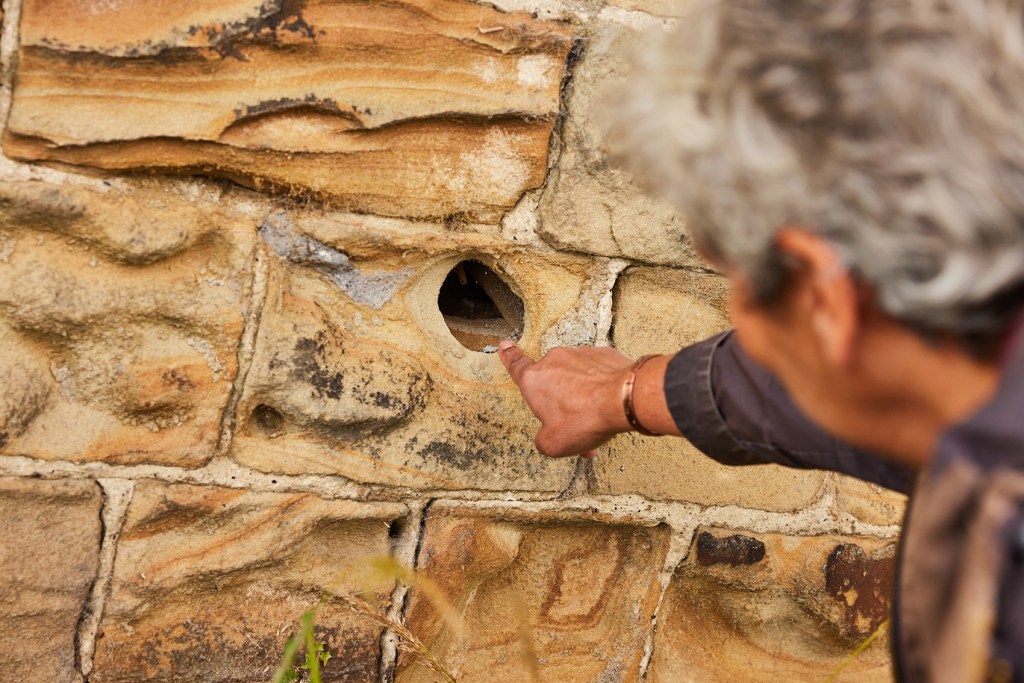
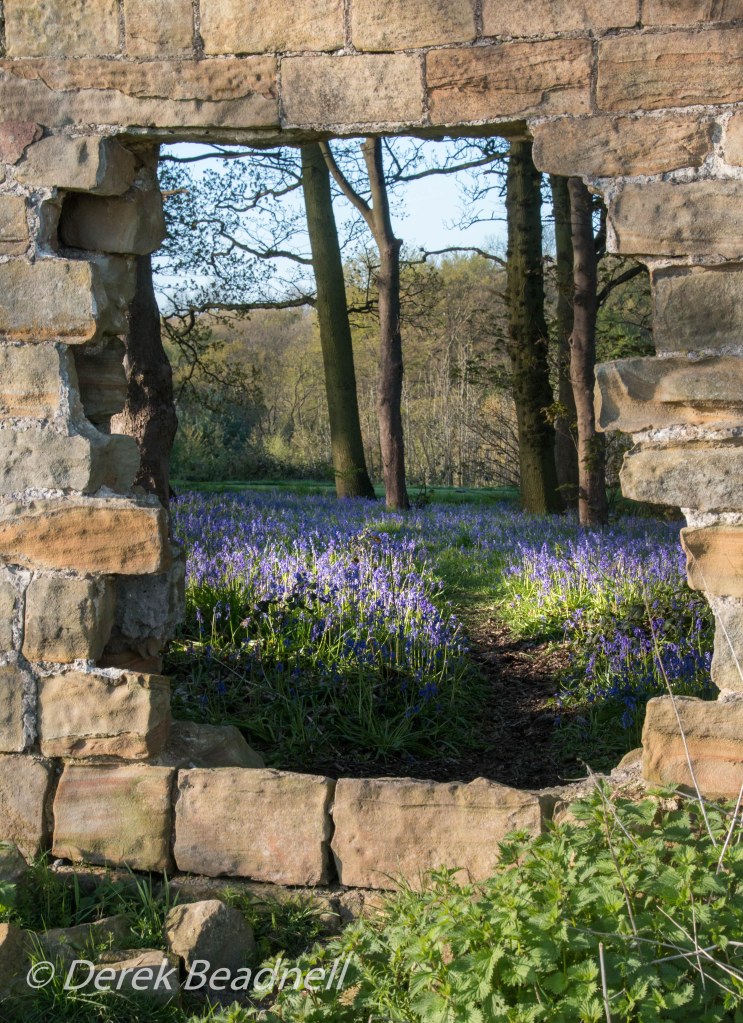
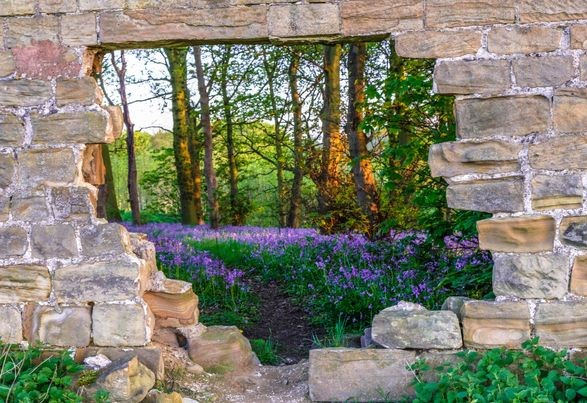
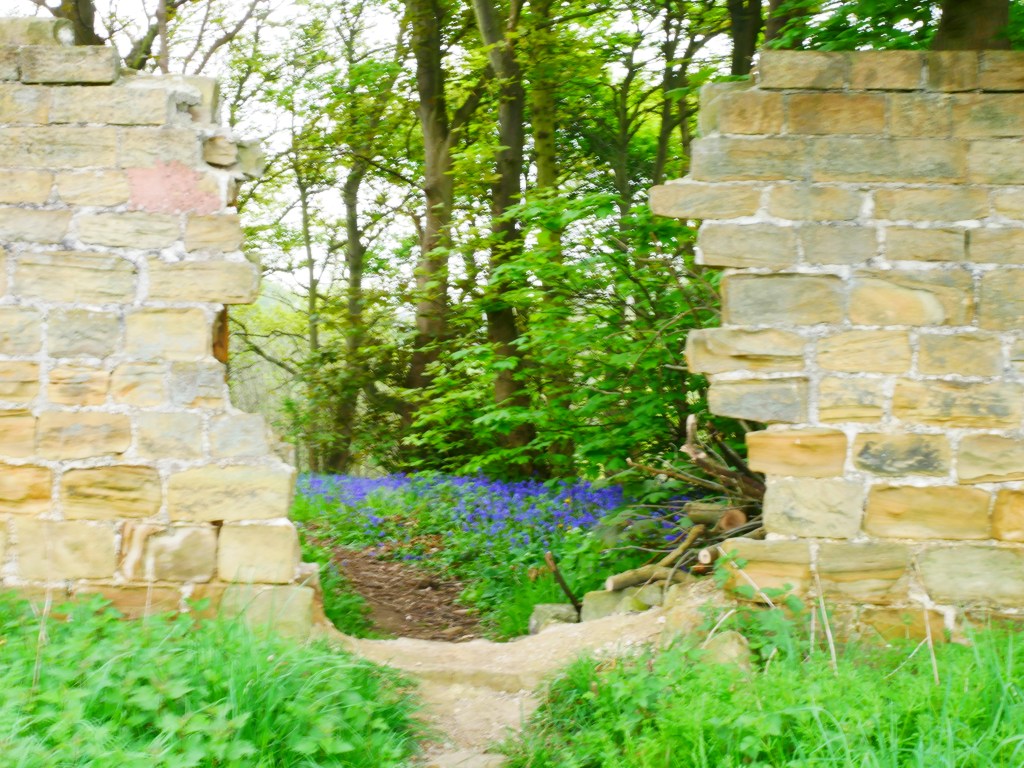
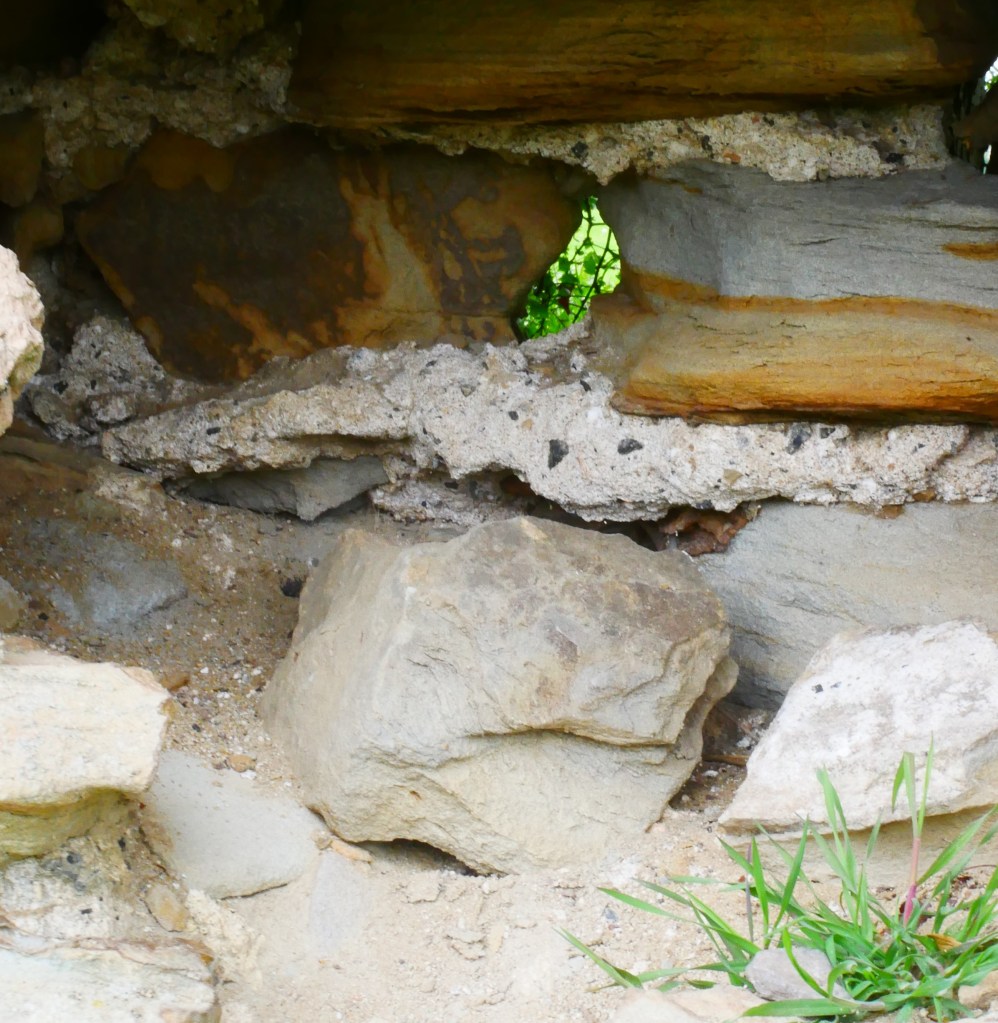
There is a section of wall overlooking fields towards Crofton which is a favourite with walkers at bluebell time. A hole in the wall provides a perfect frame for the bluebells growing inside the estate. The first of these photos was taken in about 2016, I think, and the second a year later and the third is as the wall was in 2021. The rapid decline from hole to gap is alarming and as the wall’s defences are broken and water can get in more easily, it will continue apace. I wanted the work I made in response to this to show the passage of time – so a triptych seemed appropriate.

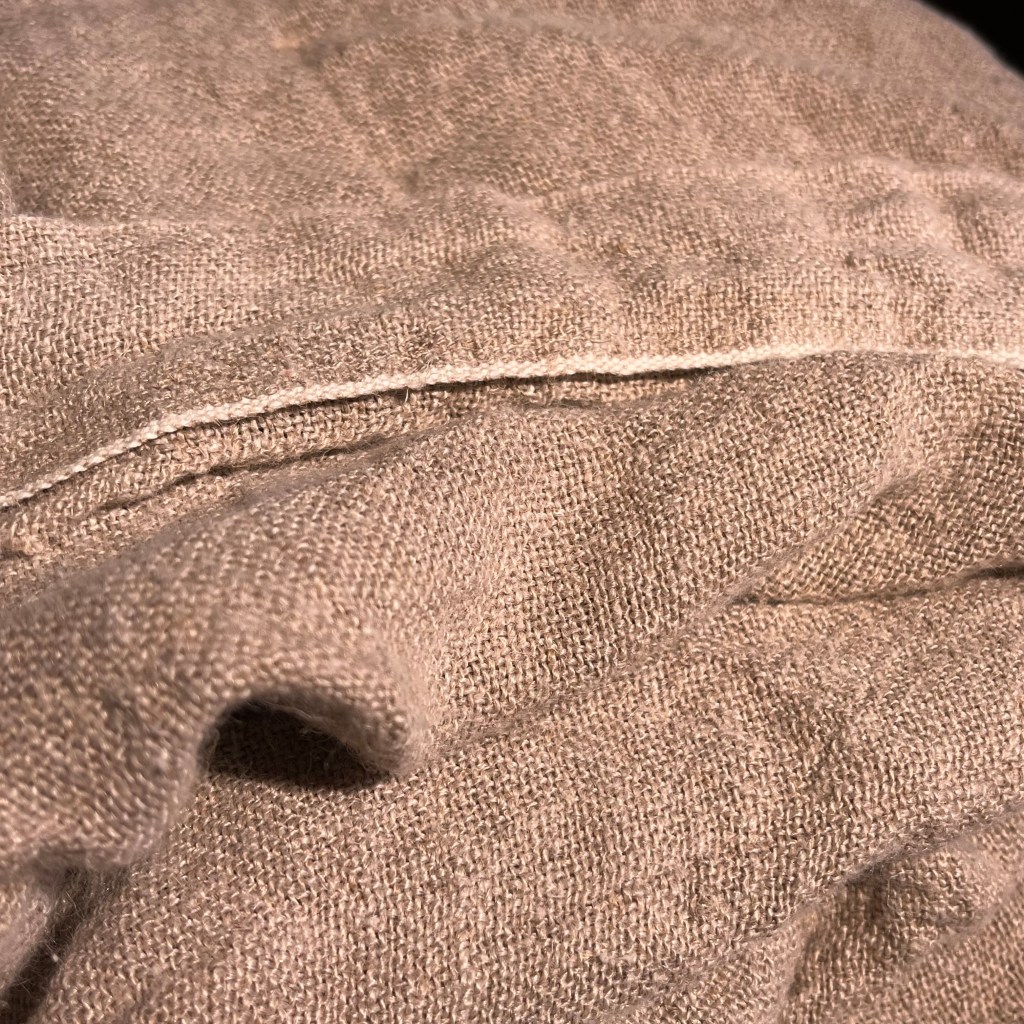
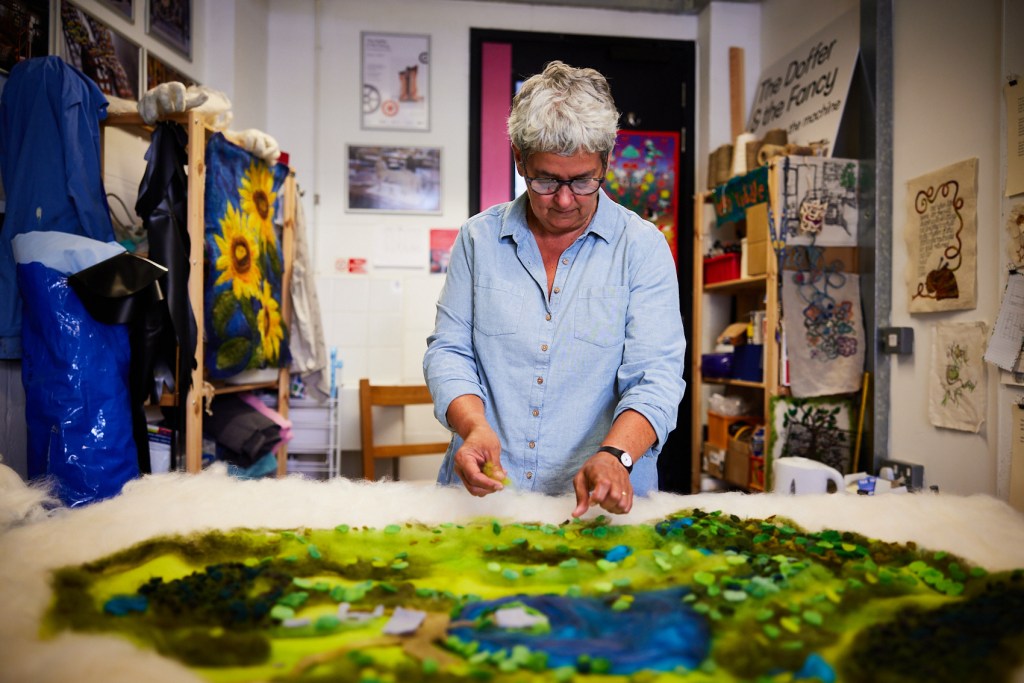
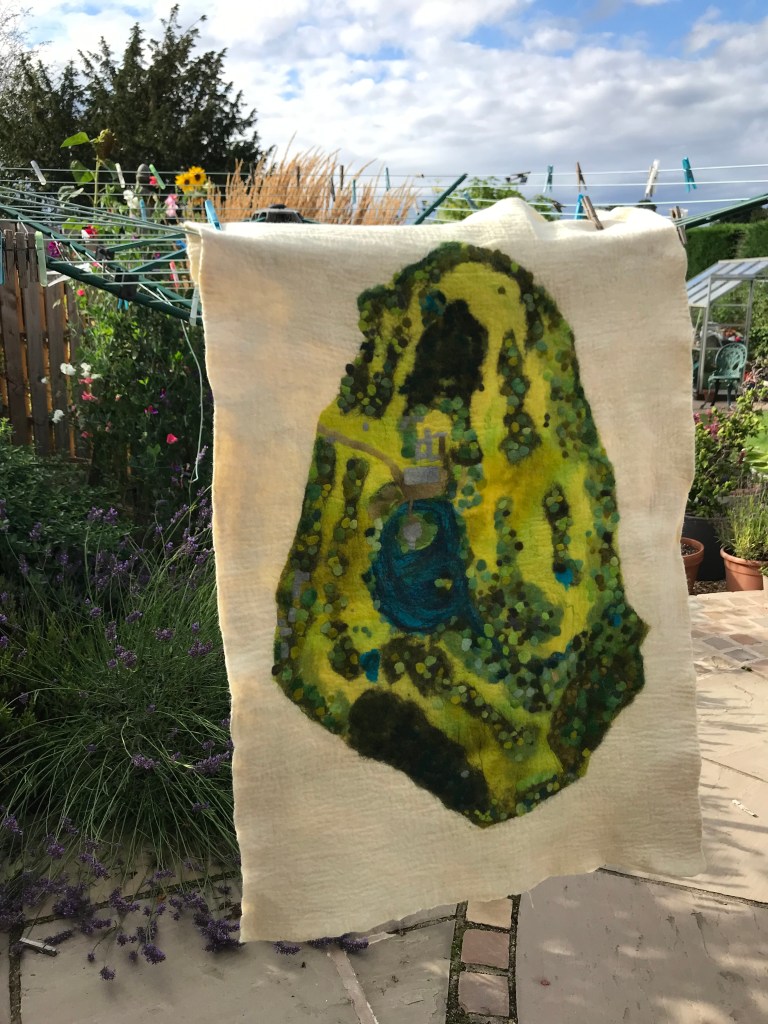
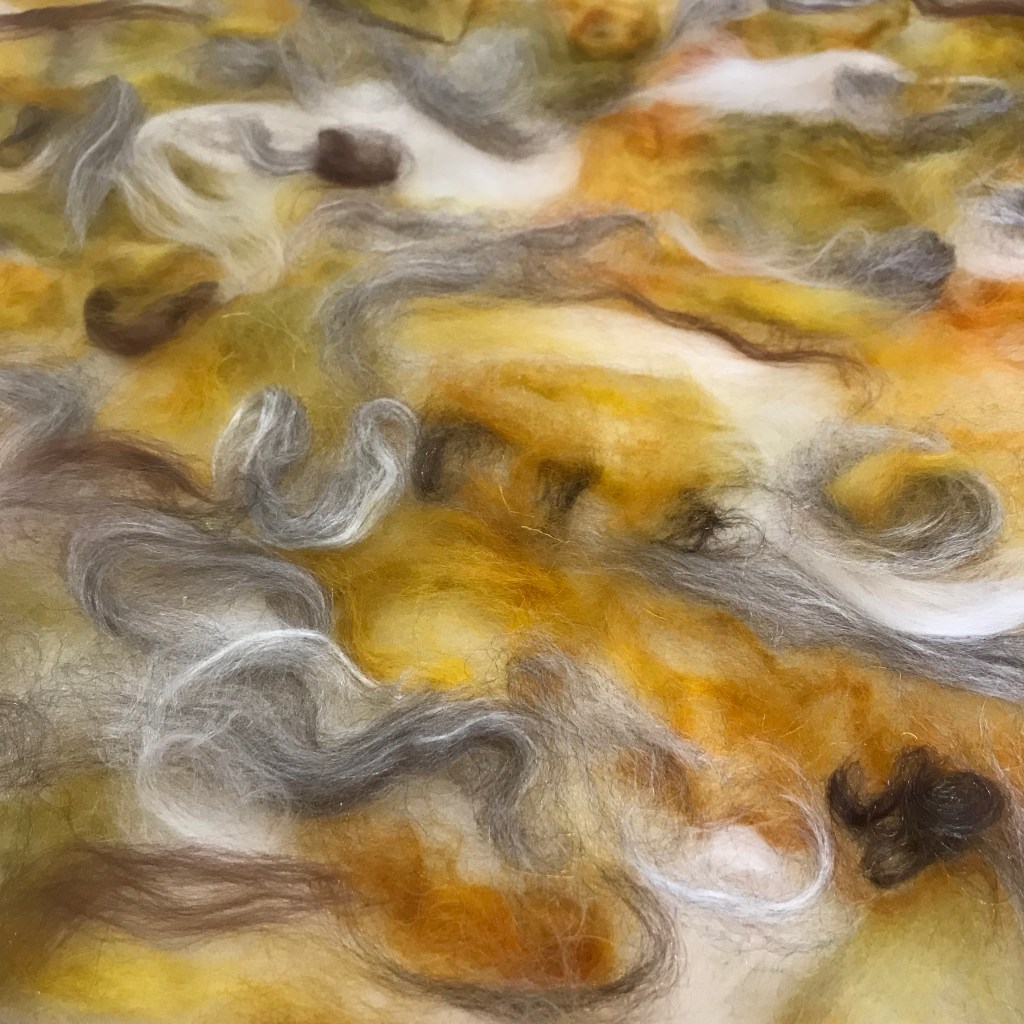
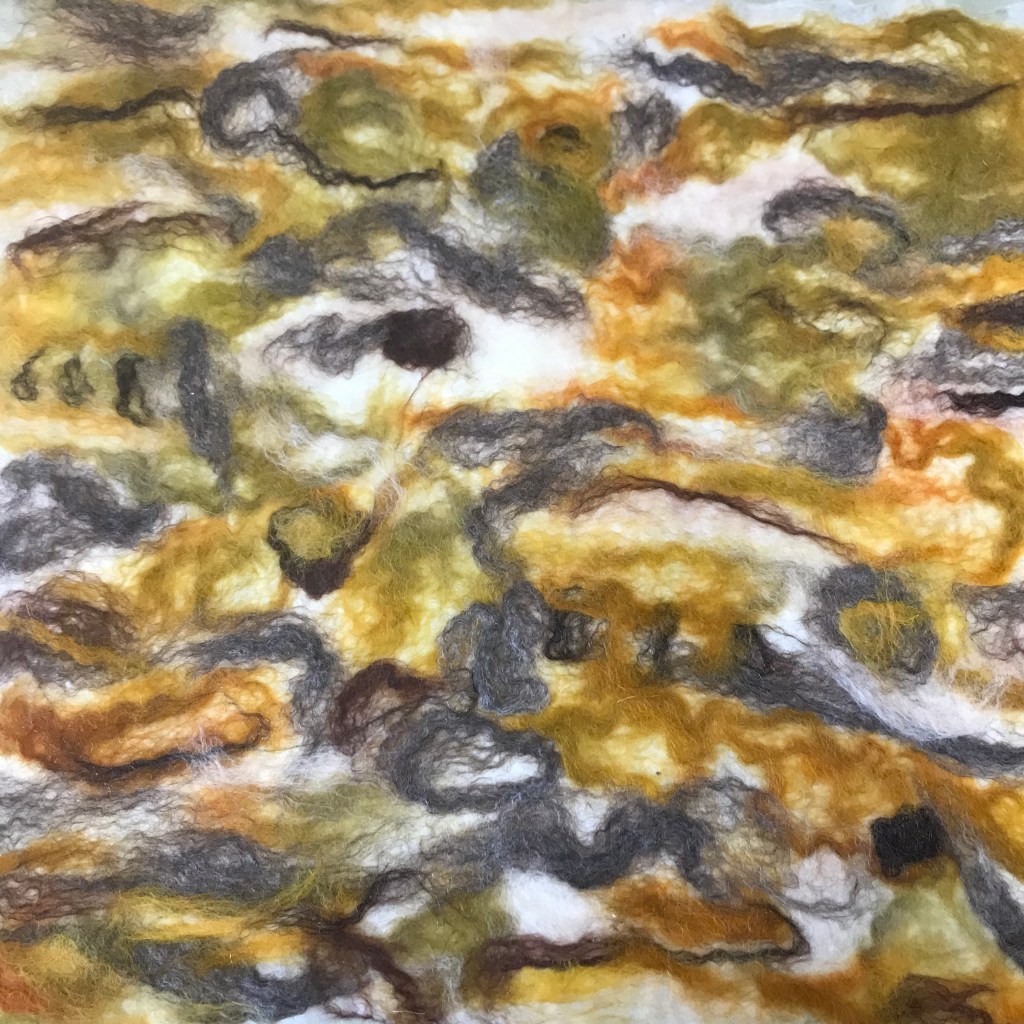
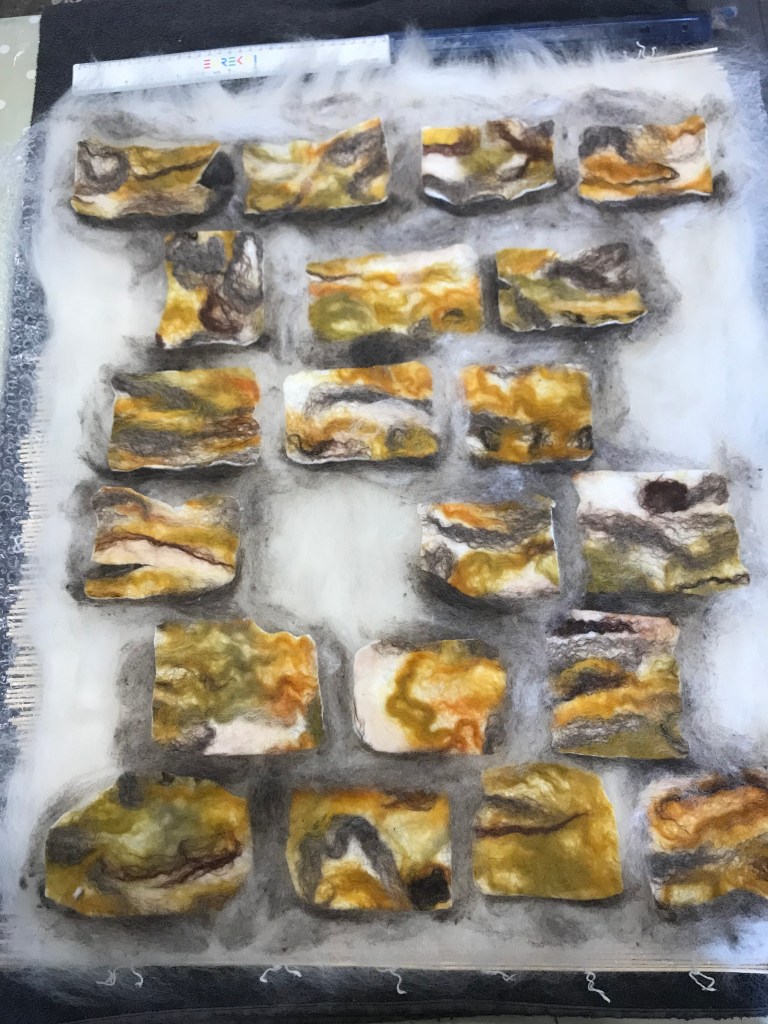
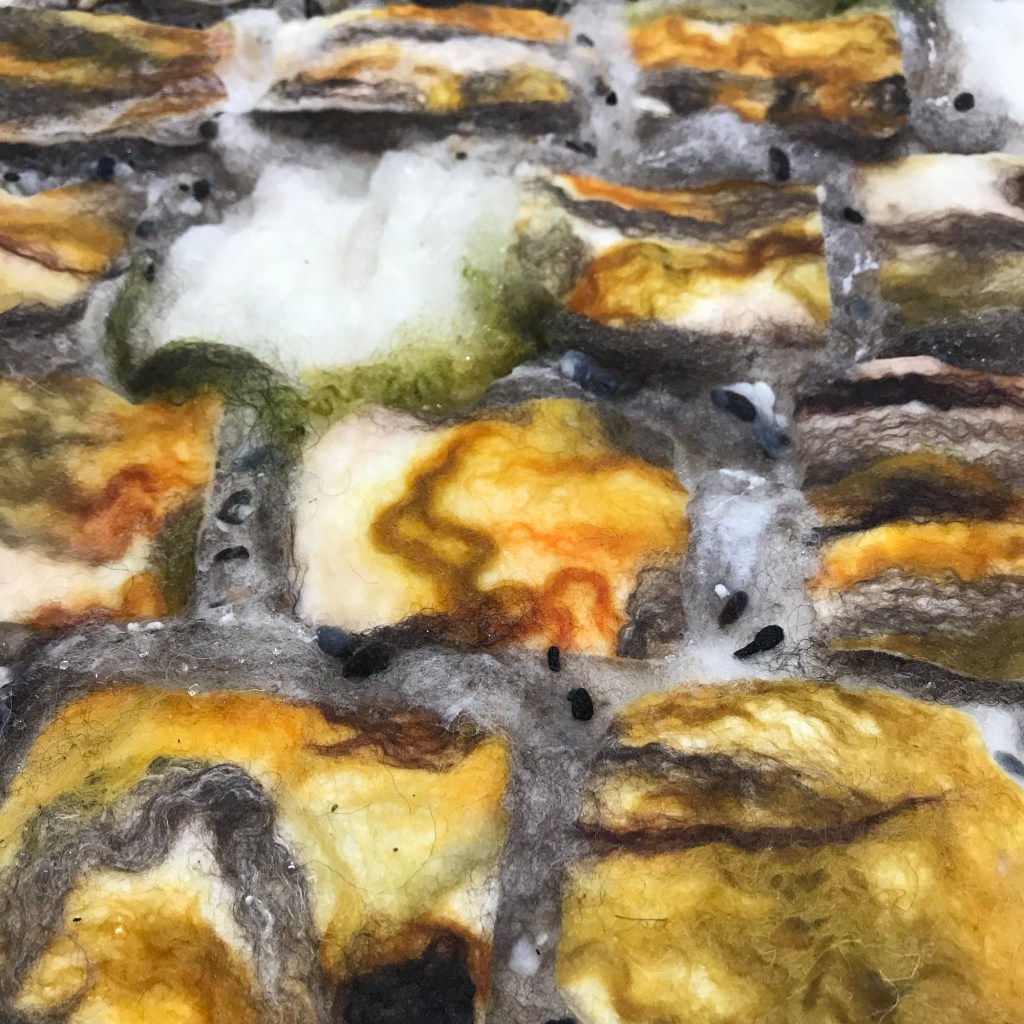
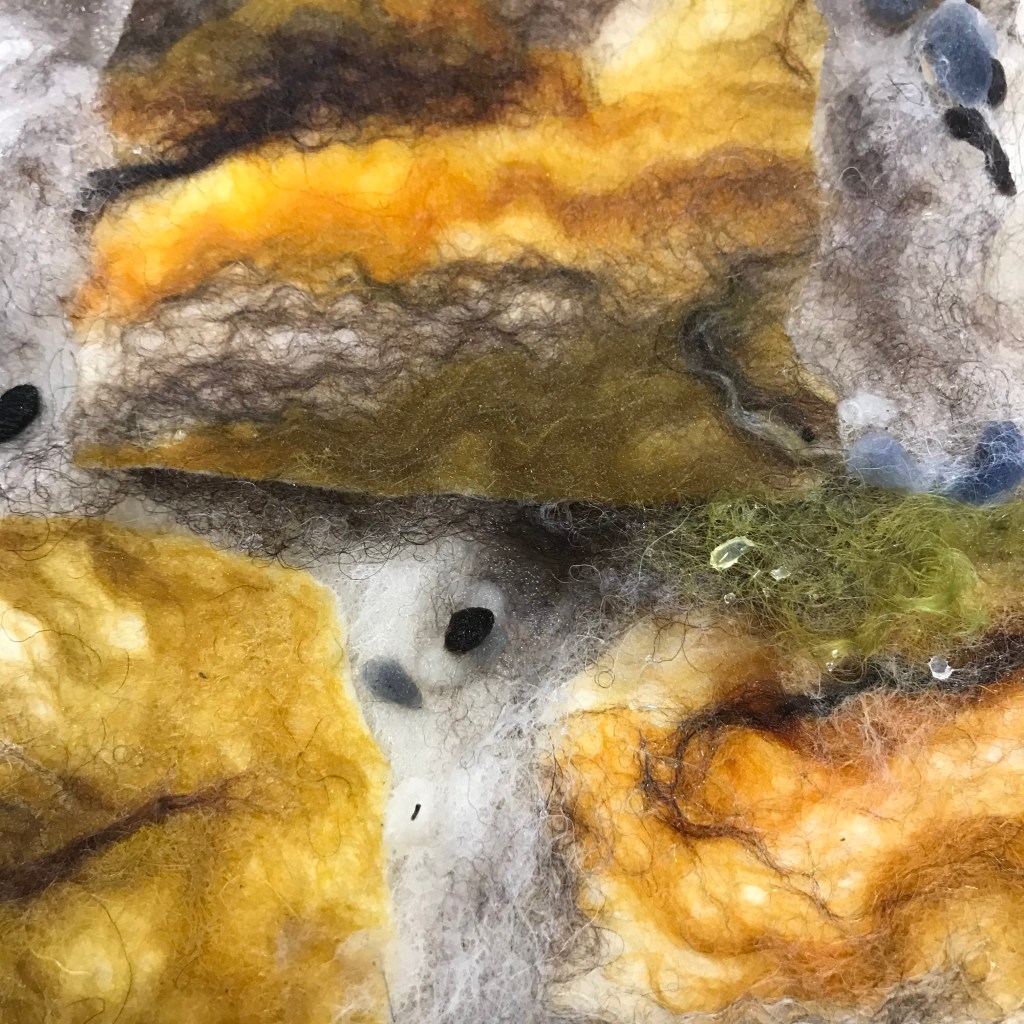
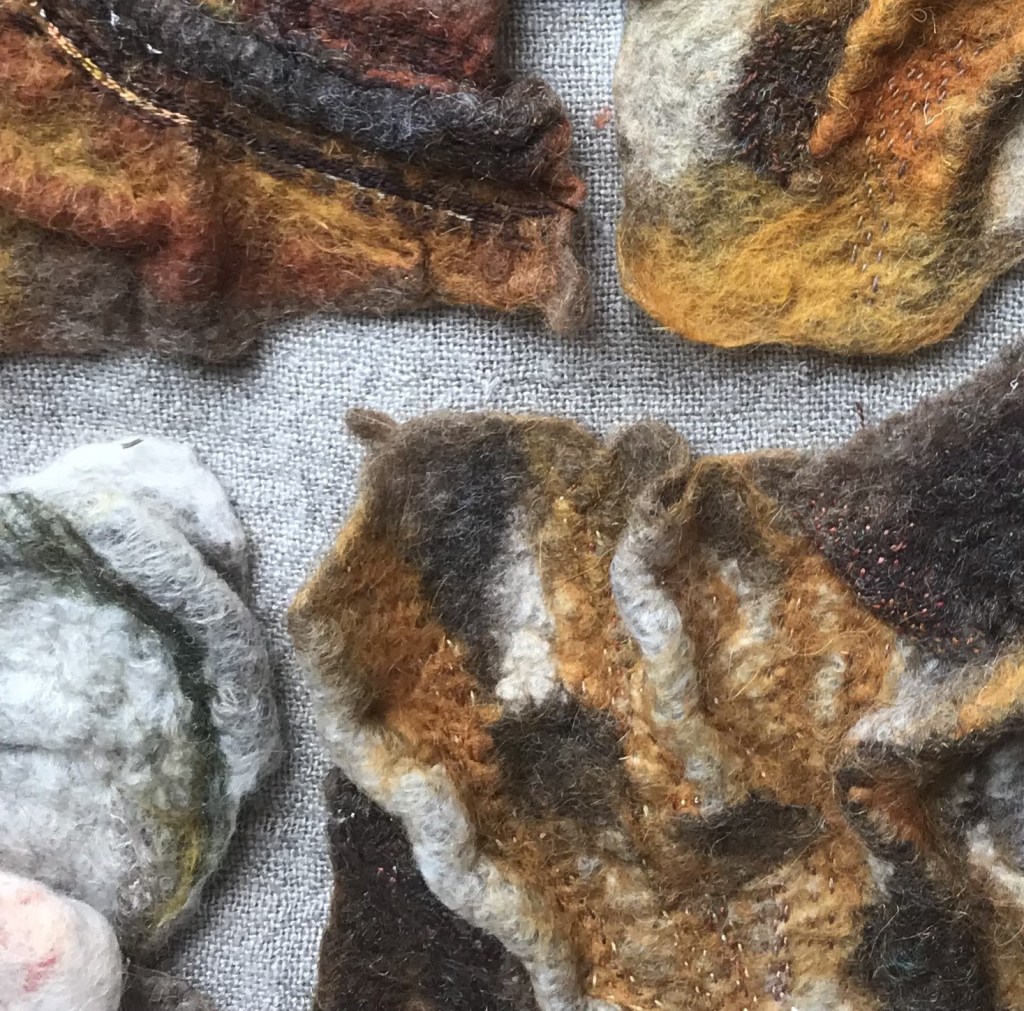
 I started with the background. Three large woodland panels. To ensure similarity, I laid out designs for all 3 panels side by side and felted them simultaneously.

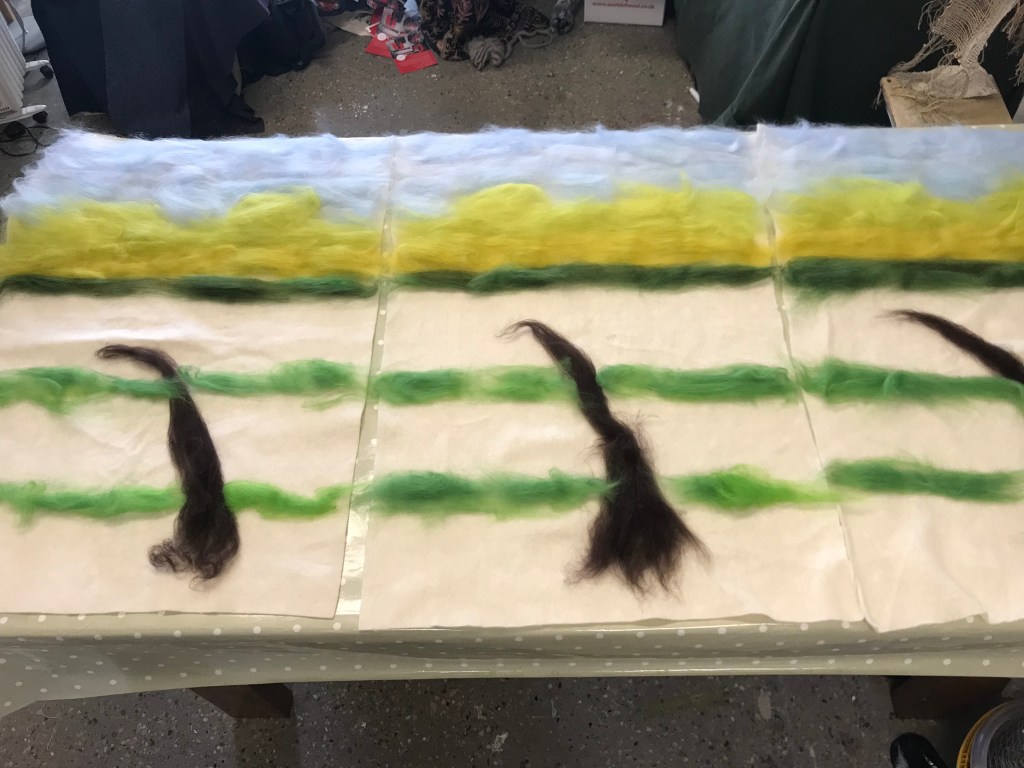
The nature of felting and (crucially here) the finished dimensions depend on a number of variables – type and amount of fibre, the number of layers, the direction of the fibres on each layer, the amount and temperature of water used at each stage, the type of soap, the duration and intensity of the agitation and rolling and the type of fulling method used. It was vital to me that the three panels looked similar but also that they shrank to the same size. For that reason, I treated the felting as one large piece rather than 3 smaller panels.

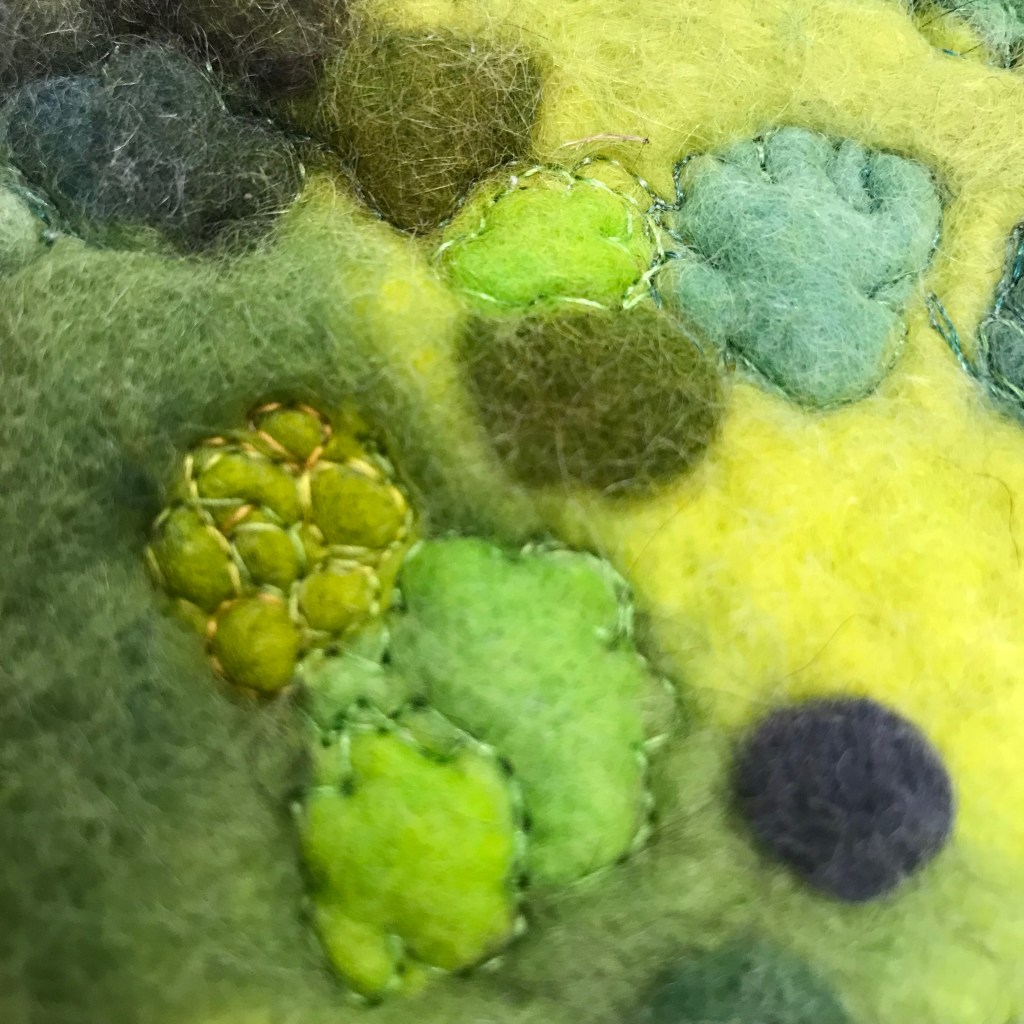
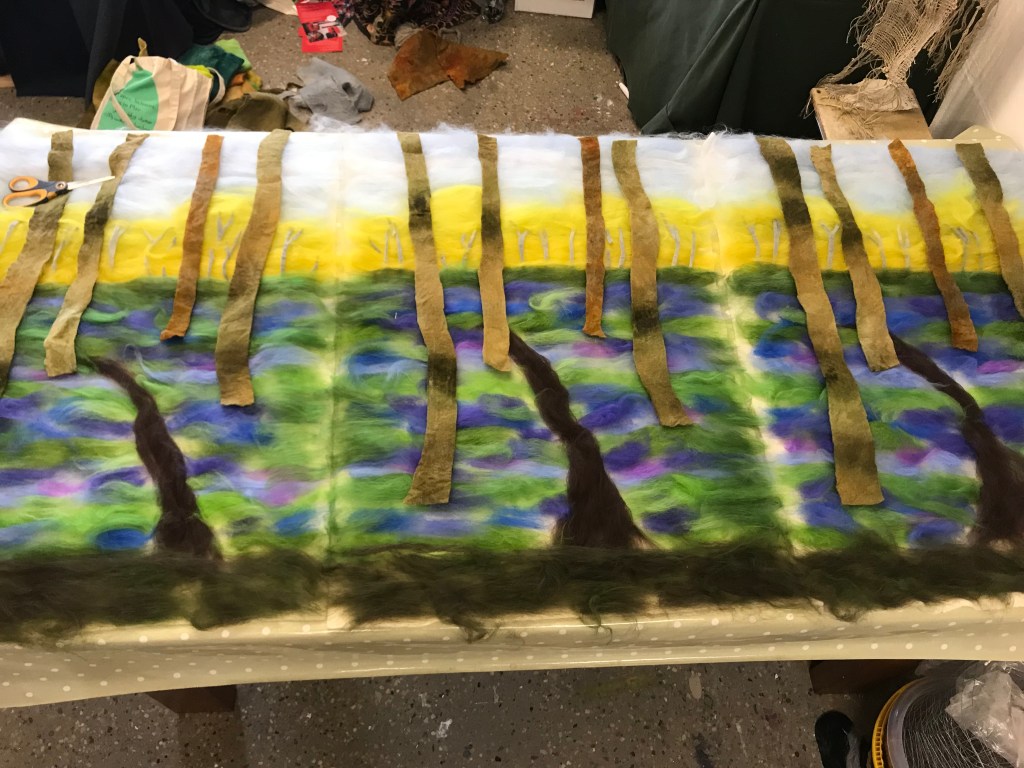
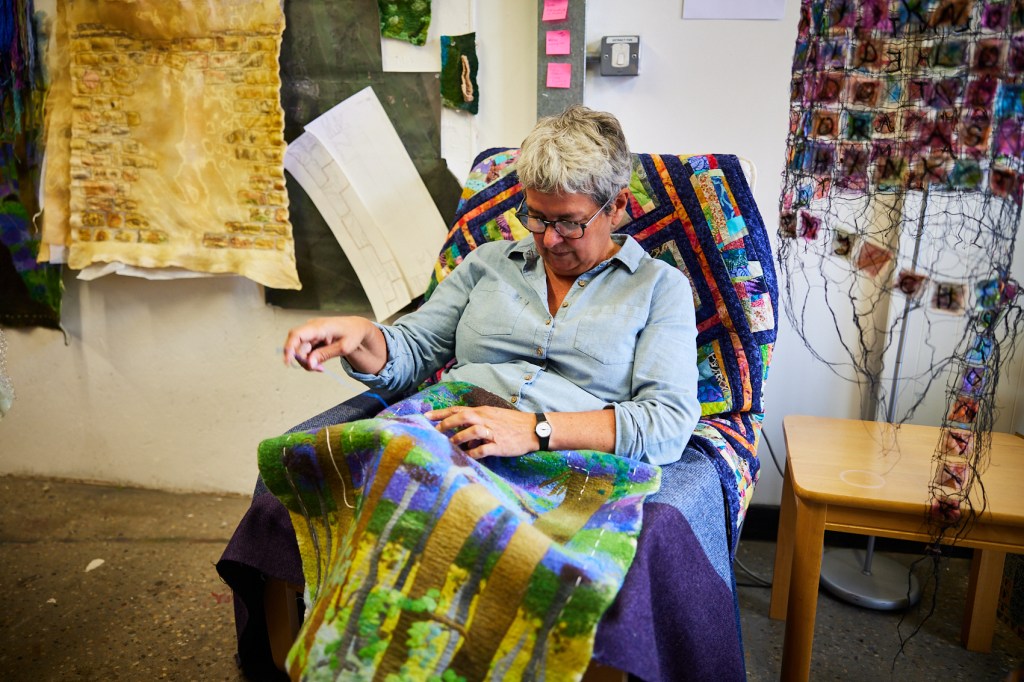
Once I had felted the backgrounds it was time for some free motion embroidery and then handstitch. I usually leave handstich for times when I’m tired and can enjoy sitting and thinking while I stitch. Hundreds of little bluebell heads and lots of contemplation!

Photo credit: David Lindsay

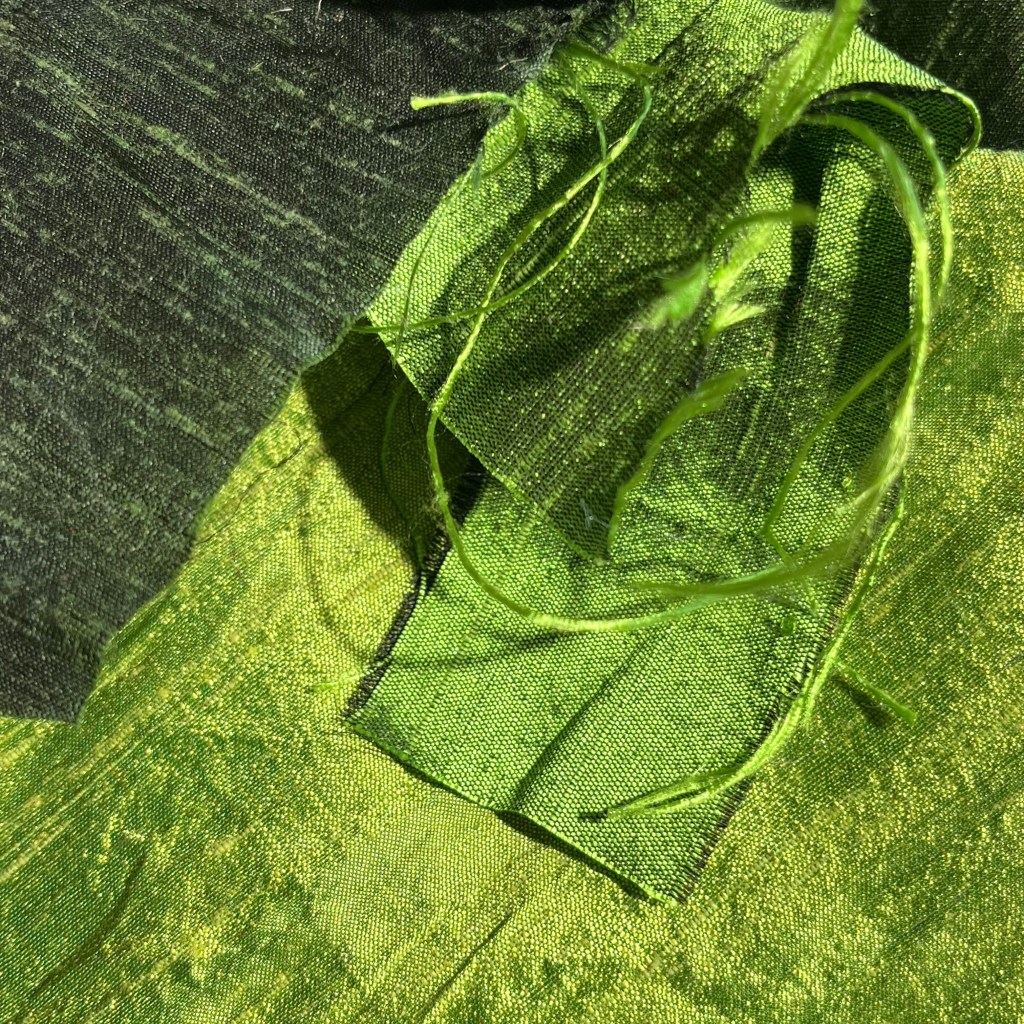
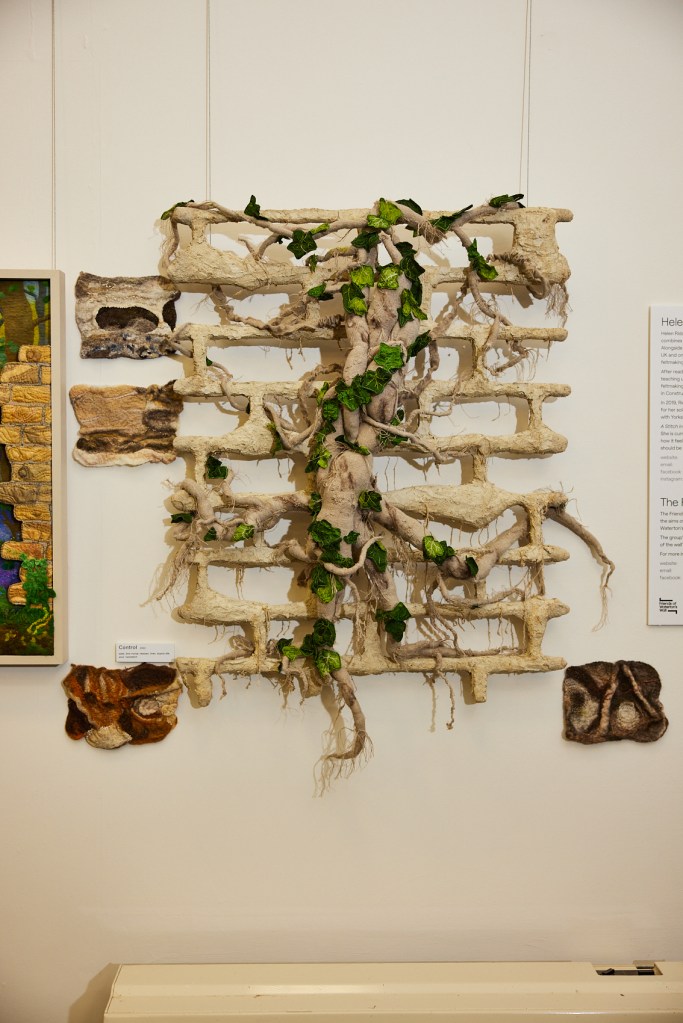
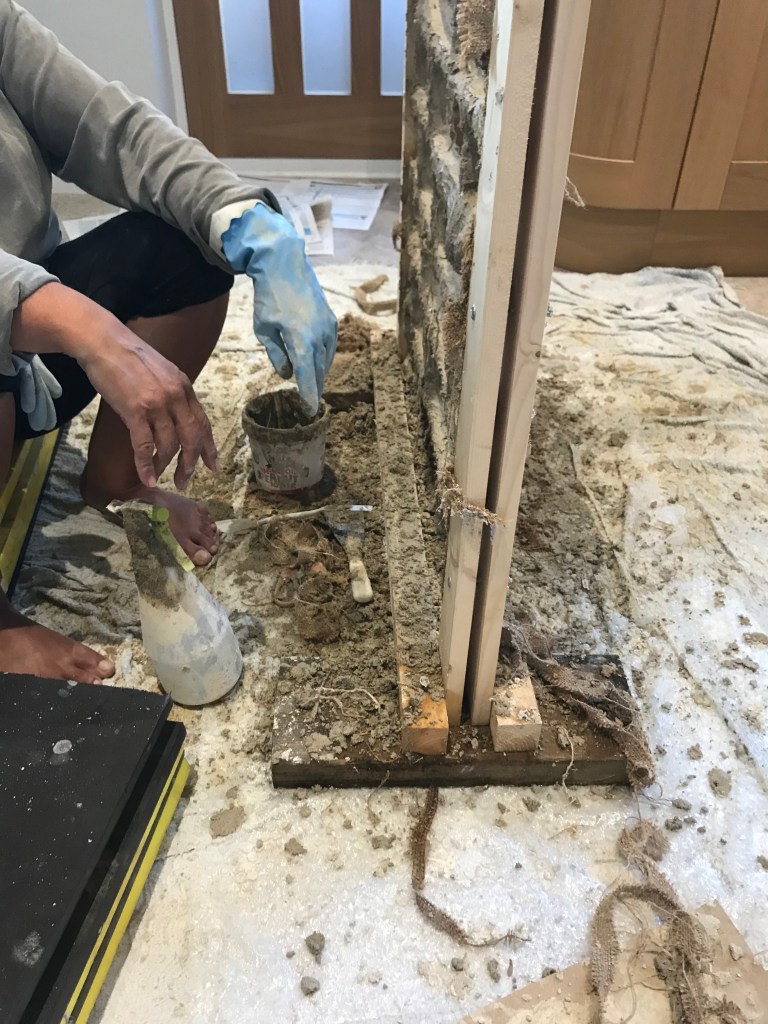
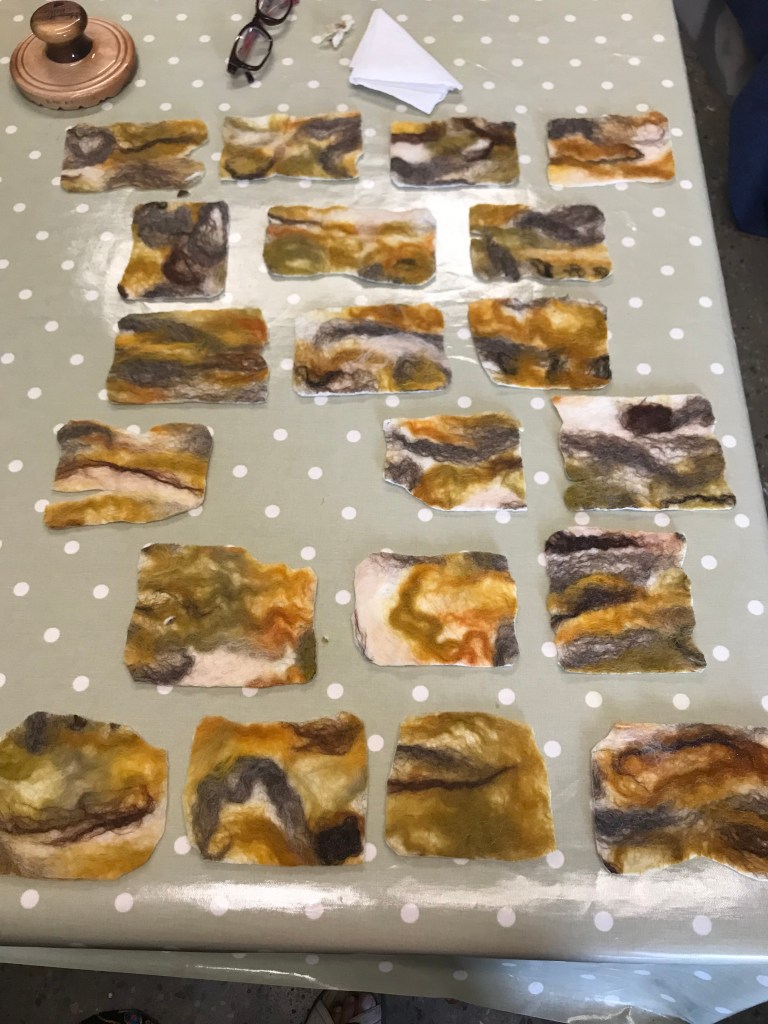
I wasn’t sure how to create the wall layer. My initial idea was to produce a calico wall with painted stones and to stitch it together like a mattress. The resulting sample lacked the glint of the sandstone, so the next thought was to use organza and stitch.

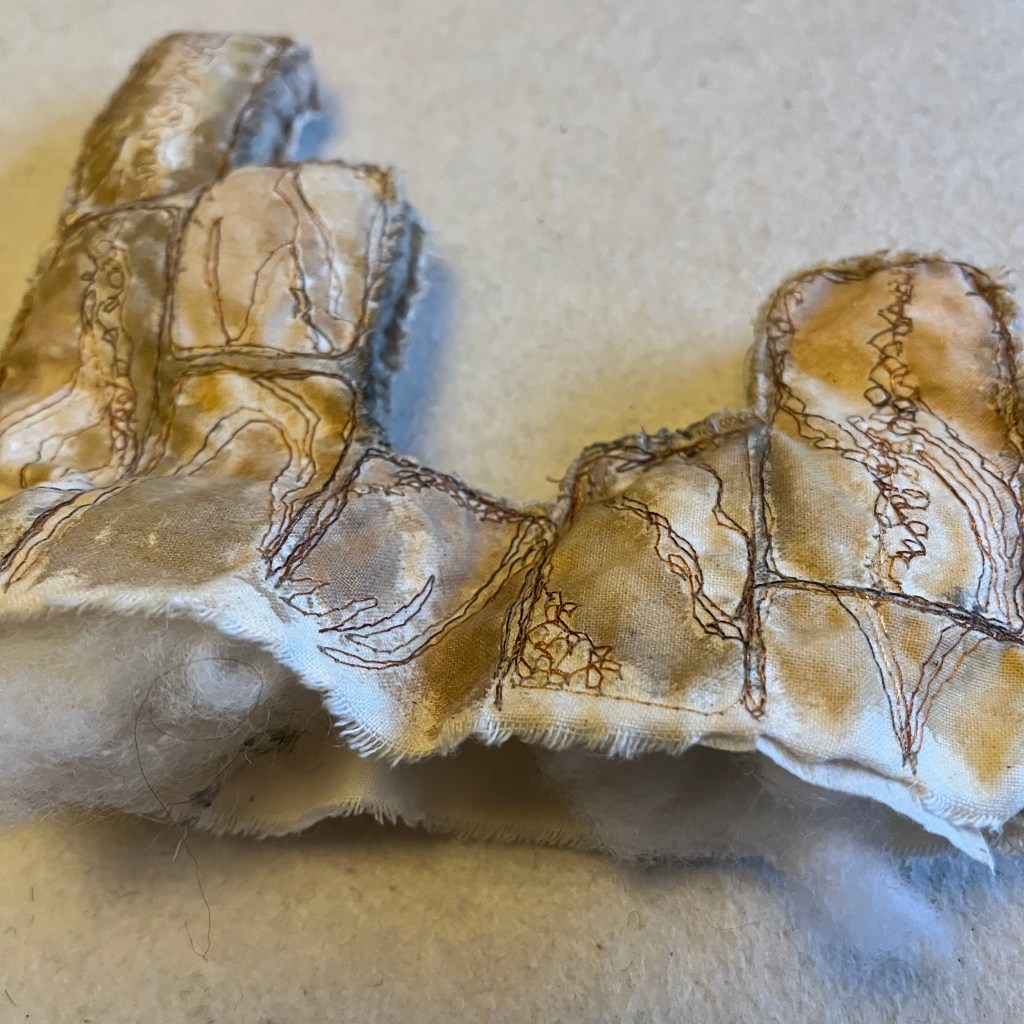
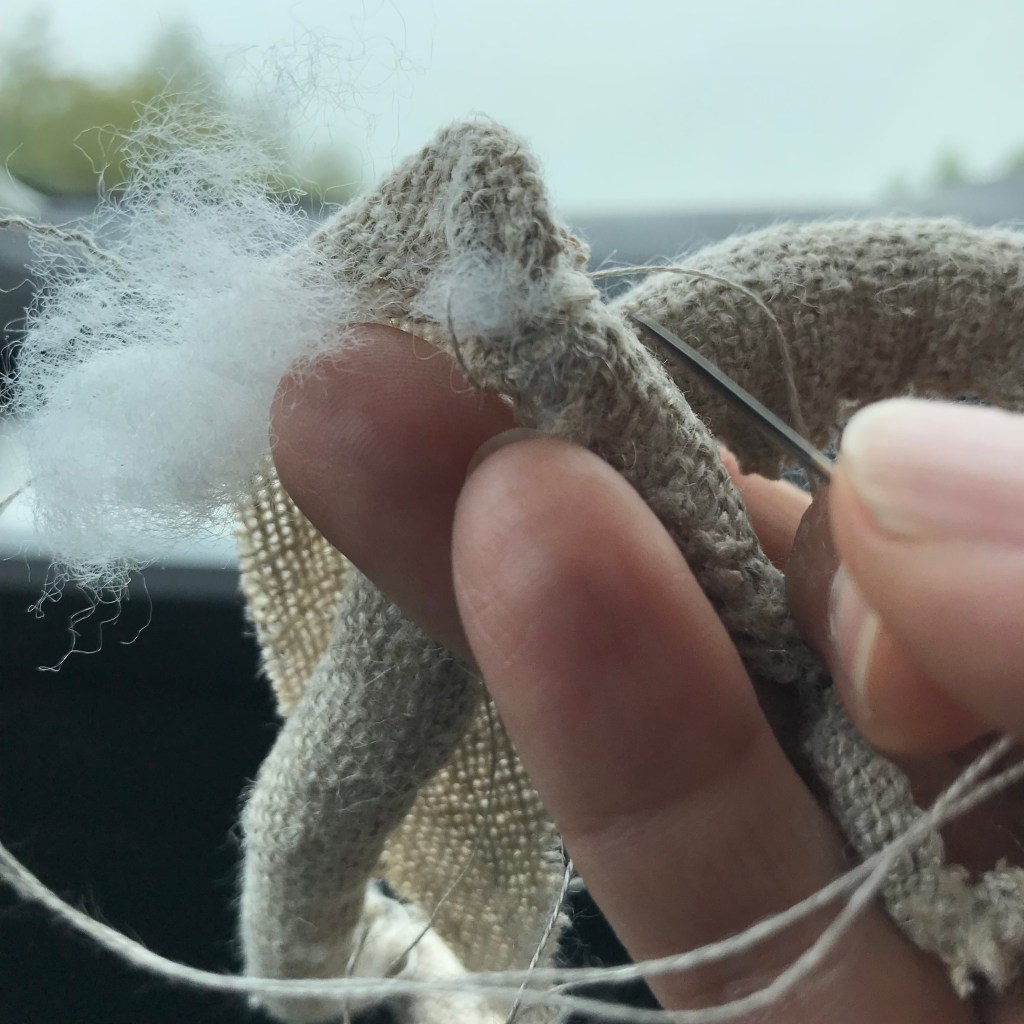
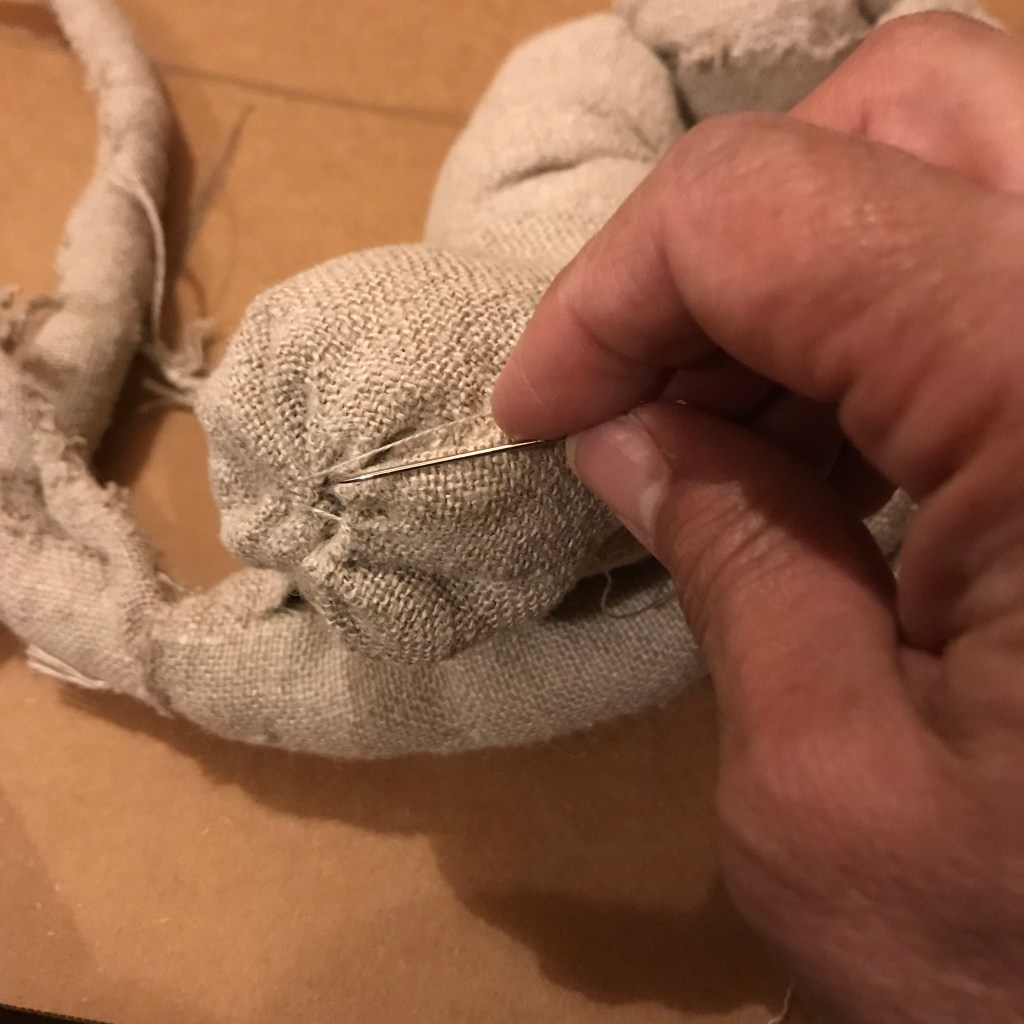
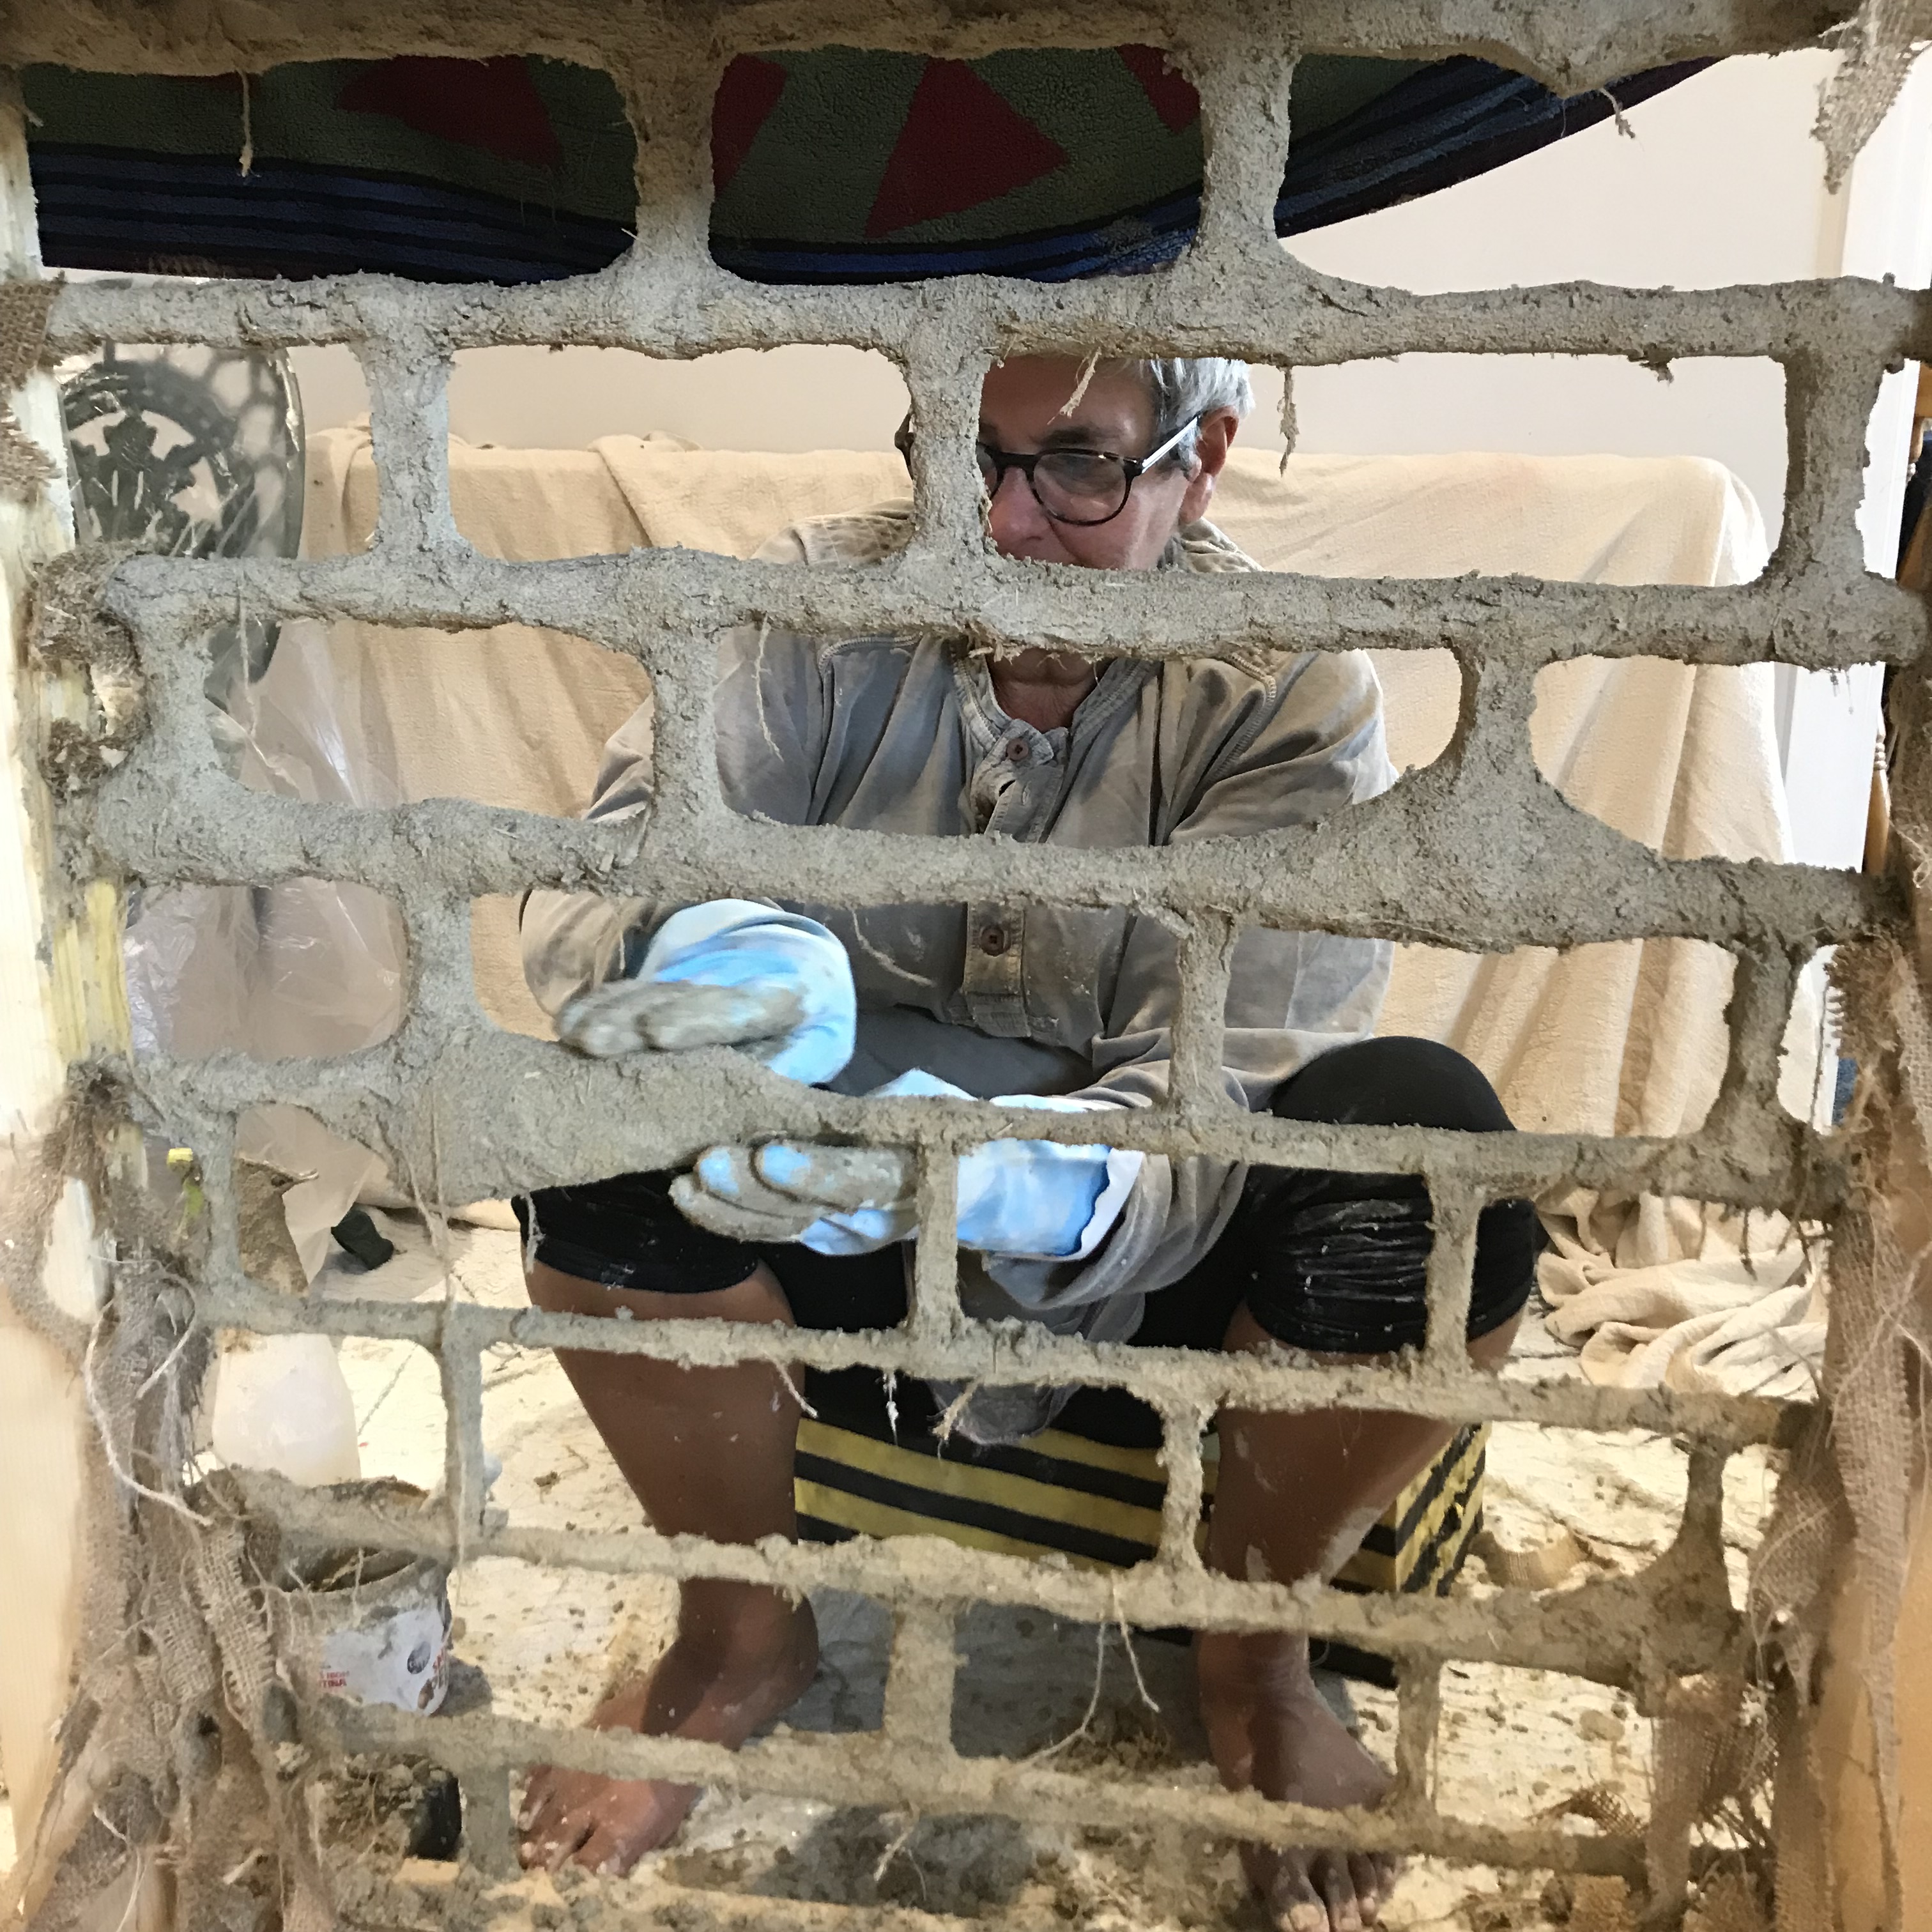
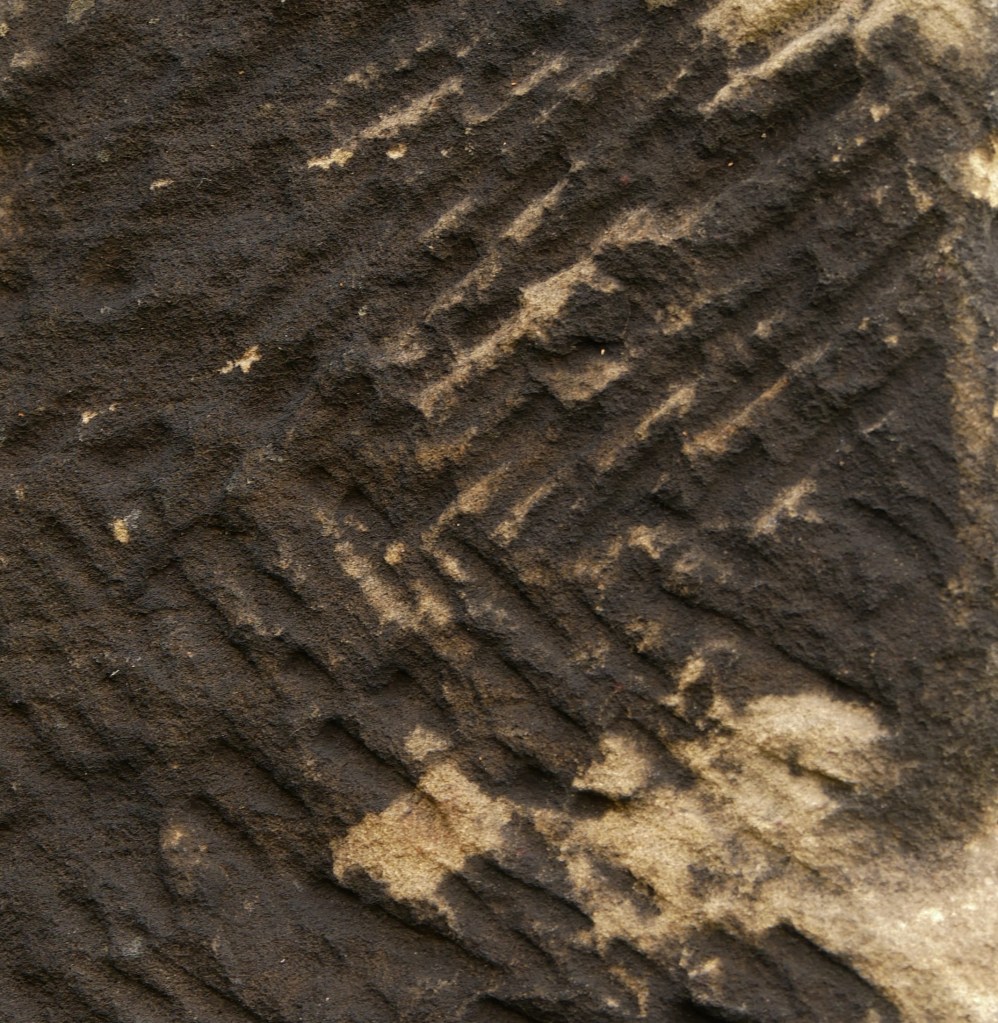
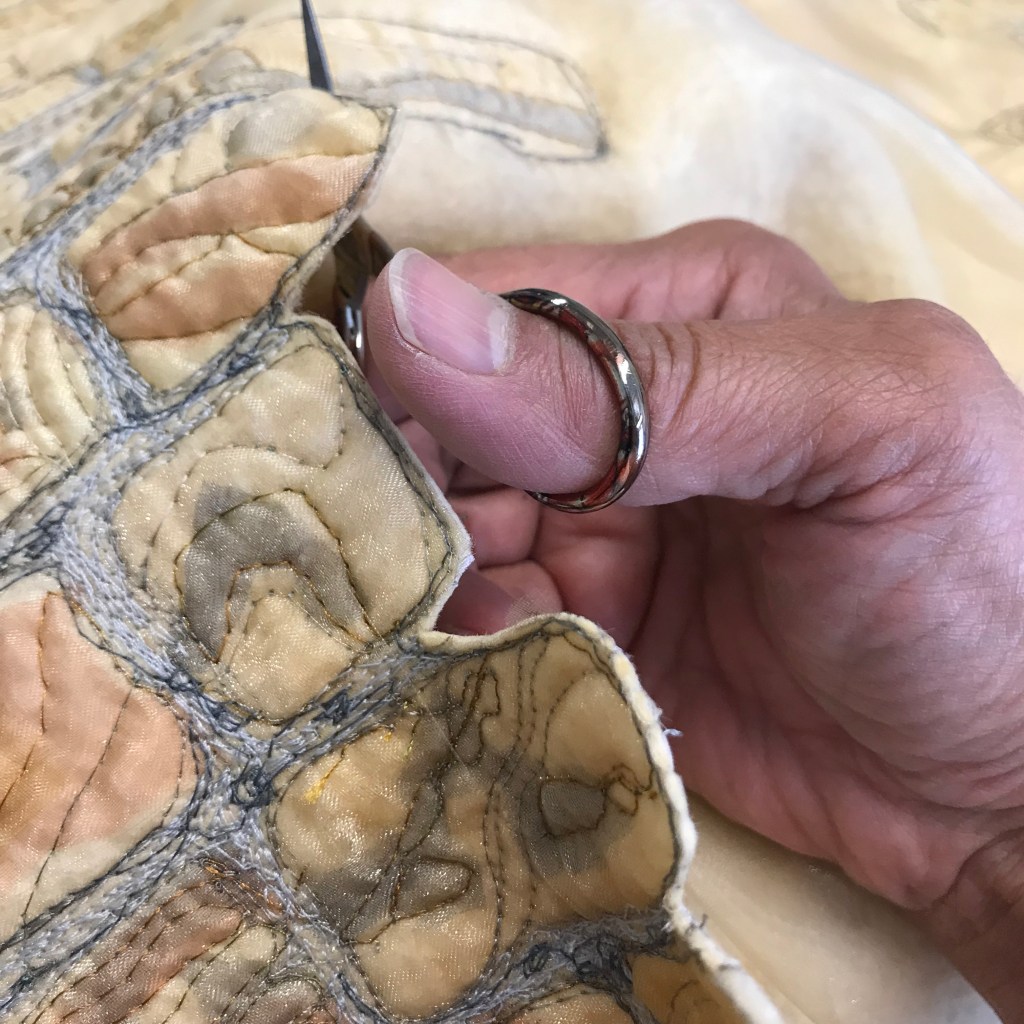
That gave me shine but I started thinking about how to construct the pictures and realised that something more rigid than a stuffed mattress would be easier to hold in place than something soft and flexible. I also had a chat with the brilliant John the Framer (Saturday mornings, Pontefract Market, outside, opposite the entrance to the covered market hall – I cannot recommend him enough!) which gave me more insights into how I could achieve the effect I wanted. Just then, in a wonderful moment of synchronicity, a friend de-stashed some foamboard in my direction and that gave a perfect solution, lightweight, easy to cut in complex shapes, rigid. So, the final construction of the wall is hand dyed felt, covered in layers of organza fragments, painstakingly stitched in free-motion embroidery so the same patterns on the stones reoccur across the three panels.

Photo credit: David Lindsay

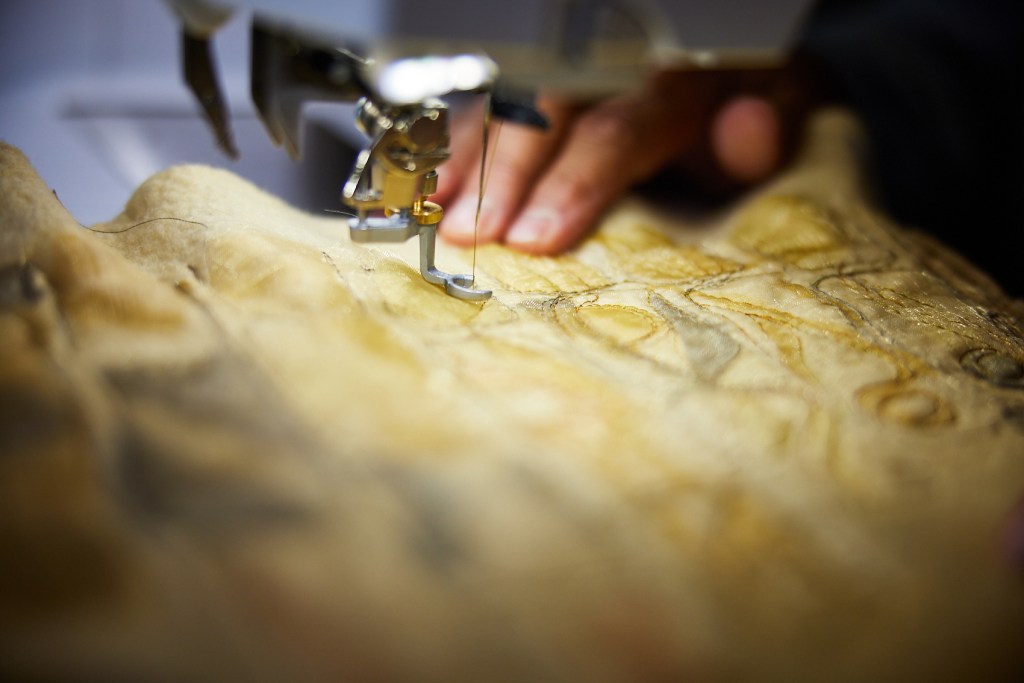
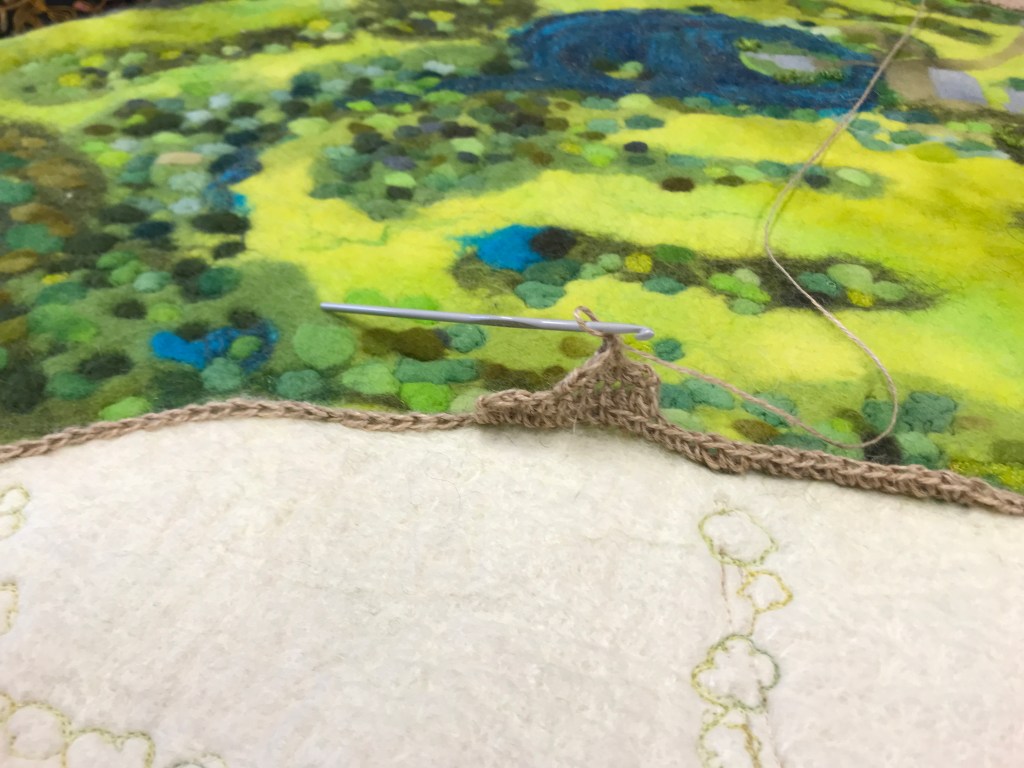
This was then cut out, used a template for the foamboard and finally stitched together by hand.

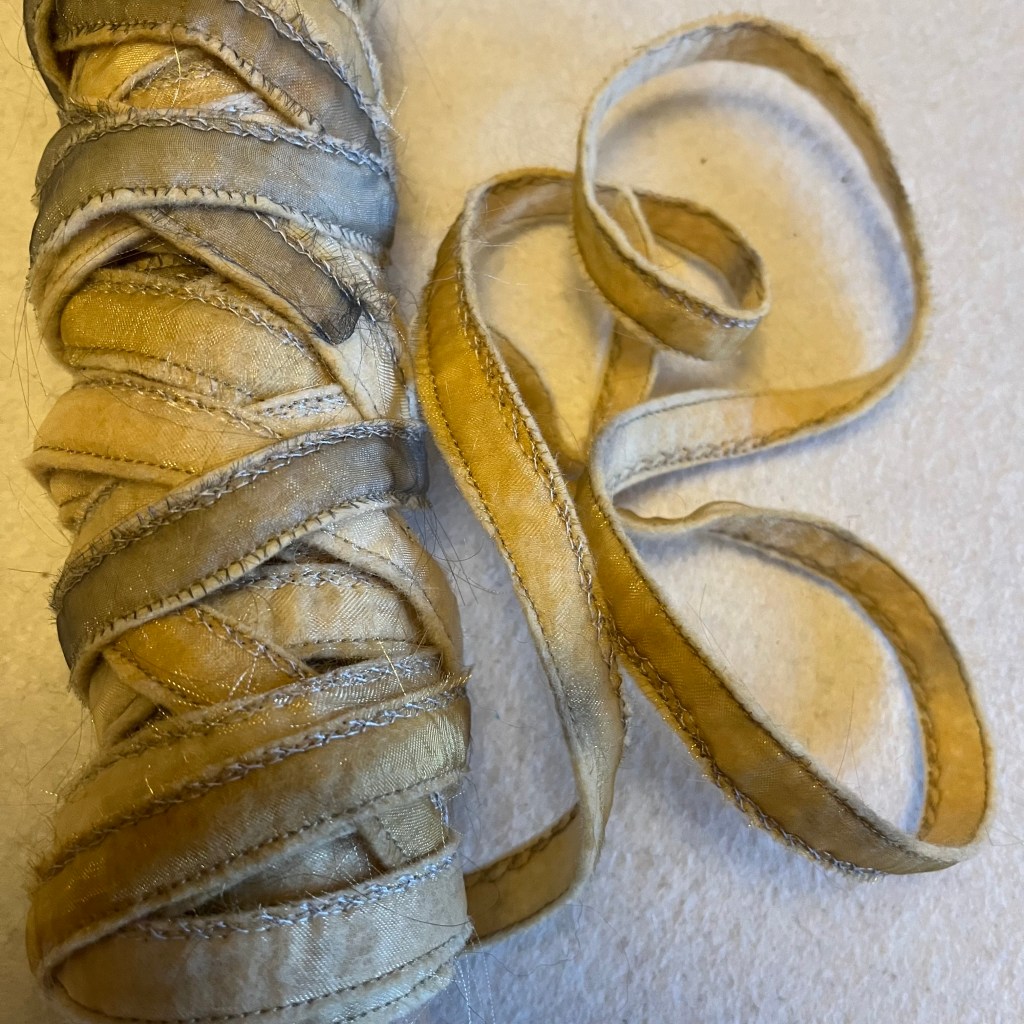
For some reason I miscalculated the amount I needed for the side gusset so am left with metres of it. Keep an eye out for it in future projects!

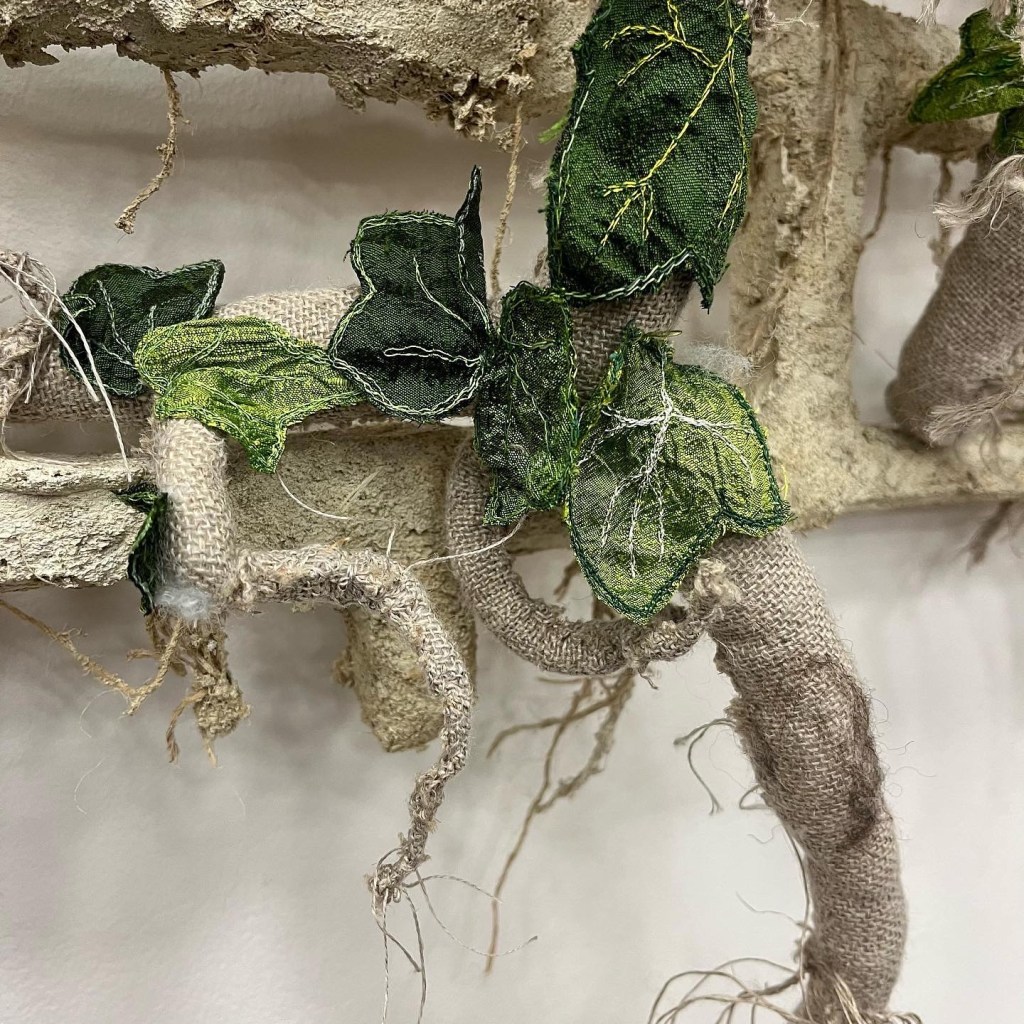
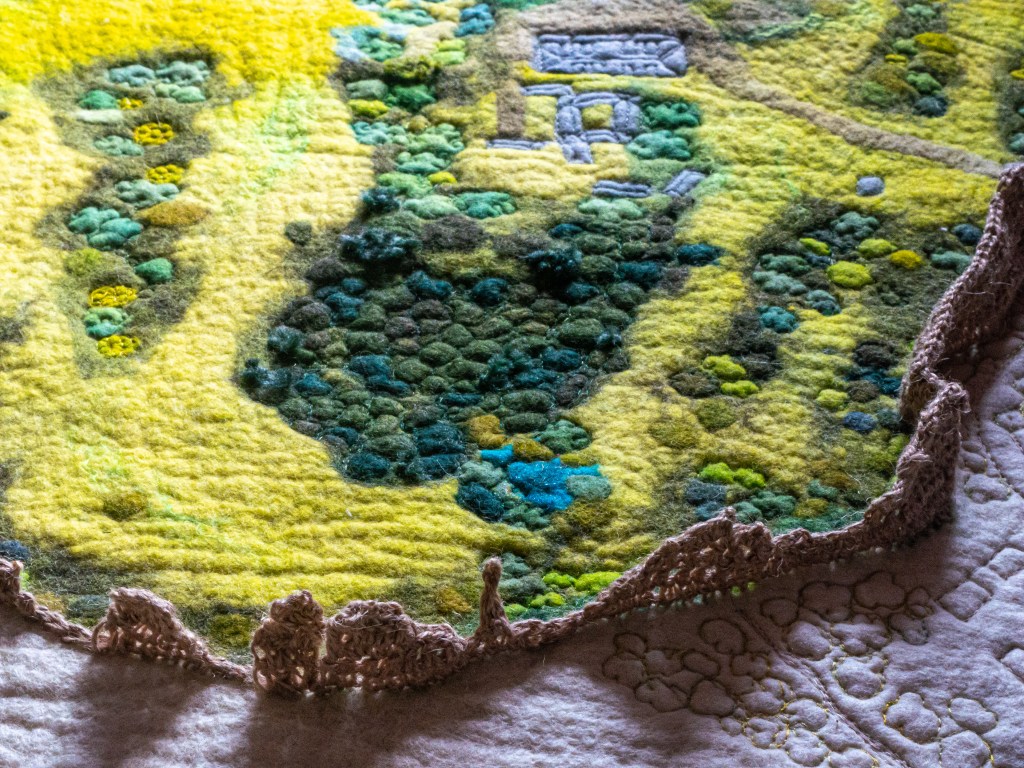
The foreground was easy in comparison. A thick layer of handmade felt for the grasses and sticky-burr plants and brambles, not forgetting the stinging nettles which love this site. As often happens with a piece of work which takes time, I had fallen a little out of love with it, but the foreground somehow breathed life back in it for me.

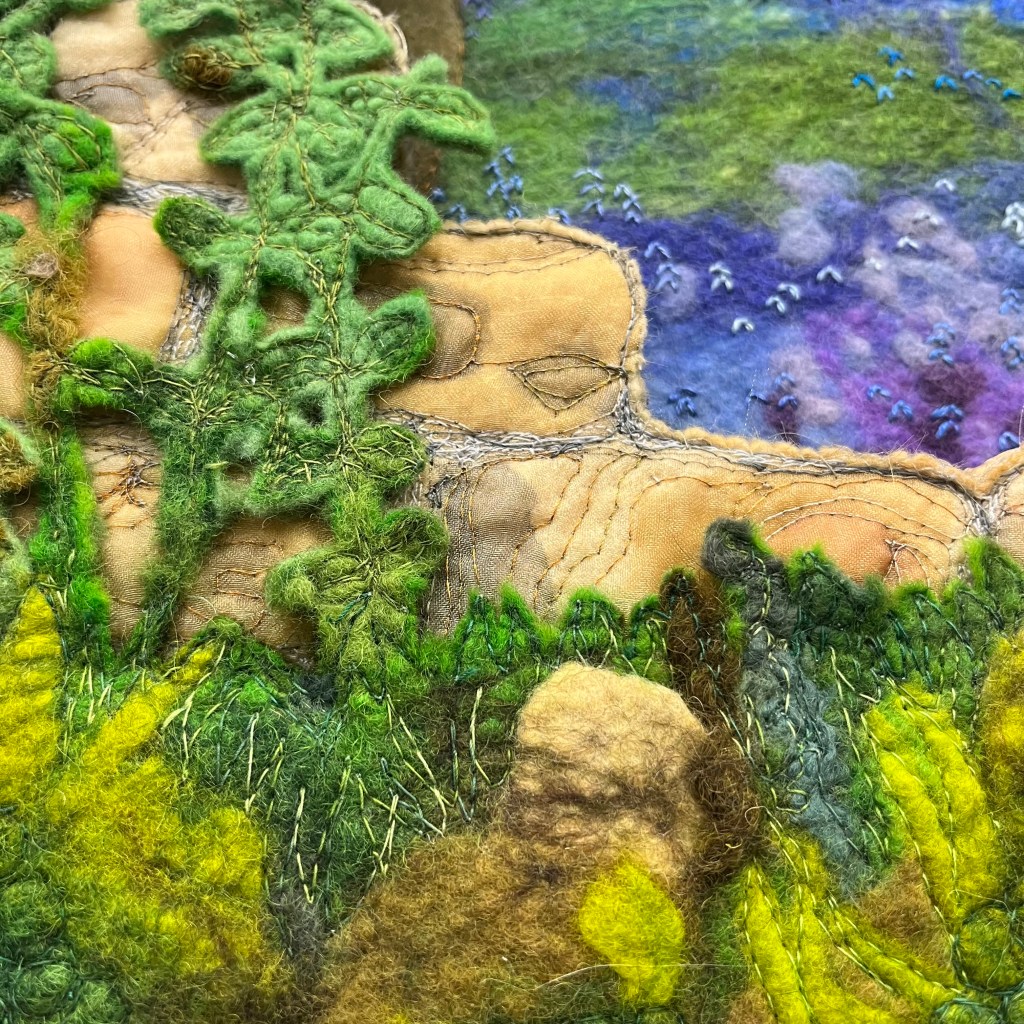
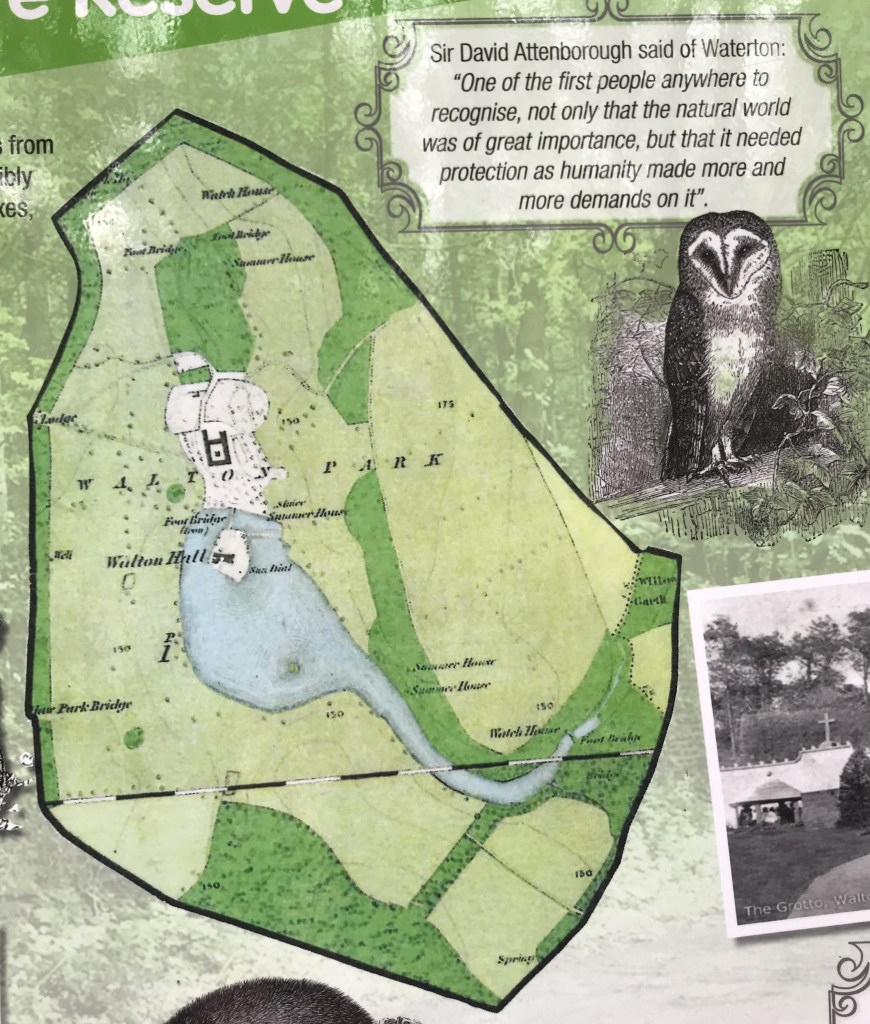
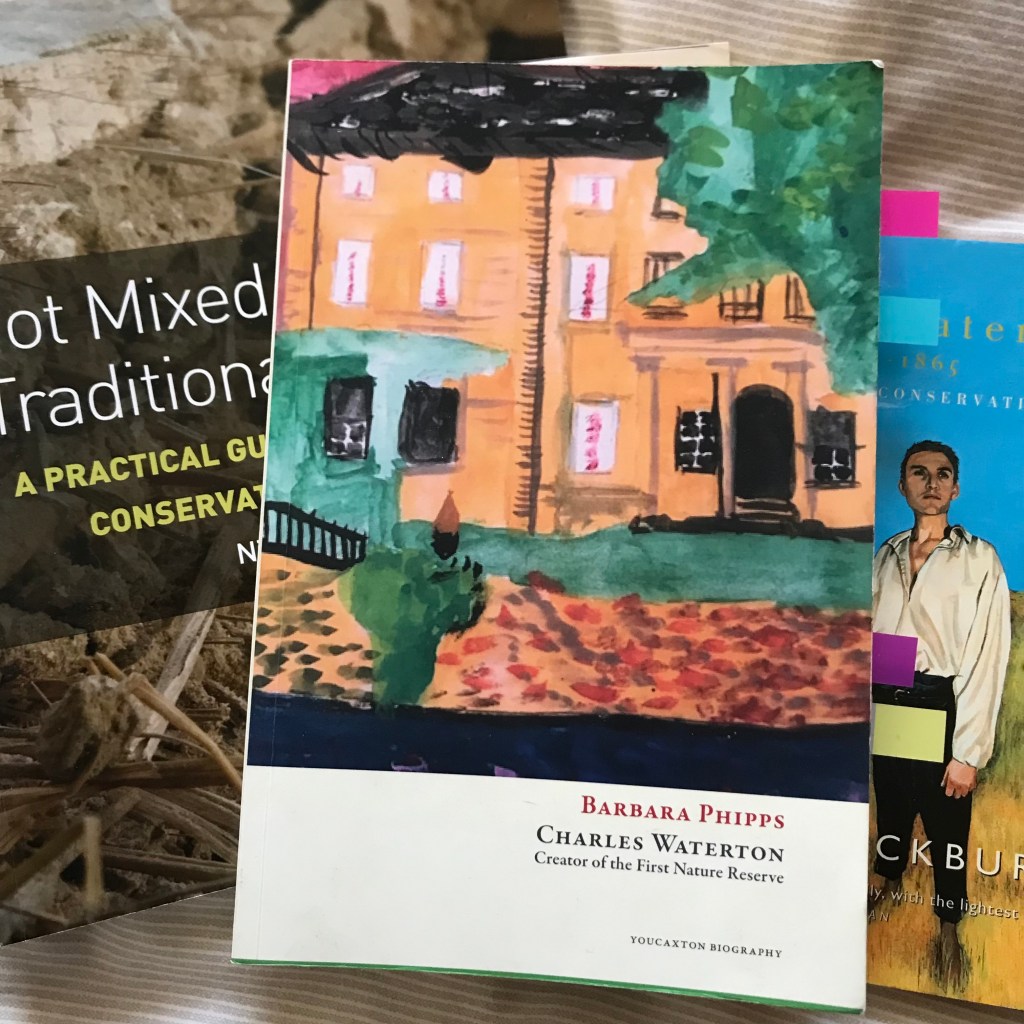
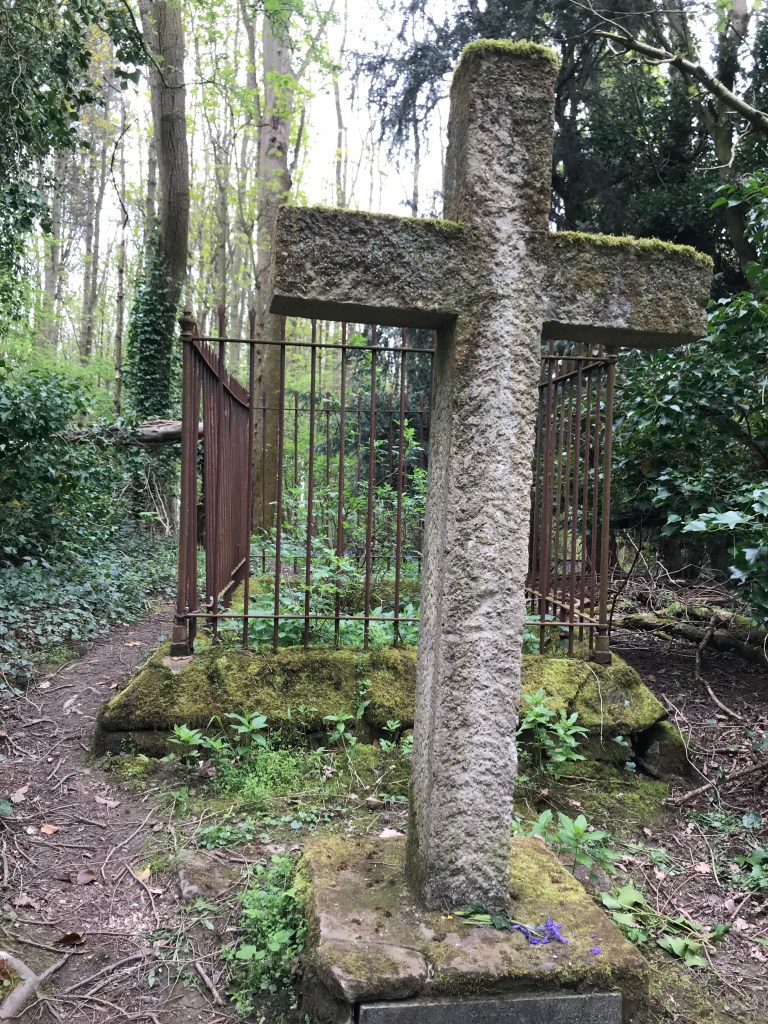
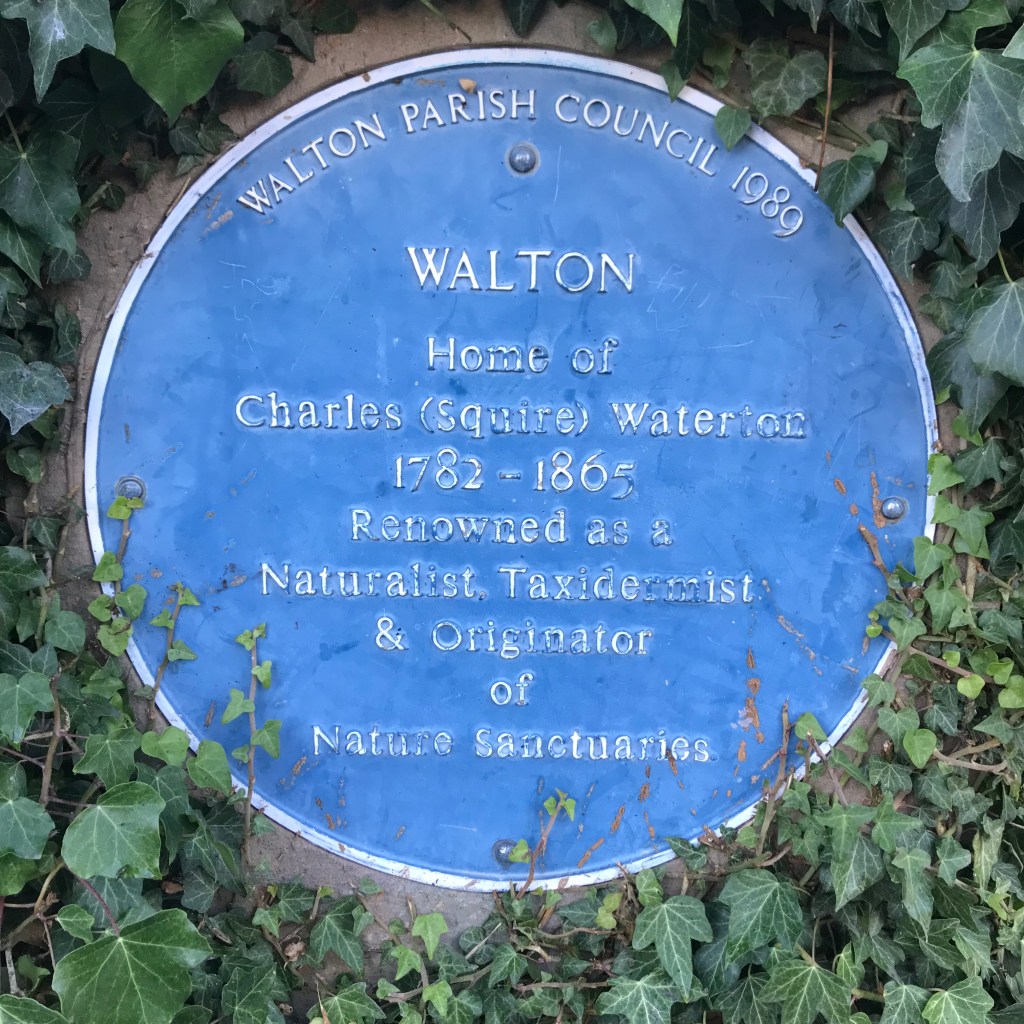
I also included a purple bramble stem in each piece – referencing the local legend that Waterton died while walking in the estate, from injuries sustained after tripping over a bramble. Watch your step!

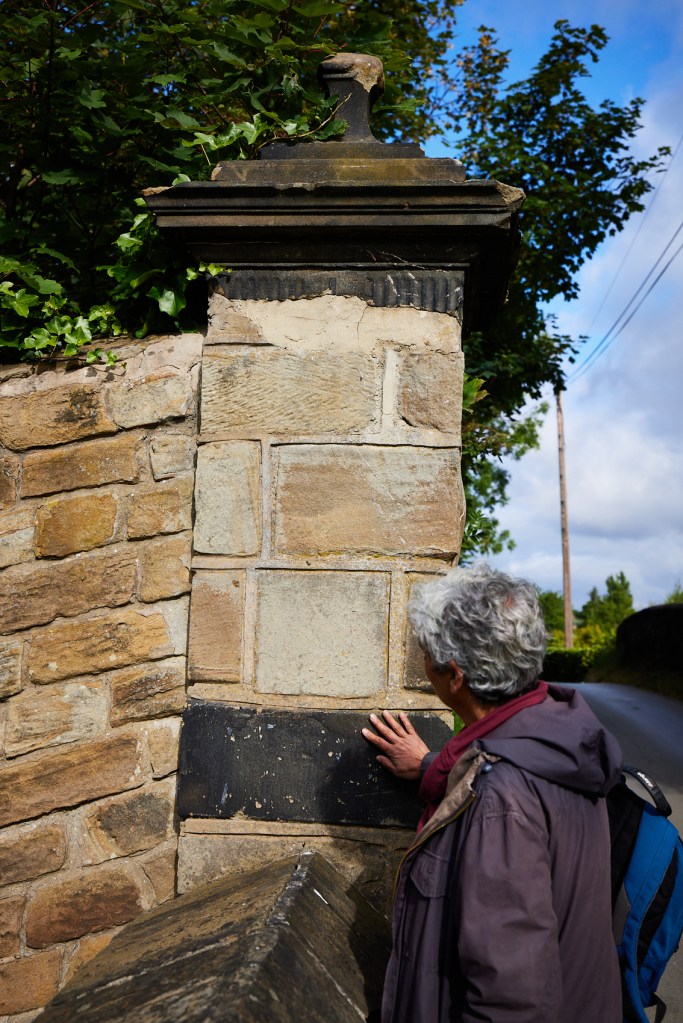
The popularity of this spot raises more general questions about our attitudes to old structures like Waterton’s wall. Decay provides us with attractive and unexpected frames for the views we enjoy. The unfinished phrase “Now you see it” (now you don’t) of the title, refers to the wall’s decline. But it could also be seen as referencing what we can now see through the gap.

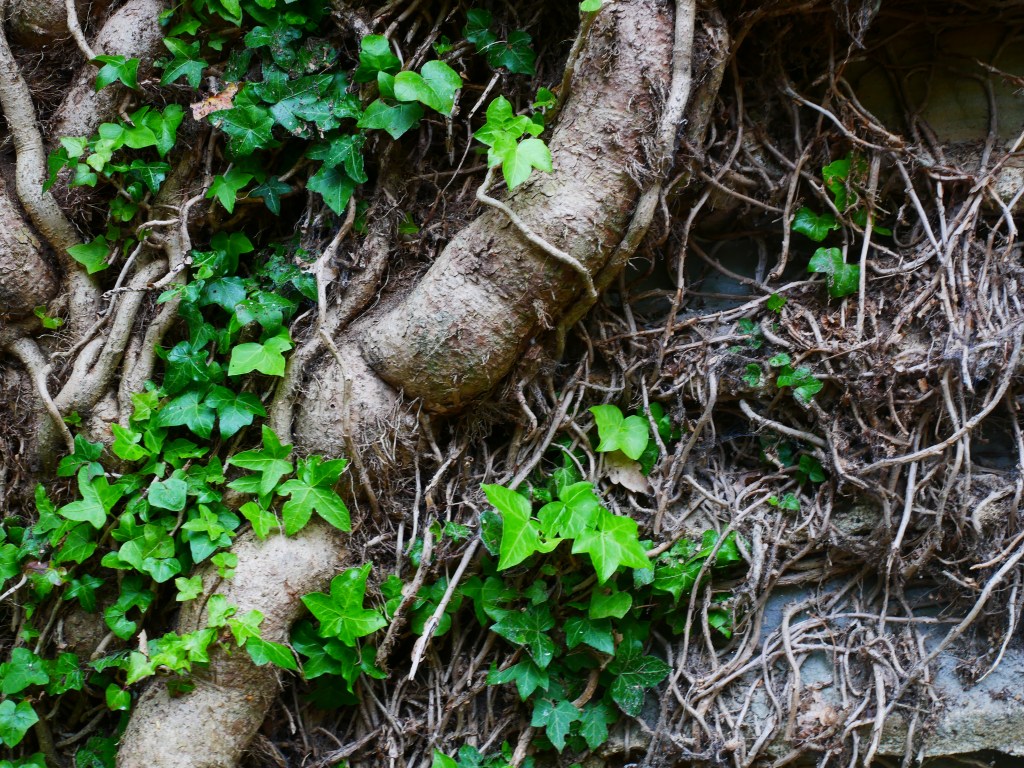
Indeed, the old structures themselves are far more interesting than a brand-new wall. So, what do we do? If we rebuild, we lose the character, of the wall we love, but retain its significance. If we do nothing the wall will continue to disappear. If we preserve what remains now, we can perhaps have the interest of age, but the certainty of a future.

The format for these three pieces is the same. A felted background of the wood at bluebell time. The foreground too, offers continuity—the wild undergrowth which grows and dies back each year. It is the mid-ground which changes. The wall, in decline from year to year. What would the fourth picture show?

December 2022 Photo credit Kate Nixon

leaves and stems

On the section of wall on which this piece is based there are a couple of large ivy stems which are prominent partly because the growth appears to have been cut back and the wall is exposed. The stems are intertwined, branching at the top and at the roots, into lateral growth bearing both leaves and a fringe of aerial roots.

I considered creating these in felt, possibly in needle-felt, but then came across some pre-loved linen cloth at the back of a cupboard which I think my aunt had used to cover her lace-making cushions.

What function the linen had had originally was lost, but she had certainly cut up and reconstructed something else in making the covers. So it seemed OK to cut and reuse again; I was sure she would have approved.

The linen was soft, having been washed many times and I was delighted to discover how well it coped when I simply overlapped the raw edges to make a seam.

Using linen thread which was a perfect colour match enabled me to free-form the stems and laterals, creating a pile of elements without heed to an overall plan, and then stitching them together to form the shape I wanted.

Any frayed edges or ends of the thread just became aerial roots which I then built up using both the linen thread and a wider linen string.

Working with linen fabric and stitching in linen thread was another source of tactile delight. It has a sort of scrunch to it, earthy and strong, an odd but satisfying friction, unlike working with cotton or wool or even silk.

Making the ivy root coincided with a holiday to Ireland. Although I was supposed to be having a break from work, I couldn’t resist slipping a little handstitch into my bag for the 3-hour ferry crossing. Also smuggling linen into Ireland seemed as pleasingly inappropriate as carrying coals to Newcastle! I think I can safely claim to be the only person on the Stena Line’s strange fluffy sunloungers who spent the crossing stitching ivy roots – possibly a world first!

Then dupion silk for the leaves to catch the glossy green of the ivy.

One thing I’m really pleased about is the colour match between the mortar and the linen. On the real wall it is hard to distinguish between root and wall and it is satisfying to have achieved this closeness in the two very diverse materials I selected.

It brings me back to the relationship between ivy and the wall. Initially the wall was the support for the young plant, but now it’s hard to tell who is supporting whom and easy to see who is the more fragile. In terms of form, they are both beautiful, fascinating in their complexity. On balance though, I find it hard to forgive the ivy for what it has done.

Next time: a hole in the wall

Ivy

Waterton didn’t just build a wall to protect the birds he loved, he also tried to provide suitable habitats for them. He turned his mind to planting:

“I am very partial to the holly, the yew and the ivy. They give both food and shelter to the birds, whilst their charming green foliage makes us almost forget that winter has set in.”

So, ivy was part of his plan.

Photo credit: David Lindsay

The relationship between ivy and the wall, however, is complicated. A wall in good condition can be insulated from frost damage by a covering of ivy. However, once the ivy finds cracks and fissures it quickly penetrates the structure causing extensive and invasive damage. There is something akin to coersive control here – a smothering protection descending insidiously into a deep undermining of structural integrity.

Photo credit: David Lindsay

 The section of the wall on which this piece is based, near Haw Wood, shows signs of heavy decay of the stone and the mortar is prominent. The blocks are smaller here than in other sections and I wonder if they were of poorer quality. Waterton had the wall built in sections over a number of years and the stone used reflected what he could afford and source at the time.

If you touch the stone gently in some places here it crumbles alarmingly into dust.

I wanted to highlight the damage to the stone so I removed it completely from my piece – there would just be the mortar and the ivy.

Photo credit: David Lindsay

The background frame is a metal grid coated in lime mortar. Making this was hugely time consuming.

I started with a standard metal grid, then removed some of the rods to make the staggered pattern of the courses of stone and then started to build up some areas with aluminium mesh.

Before going any further I needed to address the problem of fixings – finding something strong enough to allow me to hang the work eventually.

A trip to Adam Lumb of Ossett Fabrications was a glimpse into the world of someone who spends everyday creating solutions in metal. My wall panel looked tiny on his huge workbench. Adam quickly worked out what was needed.

And the work had a pair of hanging rings, firmly attached.

The main problem with covering a metal frame with lime mortar is finding a way to ensure a bond between the two. Thinking this through I had the help of Simon Kershaw, architect, who is a member of the Friend’s of Waterton’s Wall group and hugely knowledgeable about stone and mortar and heritage building techniques. I had used a metal grid in a similar way with plaster in my 2019 exhibition so the solution we found for my wall was a development of what I had done then.

Headstock The Doffer and the Fancy: Reimagining the Machine Leeds Industrial Museum 2019

The first step was to wrap the whole frame in plasterer’s jointing tape. This is an open weave fabric tape which is slightly tacky so easy to adhere to the metal rods and to itself. You can see it on the hanging ring photograph above. Then I coated this with PVA glue and sharp sand which would give the structure a tooth for the mortar to attach to. The weather in August was exceptionally hot so I was happy to have the excuse to work in the garden.

The next problem was to find a support structure within the mortar. I was not proposing to press the mortar into gaps between stones as a mason does when pointing a wall – my mortar needed to hold its form without stones around it. Hessian to the rescue – lots and lots of strips of hessian!

Following Simon’s advice, bit by bit, I coated a small section of the frame in a layer of mortar, then bound this tightly with hessian, then smeared another layer of mortar on the top pressing it into the weave of the hessian. Then I moved on to the next section.

This first coat took 12 hours. I started off in the garden but as the temperatures rose I realised that I needed the ‘relative’ cool of inside. The kitchen was hastily converted into a construction site. At least there was no wind and no need to keep moving to escape the sun.

Mortar has to be kept damp for 4-5 days once it has been applied in order to enable curing to take place. So it remained in the kitchen, draped in a tarpaulin which allowed in air but kept things moist and 4 or 5 times a day I sprayed it with water. It felt a little like having a new baby who needed frequent attention! We got used to moving carefully around it.

5 days later and another 12 hour shift adding the second coat in the same way, coinciding, unfortunately, with another wave of exceptionally high temperatures.

After another period of 5 days of misting and curing, the wall could eventually come out of its frame and we happily got our kitchen back!

The finished frame weighed 20 kilos which gave me some sleepless nights as I knew the upper limit for the hanging system was 25 kilos. I was also amazed by how much flex there was within the panel and expected the mortar to start cracking and crumbling every time I had to move the frame. One of the glories of this material is that it has a reasonable tolerance for movement – a strange elasticity for something so seemingly hard and robust.

Next time: creating the ivy

Timely stitch

Stitching onto felt is always a delight – it’s a very forgiving fabric especially if it’s robust. I started by adding some free-motion embroidery (FME) which is a way of drawing free-hand with the line of stitch on a sewing machine. This allowed me to outline some of the trees in the park and add some detail of the lie of the land outside the park.

The key to FME is not an expensive machine, it’s just a question of preventing the teeth of the feed dog from touching the underneath of the fabric. The purpose of the teeth is to move the fabric forward in a straight line while the needle goes up and down. Once they are disengaged the fabric doesn’t get pushed along, unless it is moved by the person sewing. I always think it’s like inverse drawing. Instead of a moving pencil on static paper, you have a static pencil and move the paper under it. It seems difficult at first and calls for good hand eye co-ordination but like most things, what it really needs is practice – hours and hours of it and maybe a relaxed attitude to perfection! This bit of footage was filmed at Leeds Industrial Museum where I had an exhibition in 2019. I remember seeing this clip for the first time and getting an out-of-body type realisation of how my hands make this happen!

Back to 2022. After the machine stitch, which tends to indent the felt and create a quilted effect, I turned to hand stitch which sits on the surface and creates raised texture. I went for a tufted stitch similar to that used in rugging.

It just remained to add the wall. Crochet seemed an appropriate medium for this, with its linear structure for the courses of stones and square stitch formation for the blocks.

I’ve used jute thread for its natural colour and stiffness. It’s a fibre I’m very fond of and hessian (loosely woven jute) has played an important role in all the pieces involving mortar where it is buried in the mortar to give it strength. In this piece I wanted this humble fibre to have a starring role!

I used my contour drawings to make my jute wall as close a representation as possible to the state of the actual wall. Obviously working on such a tiny scale has its limitations, but it’s satisfying to think that, at this point I am creating the only survey of the state of the wall in 2022 currently in existence.

At one point I was moving the map onto my table and accidentally caused the wall to start unravelling. It was a poignant moment and stopped me in my tracks. My work was disappearing stitch-by-stich reflecting what is happening in reality to the wall, day-by-day, year-by-year.

So here’s a bit of slow-cinema, I hope you’re sitting comfortably. If no action is taken soon, what will remain?

Next time: ivy

Mapping it out

As I said in an earlier post, it took the increased frequency of walks during the pandemic for me to realise that Waterton’s Wall was in fact a single structure. As soon as I started talking about the project to local people, I realised it wasn’t just me who had missed this. So it was fairly early on that I decided the centrepiece of my exhibition would be a map.

Unscientifically, I walked the perimeter and recorded what I saw in order to build a complete picture. Access is very difficult in places and the vegetation and overhanging trees make it difficult to see what is what.

Photo credit: David Lindsay

But eventually I began to identify the different stretches and see where the wall stands tall and where it no longer stands at all. On different lengths of paper I drew the contour of the top of the wall as I walked.

I used a combination of Google Earth images, existing maps and the drone footage shot by David Lindsay for this project to inform the design.

It was great fun seeing the wall from a drones-eye perspective and also from that of a photographer – we all bring our own thoughts.

I decided my map would be very much representative of today – a wall, containing a golf course and a hotel set in parkland – and that my representation of the wall would be ‘warts and all’ 200 years after its construction. I drew a sketch and, from that, a layout plan. Then I started collecting materials.

Wet felting a large piece like this comes with its own practical complications. To save me the backache of working on the studio floor, I had to create extensions to my already large felting table. The background wool is a mixture of merino and blue-faced Leicester fleece and silk.

Once I had a thick, even background the fun started, creating the inside of the park, the golf course and hotel with mixed hand-dyed wools, prefelts and other fibres.

After 3 days the laying out was complete.

I love wet-felting. After all the years I’ve been doing it, and with a pretty sound understanding of managing the interaction between wool fibres, water, soap, temperature and friction, I still regard the moment when it all comes together as pure magic! At this scale it is hard work physically and I was glad to be in the studio with a moppable floor and my own deep sink. There is something very therapeutic, after all that rubbing and rolling, about gently rinsing the felt on a hot day!

Fortunately, the hot weather continued and drying didn’t take too long.

Next time: adding stitch.

Walking the wall

The first walk around the wall was in April with Barbara Phipps, a resident of Walton, member of the Friends of Waterton’s Wall and author of Charles Waterton: Creator of the First Nature Reserve.

It was fascinating to hear about Charles Waterton, to gain insights into his life and character and to start to understand certain features of the wall. The gateway which is halfway down the Crofton side of the wall is one such curiosity. It appears to lead nowhere and yet it has a definite presence. Barbara mentioned the possibility that this gateway may originally have marked the point where a track led off to nearby Nostell Priory allowing Waterton to visit his friends there.

Photo credit: David Lindsay

The stone has weathered differently to the rest of the wall around it and I wonder whether it is millstone grit rather than sandstone as this was frequently the material of choice for monuments and gate posts. I wonder, too whether it dates from a different time.  Whatever the history though, the erosion, particularly around the trauma to the stone of the fitting of the iron hinges, has all the mystery of a miniature cave system.

Hidden within the estate and largely neglected is Waterton’s grave. It originally overlooked his beloved lake which has now receded and, in many ways, I found it sad to see this in such a sorry state. In other ways though the wilderness feel it had seemed to fit equally with this man who loved to explore nature in the wild.

The second walk which happened a few weeks later was with Russ and Simon, also members of the Friends group. Their expertise is in construction and architecture. This time we managed as complete a circumnavigation as is possible and it felt good to have gained a physical feel for the extent of the wall and the huge variation of its condition.

It was on this walk I learned about the importance of getting the lime mortar right;

 the role of the coping stones and the different shapes, from twice-weathered to hogsback;

and the appearance of iron ore in the sandstone and how varying concentrations of iron ore oxidise to produce the different colours in the stone.

Walking the wall that summer evening was fascinating and inspiring, and it enabled me to identify key points of the wall which I wanted to explore in the exhibition. But it was also worrying eye-opener as to the mammoth task ahead if the wall is to be preserved from further deterioration.

Next time: A birds eye view

The Friends of Waterton’s Wall

How did the Friends of Waterton’s Wall come into being?

John lives in the village of Walton which encompasses Waterton’s estate. Concerned about the declining state of the wall, which he knew from walks around the village, he emailed a few other local people in 2020, suggesting that action needed to be taken.

Photo credit: David Lindsay

Walton, it seems to me is that kind of a place. I live in Sandal which has always felt to me like a leafy suburb of Wakefield. But if I turn the other way at the end of my road, I cross a field and am soon in the village of Walton. It very much has the feel of a place in its own right, there are lots of things going on there and groups which bring the community together. Waterton’s name seems to pop up all over the village

Given that 2020 saw the country in the thick of the pandemic, John’s email was followed by a zoom call for interested parties. Things moved rapidly from there, a committee was formed, letters were written to prominent celebrities, councils, local bodies and anybody who might be interested.

Messages of support came back, some from well-known and hugely respected people.

The Friends of Waterton’s Wall was officially established on 21 July 2021, their first project being the preservation of a section of wall in time for the bicentenary of its completion in 2026.

The public launch was in the village hall in March 2022 – the day I first went to meet Abby King at Anglers Country Park and called in on John on my way home. 45 people came.

The Friends of Waterton’s Wall have a website: www.friendsofwatertonswall.com and a Facebook page www.facebook.com/friendsofwatertonswall so do join their mailing list to follow their progress or to get involved.

Much of my time as an artist is solitary so collaborating on a project with another interest group is a new way of working for me. I wanted the benefits to work both ways. I looked forward to learning from their different knowledge and skill sets and I hoped we could find ways of working together to raise awareness of their work and their aims for the future through my work. These are local people, each one contributing in their own way. Some have specialist knowledge of building, architecture, history, and others help with organisation, publicity, photography and the vital role of spreading the word over a pint at the pub, at the Saturday market, at school picking-up time, at church or at the lovely new community library.

The Friends of Waterton’s Wall are united in their enthusiasm and desire to protect the wall for the future. They are good people and it’s a privilege to be working with them.

We’ll be meeting some of them in a bit more detail in future posts, but next time, firming up plans with a couple of important walks.

First felts

Starting a new project is daunting – lots of new ideas sparking off tangentially – you don’t want to stop them happening but sometimes it’s like herding cats!
So it was grounding to start felting something central to my thoughts but fairly simple.
I looked through my photos and laid out the fibres loosely to create the impression of the wall in colours and patterns. I love this airy dreamlike stage for itself, before the water and the work!

Then I wetted the fibres out and started to work on it, rubbing gently and then rolling to set the surface. I didn’t want this piece fully felted – just enough for it to hold together – what we call a prefelt.

Normally I would let it dry but I was too excited so I got the scissors out and started to hew the blocks!

The arrangement did not respect the initial layout – in keeping with the behaviour of a mason I thought, who was hardly likely to be taking care to position blocks in the same configuration that they had laid under the ground since their formation.
Back to the felting mat to create a background for the mortar and then place the prefelt plocks on the top.

White fibres, grey fibres, a touch of green for the moss and some wool nepps for the aggregate.

More wetting out, rubbing and rolling.
In the end I wasn’t entirely happy with the piece and didn’t photograph it, but it got me started. Things are never wasted. For one thing, I often need to think through making and learn from early creations. On a more practical level I had included in my application the provision of handling samples in the exhibition room – so what didn’t make it into the final hang would play and important role in letting people enjoy the feel of the felt.

Next time: The Friends of Waterton’s Wall

Application

Writing funding applications is hugely time consuming and, in these difficult financial times, wrought with the frustration that they are most likely to end in nothing. I’m definitely a beginner. I have only one previous funding application under my belt and that was unsuccessful; so a 100% record of failure!

I also don’t have much to compare it with, but Wakefield Council do seem to be trying hard to nurture creativity across all areas of the district and encourage artists, groups, communities to have a go. Their new Culture Grants offer funding for large and small creative projects, some with a deliberately open brief and others specifically designed to support projects in areas and for communities which don’t normally engage with the arts. The response from creatives of all sorts has been huge and applications are increasing as the news spreads – so maybe I was lucky to apply in the first round!

Writing an application means envisaging the whole project in advance – thinking of everything you want to happen and planning contingency for the things you don’t, why you think it is important, how you are going to do it, how you are going to tell people about it, how much it will cost, who else will be involved and why the world will be a better place if you do it.

While that might seem impossible, I did find it useful to firm up what had, thus far, just been a vague idea about a wall. Then there is the matter of it being public money. Maybe because this is the first time for me, I feel the weight of that quite heavily on my shoulders, so I want it to work.

At the end of a couple of weeks of writing, planning, discussing, picking brains, drinking tea and not wanting to spend so much time at the computer, I had a plan.

What?

An exhibition of wall-based pieces exploring decay and repair in Waterton’s wall, exhibition film, children’s activity sheets, drop-in textile workshops.

Where?

The newly refurbished visitors’ centre at Anglers Country Park.

Why?

The wall is beautiful and largely ignored by passers-by; it is historically significant and it is crumbling, so awareness needs to be raised.

How?

Me, hours of work, textiles and construction materials, collaboration.

Who else?

The Friends of Waterton’s Wall; Abby King, Visitor Services Manager Anglers Country Park; photographer David Lindsay; Graphic Designer Richard Chappelow; and, quietly, behind the scenes advice and support for me from The Art House and my family.

Why will the world be a better place?

  • People will go away from the exhibition looking out for the beautiful shapes in eroded walls across the region and beyond, and that will enrich the simple pleasures of life;
  • Awareness will be raised of the precarious condition of the wall and hopefully some will want to join the Friends of Waterton’s wall, contribute with time or expertise or offer financial support;
  • People who don’t usually visit art galleries will experience, and hopefully enjoy some art; and
  • People who come specifically for the exhibition will discover what a lovely place Anglers Country Park is.

Of course, I didn’t say it quite like that – the completed application ran to 17 sides of A4. But eventually it was done, and I pressed submit.

Then the 3 weeks of thumb-twiddling and waiting for a decision. Itching to get on with it, unsure it will happen, so trying to put on hold the enthusiasm generated by the process of applying!

All in good time, the decision is made, the email arrives, “we are delighted to inform you…”, success!

Excited, grateful, humbled. It’s full steam ahead!

Next time: First felts

First love

As an artist my first response to the wall was visual. Even before I’d thought about what the exhibition as a whole would look like, I knew that some of the individual blocks of stone I’d seen would feature. This one was my first love:

The erosion of the stone allows it to reveal its inner beauty. Whereas a new wall will look fairly uniform and the scutch marks left by the mason’s tools are the main distinguishing features, once erosion starts and develops, all sorts of secrets emerge.

Scutch marks

There are contour lines and curves

And holes

And protrusions and concavities

There are yellows and greys and greens and reds.

There are hidden worlds and places to explore

In the sun it glistens, in the shade it is more subtle. The same changes of light which bring sculpture to life create a different experience of the wall with each visit and each step.

The surface is hard and smoothed by time or worryingly crumbly. My feltmakers hands, experienced in sensing the feel of the wool and the resistance it gives as it felts, are intrigued by the graininess of this new material.

I am very tempted to devote the whole exhibition to exploring the joy of the sandstone blocks and I make a few in felt.

But there is more to say about Waterton’s wall and there are reasons for concern. So, I have some thinking to do.

Next time: applying for funding